Create a "Customizing Solution" to manage your own customizations
1. Creation of a Customizing Solution
1.1 Creation of a new Publisher
1.2 Creation of the Customizing Solution
1.3 Backup of the Customizing Solution
2. Usage of the Customizing Solution
2.1 Prepare adjustments: Adding Entities to the Customizing Solution
1 Creation of a Customizing Solution
You should always create your own customizing solution for all adjustments you want to make to your Dynamics platform. In this solution, you manage all of your customizations and you can export the solution regularly (definitely before a system update) as a backup. This ensures that your customizations are not overwritten.
Prerequisite for creating the Customizing Solution:
- Open your CRM system with a user that has the Microsoft Dynamics CRM System Administrator security role or equivalent privileges.
1.1 Creation of a new Publisher
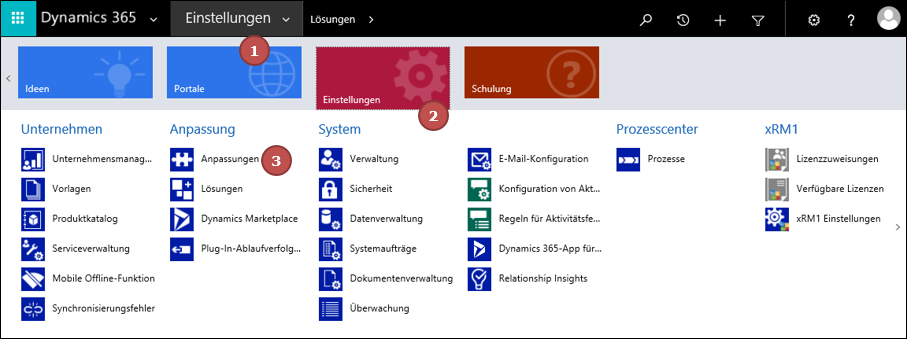
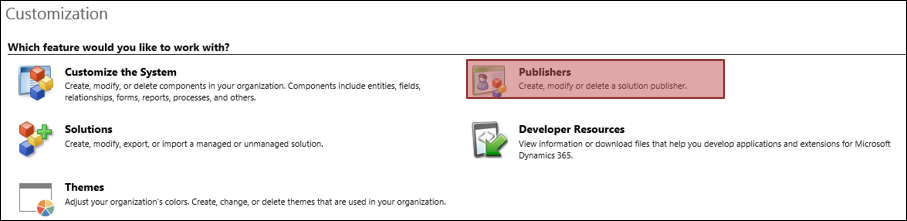
At first, you should define a new publisher for the customizations. Please navigate to the Navigation bar -> Settings -> Customizations -> Publisher
You will get an overview of all publishers. Click on NEW.
A mask will open for creating a new publisher. Fill in the following fields:
Display name: Enter a name of your choice, e.g. "Company Name Publisher".
Prefix: Select a prefix of your choice, e.g. "COM".
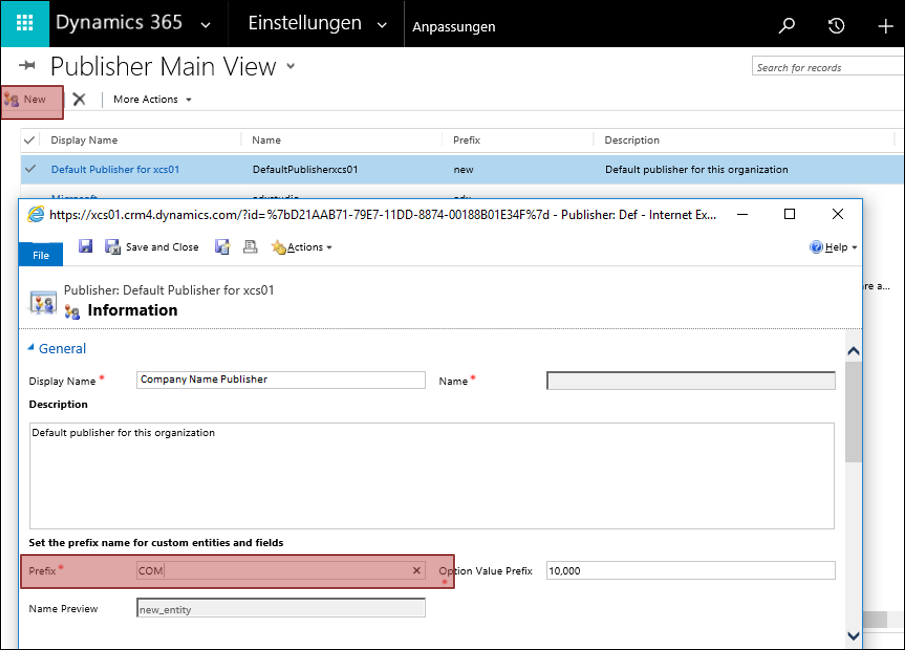
Save and close the newly created publisher.
1.2 Creation of the Customizing Solution
To create a customizing solution please navigate to
Navigation Bar -> Settings -> Solutions

You get an overview of all solutions. Click on NEW.

A mask will open for creating a new solution. Fill in the following fields:
Display name: e.g. "Customizing Backup Solution".
Publisher: Select the publisher you have just created from the drop-down list "Company Name Publisher".
Version: Enter a version number "1".
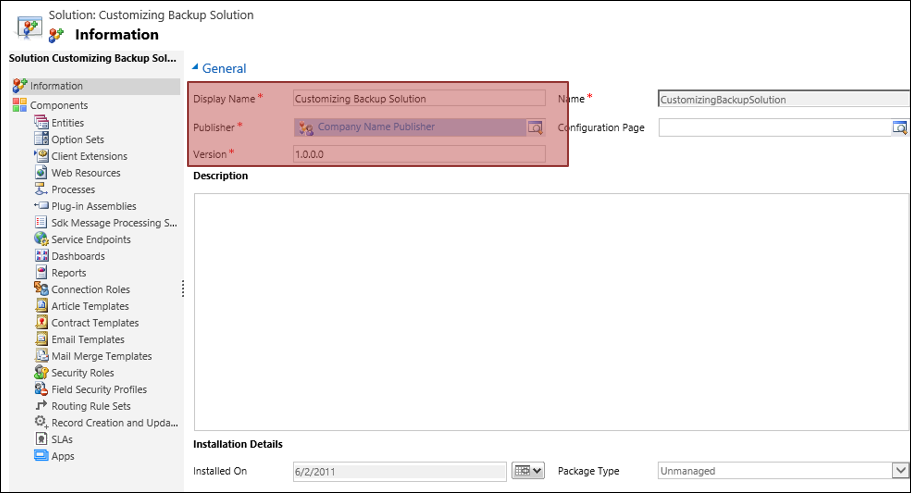
Click on the disk symbol to save the new solution.
Your Customizing Solution is now prepared.
1.3 Backup of the Customizing Solution
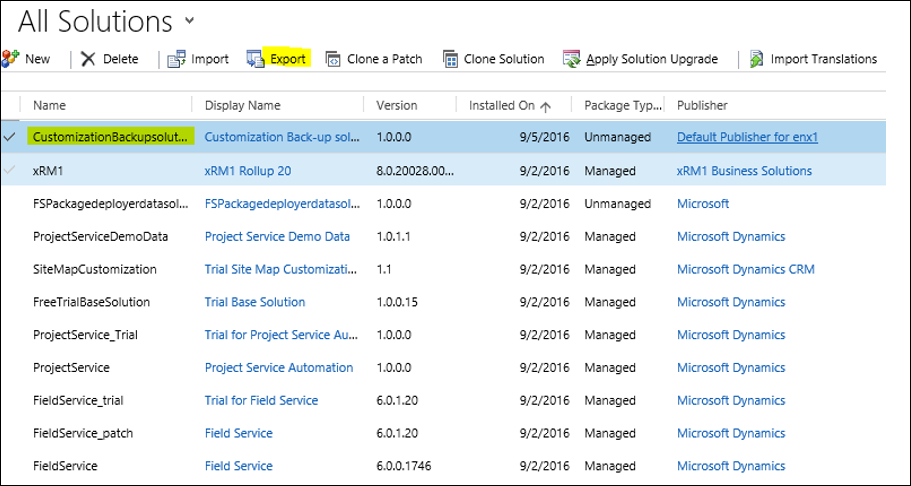
You should back up your Customization Solution regularly and before upgrading your system. Navigate to Navigation Bar- > Settings -> Solutions
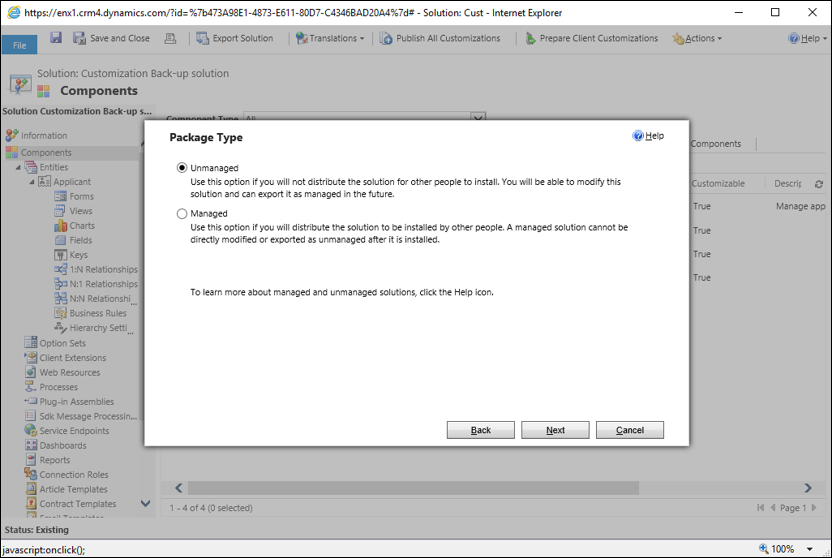
Select your Customization Solution and click on "Export". Select "unmanaged" solution.
2 Usage of the Customizing Solution
2.1 Prepare adjustments: Adding Entities to the Customizing Solution
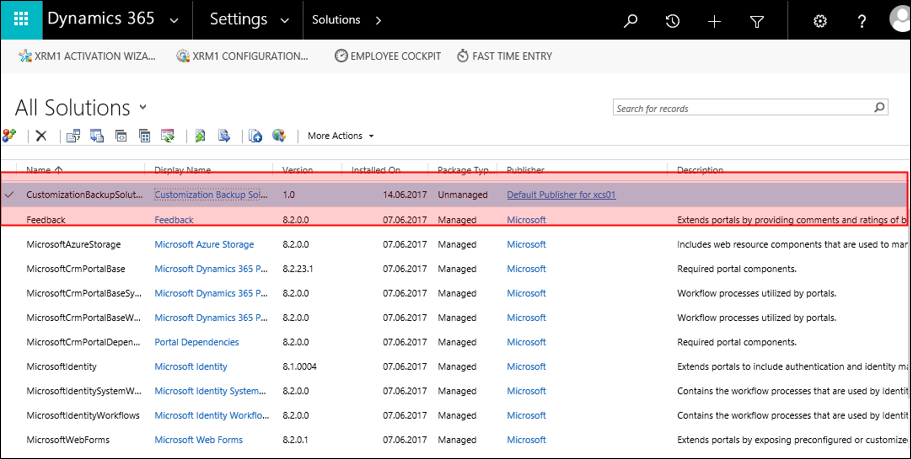
To make adjustments, open your Customizing Solution with a double-click.
Navigation Bar -> Settings -> Solutions
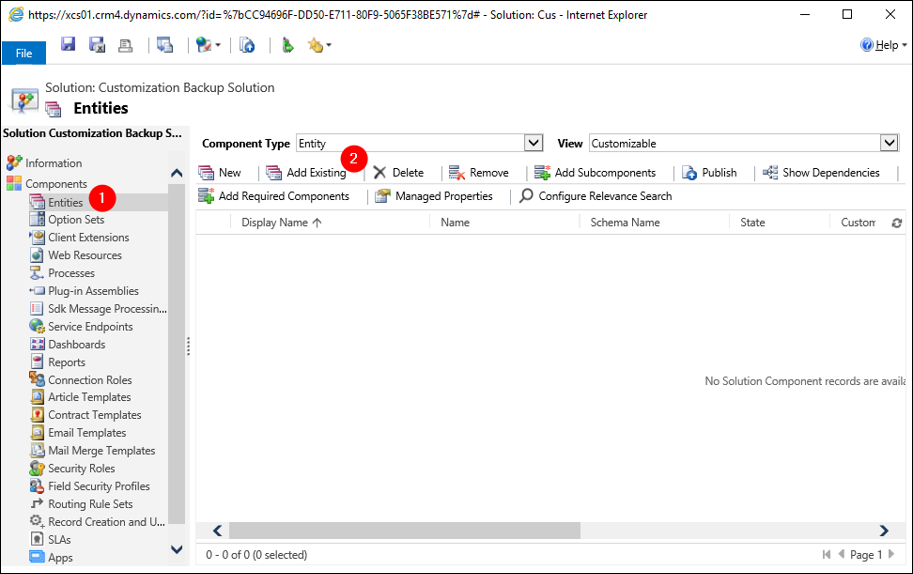
You can then add the components you want to modify.
Select the component type, e.g. "Entity" and click on "Add Existing".
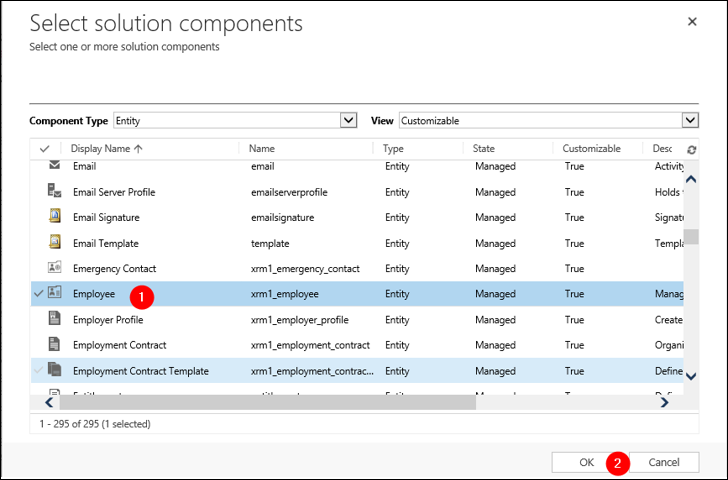
Select the entity:
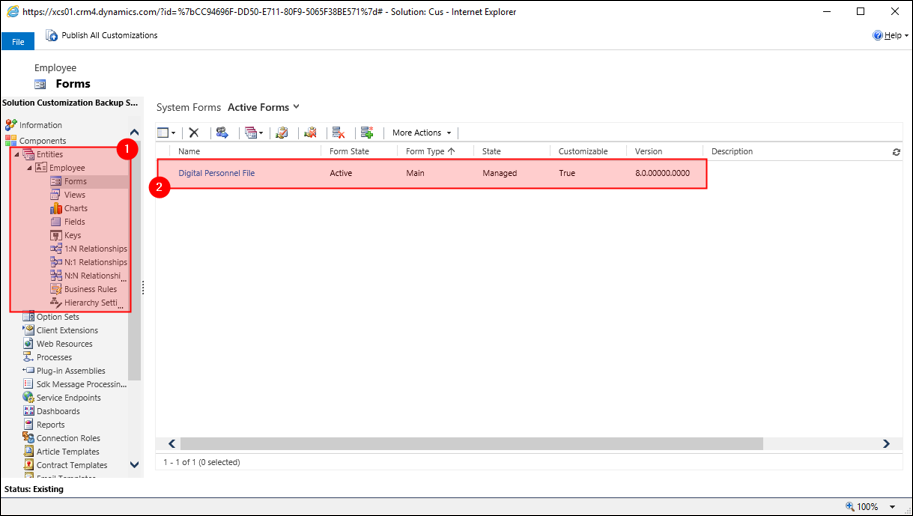
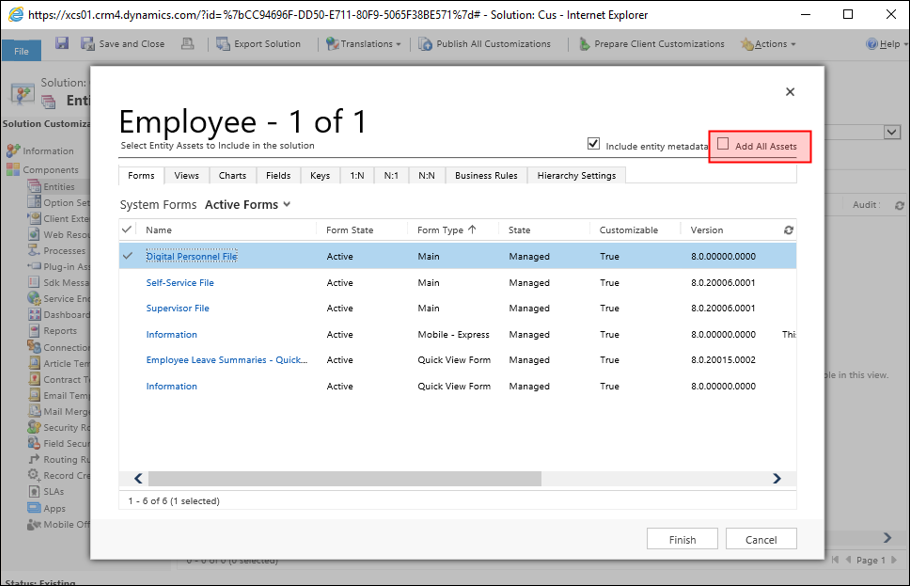
You can select the specific area (Forms, Views, Fields) you want to modify.
Please only add the part you really want to modify. Please make sure that the "Add all Assets" option is NOT checked. Click on "Finish".
Then please select "No, do not include required components" and click on "Ok".
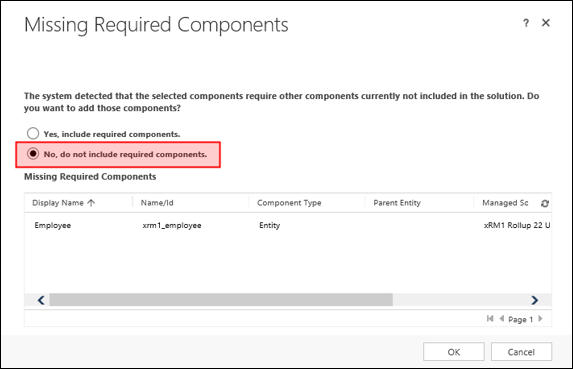
You have now added the component to the Customizing Solution.
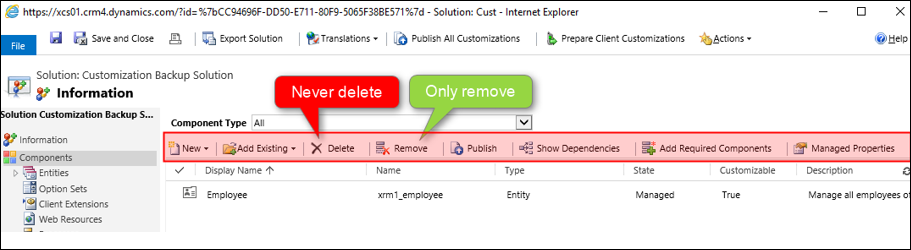
Important:
If you want to remove the component from your Customizing Solution, select the component and click on "REMOVE" (Never click on Delete, because this deletes the entity completely from your system).
After adding the component, you can make the following modifications.