Customize the Site Map

Objective

In this comprehensive guide, we will walk you through the process of customizing the site map in Power Apps, an essential aspect of the Power Platform. The site map allows you to structure and navigate your app, providing users with a seamless and efficient experience.


The Purpose of Customizing the Site Map:
Customizing the site map in Power Apps serves several key purposes:
- App Navigation: Structure the navigation flow to guide users through the app and make it more user-friendly.
- User Experience: Enhance the user experience by providing easy access to different app features and sections.
- Brand Consistency: Customize the site map to align with your organization's branding and layout requirements.
Prerequisites

  • Access Permissions: Ensure you have the necessary permissions to edit and customize the app. (Minimum 'System Customizer'-Security Role or Admin)
  • Understanding of App Flow: Familiarize yourself with the flow and structure of your app, including which components and sections you want to include in the site map.

Click Through

Step 1: Open the Power Platform Step 2: Navigate to the Environment
  • Choose the specific environment where you want to customize your site map. Click on the top-right environment name to enter it.
Step 3: Navigate to the correct Solution
  • Click on Solution in the left navigation.
  • Open your storage for customization (see a guide on how to create one here)
Step 4: Access the Entity (Table) for Customization
  • In your chosen Solution, you see all Objectives
  • Navigate to Apps and click on it
  • Now choose the specific App where you would like to configure the Site Map
Step 5: Access the Site Map Section
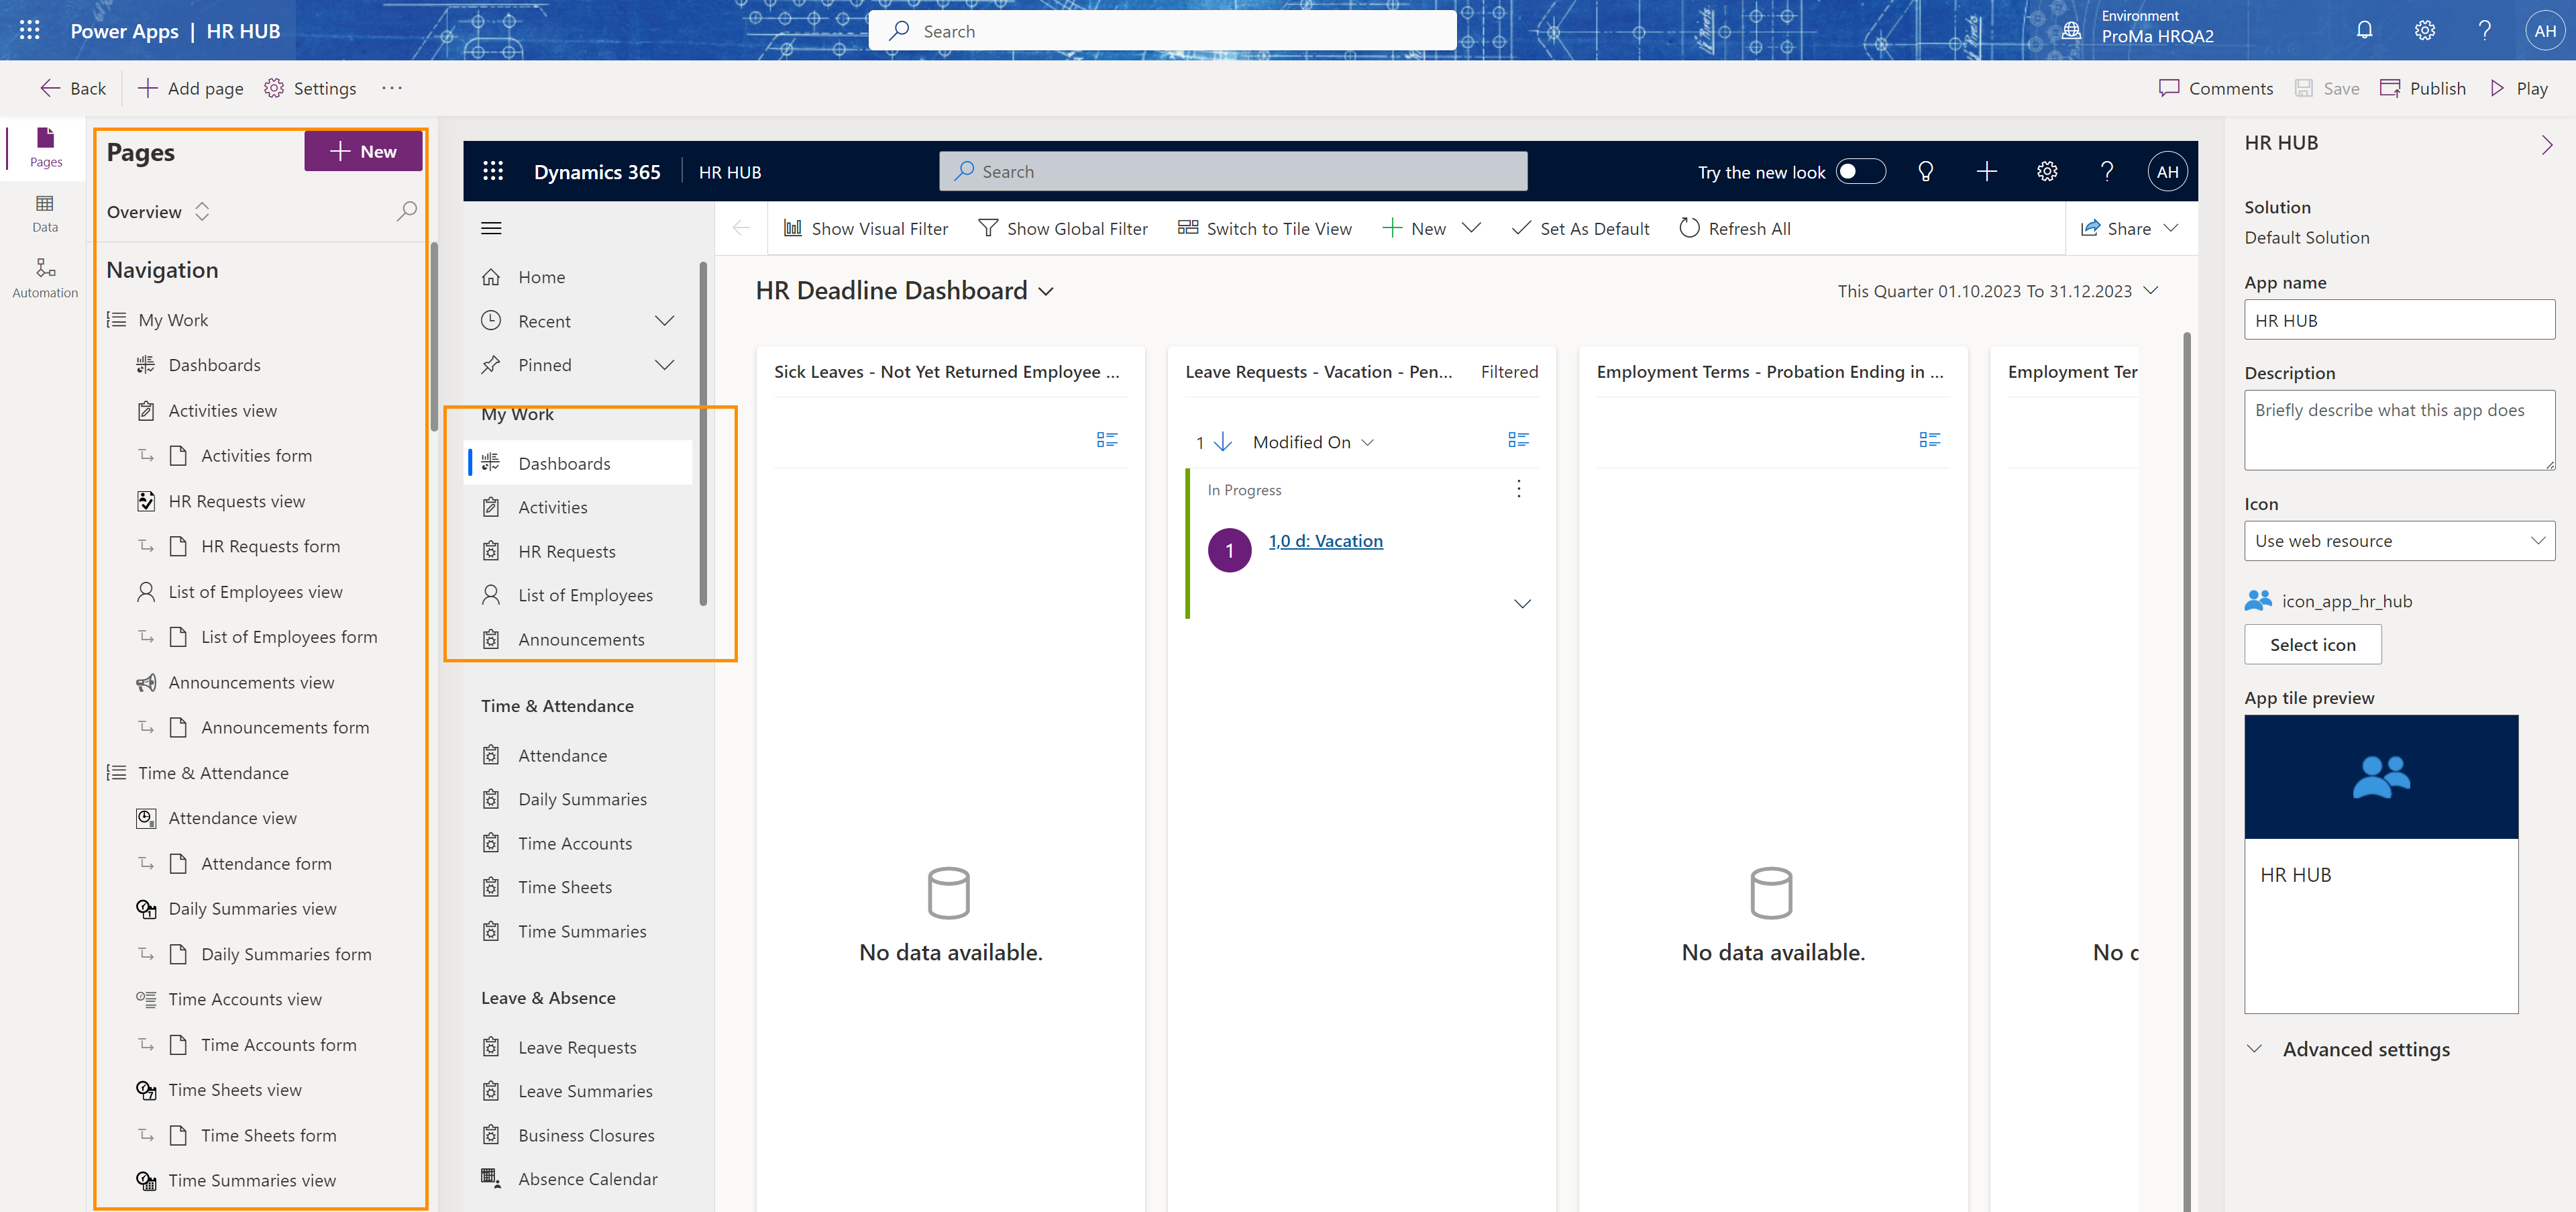
  • In your selected and opened app, you see on the left the area Navigation

Step 6: Customize Site Map Components

  • While in customization mode, you can add, edit, or delete site map components such as entities, web resources, and URL links.
  • You can easily add new Pages to your Navigation
    • Click on the top (near Pages) on + New
    • You have several options there
    • Click on Dataverse table if you want to add an entity
    • Then choose the specific entity which you would like to add
    • The page is now created
    • Click on this newly created Page once
    • Then click on the three dots '...'
    • Here, you can move the page up and down
  • You can also switch the Area, by clicking on them above Navigation
Step 7: Set Properties and Icons (optional)
  • Customize the properties of the site map components, including display names, descriptions, and icons.
Step 8: Test the Site Map
  • Before saving, thoroughly test the site map to ensure that the navigation flow is user-friendly and that all links and sections work as expected.
Step 9: Save your Changes
  • Once you've customized the site map to your satisfaction, make sure to save your changes by clicking on the right-top Save button. After saving your changes, publish your app by pressing the Publish button next to it.

Result

Your customized site map is now ready to provide users with an organized and efficient navigation experience in your Power App. Customizing the site map enhances user guidance and access to various app features.
Image
HR