The objective of this page is to show how to configure the wLAN in your Datafox terminal. This will ensure that the data captured via the physical terminal can be transferred to Hubdrive.
Datafox Terminal: wLAN Configuration
Objective
Prerequisites
- The Datafox Software Configuration has already been done
- You have downloaded Datafox Studio (Link to official Download page)
- You are System Administrator
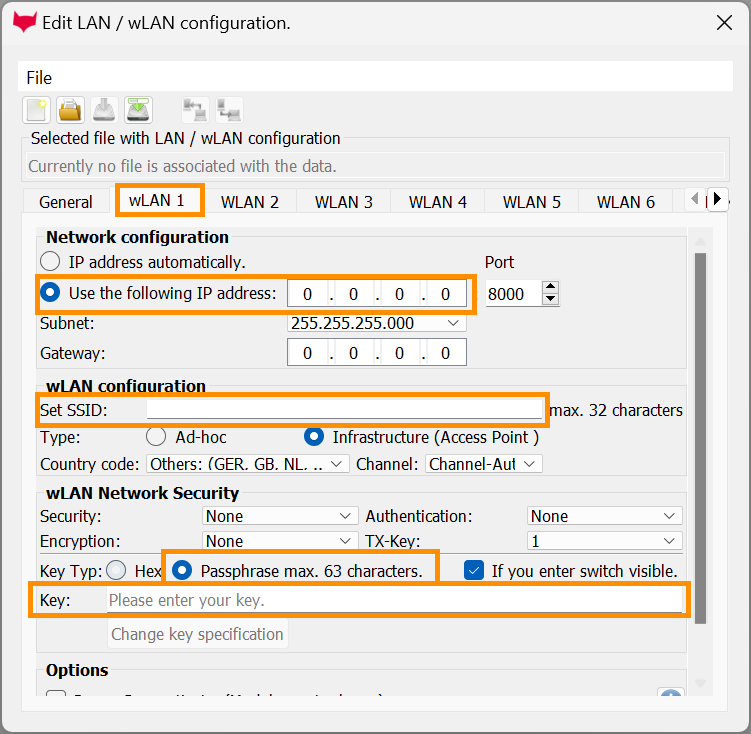
Click Through
- Connect the Datafox Terminal to your computer
- Open Datafox Studio
- Click on Configuration
- Click on LAN/wLAN configuration
- Click on the first tab: wLAN1
- Depending on the setup of your network, there are two choices now:
- If the way your network is set up requires a specific IP address or port, select Use the following IP Address, then add your company IP Address
- If that's not the case, then select Choose IP address automatically under Network configuration
- In wLAN configuration, add the SSID
- SSID stands for service set identifier, and is your WI-FI network name. You can find it by clicking on the WI-FI symbol on the bottom corner right of your desktop.
- In wLAN Network Security, select Passphrase
- Enter the Key
- This is the password key that you have for your WI-FI.
- Save
- Click on Write
- Select the correct device
- Click on Perform
- Close the window
Hint
- Optionally you can configure multiple connections by using the other tabs (WLAN 2, WLAN 3 and so on).
- Once the configuration is done, you can also click on the button Save as, and it will save a file with the current configuration. So in case a new configuration is necessary, you can simply upload the file.
Result
This is what your configuration in Datafox Studio should look like in the end: