Employment Terms (Work Contract) Word-Template
This documentation will guide you through the process of creating a Word employment contract template for your employees. Similar to a series letter, you can create a Word template and pull the predefined data from the system incorporating your current standard contract document.
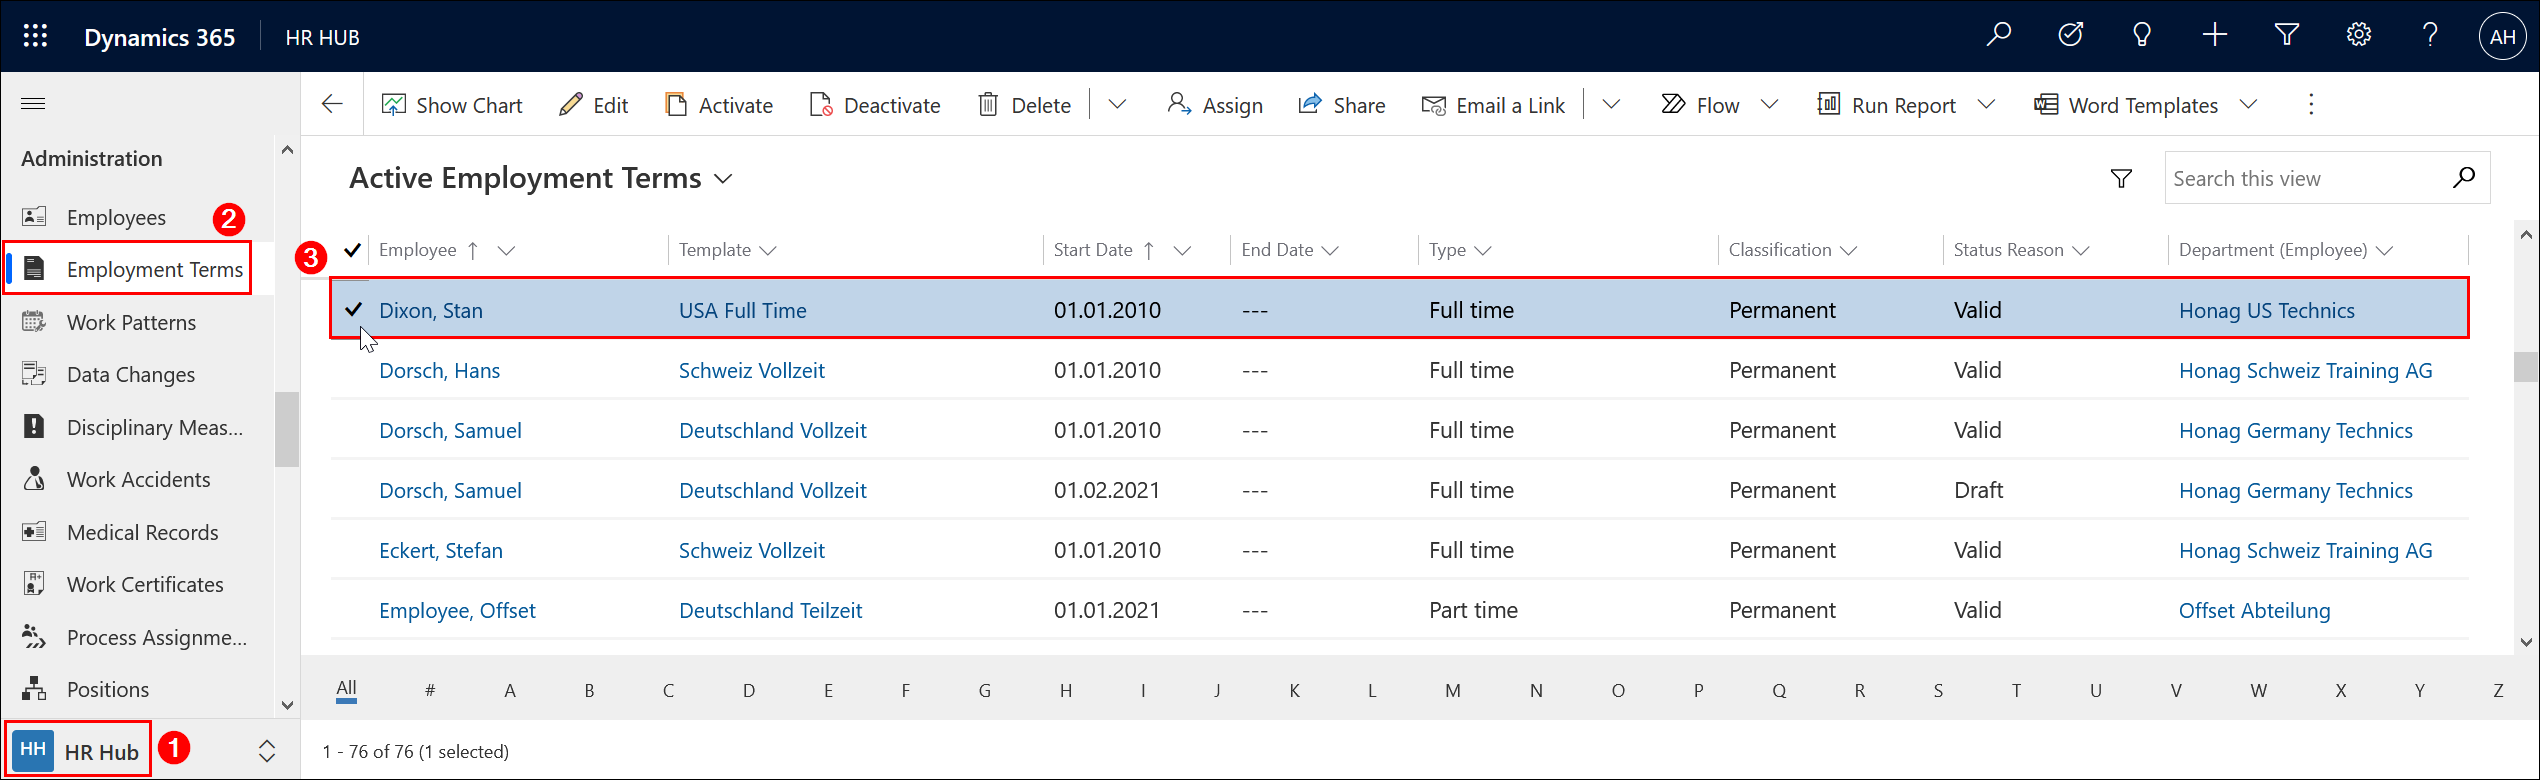
Log in to Dynamics 365 and switch to the "HR HUB" app if it is not already selected.
Navigate to Work Contracts under "Administration" (HR Hub). Create a new entry and then select it in the overview, or select an existing entry in the overview.
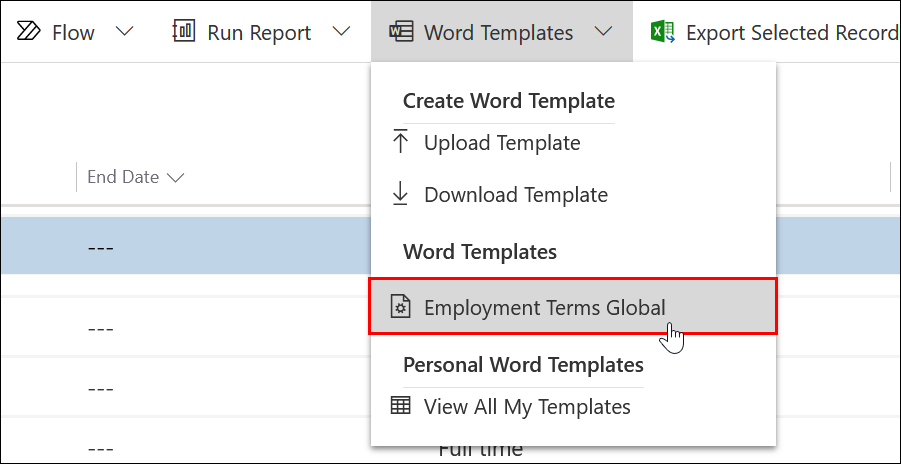
After selecting, "Word Templates" appears in the toolbar. Click on "Word Templates" and then on "Download Template".

A seemingly "empty" Word document is downloaded. It is important to download the template first so that the system can associate this template with the appropriate data.
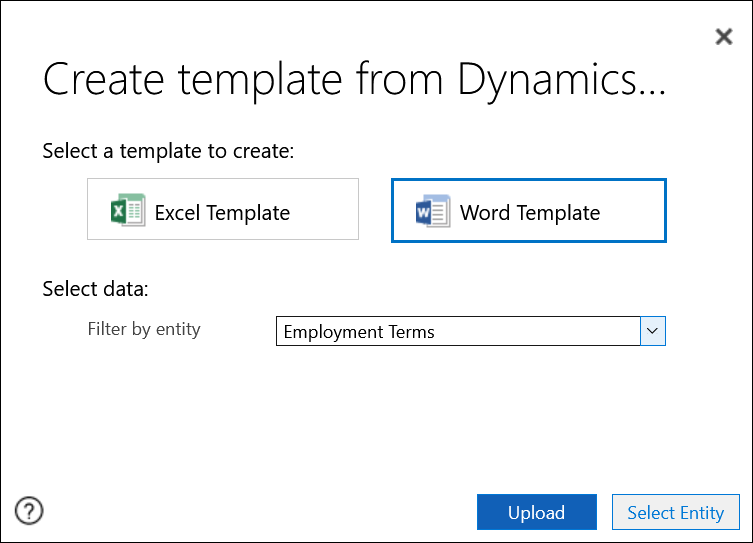
After you have clicked on "Download Template", a dialog opens. Select "Employment Terms" as the entity. You have the possibility to define additional entities in the 1:N relationship, N:1 relationship or N:N relationship. In this case, the 1:N relationship and the N:1 relationship are required.
For 1:N relationship, please select "Wage (xrm1_employment_contract_wage_referring)" and "Leave Entitlement (xrm1_employment_contract_time_slice_referring)". For N:1 relationship, please select "Applicant (xrm1_applicant_employment_contract_referring)" and "Employee (xrm1_employee_contract_referring)".

Click the "Download" button and save the document as a template to your desired location.
Since the downloaded Word document is an apparently empty document, we recommend that you first copy your standard contract text into this document.
In this article, a standard contract from the Internet is used as an example.
Activate Developer Tools
By default, the Developer Tools are not displayed. Therefore, if it is not yet displayed for you, switch to Options (bottom left) on the File tab and click Customize Ribbon in the newly opened dialog.
Activate the "Developer" checkbox here and under Main Tabs.
After you have made this setting, the "Developer tools" remains visible. If you no longer need them afterwards, you can deactivate the checkboxes again.
XML Mapping
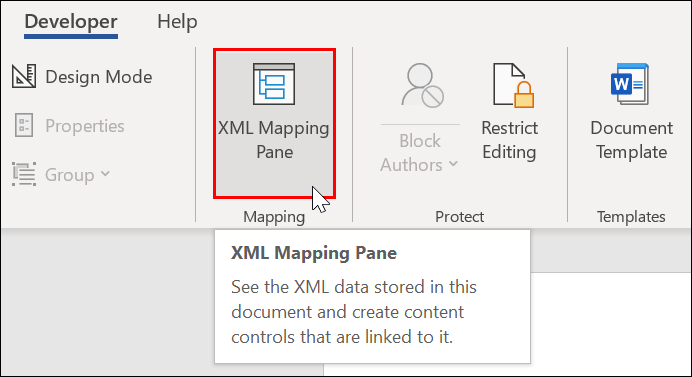
Once the " Developer" tab is in the ribbon, click "XML Mapping Pane" under the "Developer" tab.
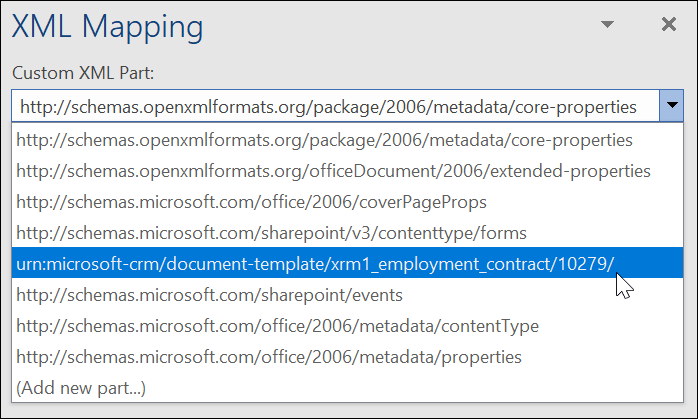
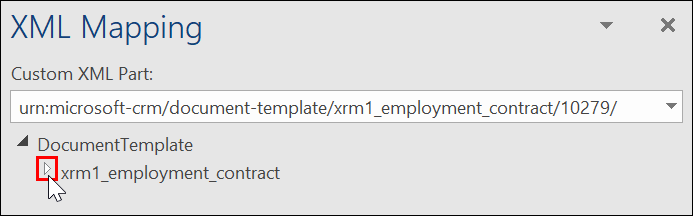
On the right side the XML Mapping area opens. Here, select urn:microsoft-crm/document-template/xrm1_employment_contract/
Therefore, please note that it is not possible to create a Word template for a test system and then use it for the productive system.
Then open "xrm1_employment_contract" under "DocumentTemplate" by clicking on the arrow.
You will now see all the content controls. If you scroll down in the XML mapping window, you will see that there are more content controls that can be opened here.
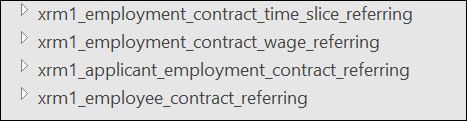
- xrm1_employment_contract_time_slice_referring: Here you can find all content controls for fields on the Absence entity.
- xrm1_employment_contract_wage_referring: Here you can find all content controls associated with fields on the Wage entity.
- xrm1_applicant_employment_contract_referring: Here you can find all the content controls associated with fields on the employment term entity assigned to an applicant.
- xrm1_employee_contract_referring: Here you can find all content controls associated with fields on the entity employment term assigned to an employee.
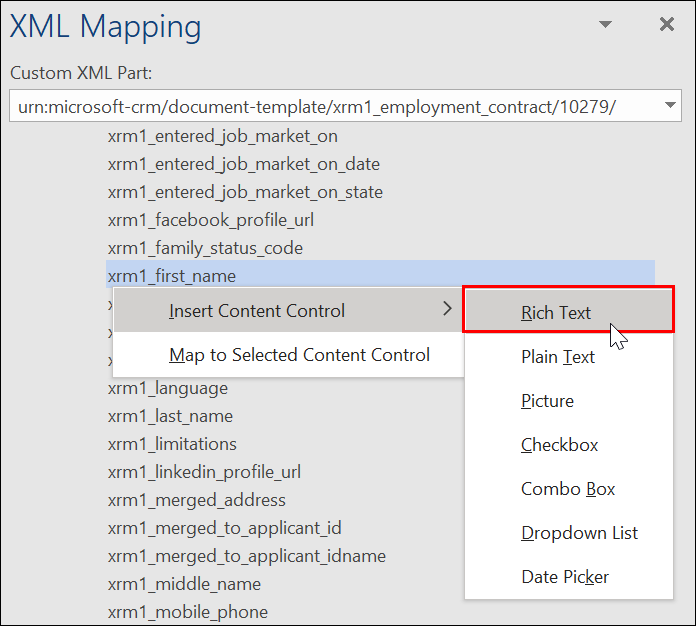
You can add the content controls to the document by right-clicking the element and selecting Rich Text from "Insert Content Control".
Now add the content controls you need to the document and format them accordingly. Adding additional text is also possible. Below you will find an overview of the content controls.
In the following example, the name and address of the (future) employee will be added. If the employee is still defined in the system as an applicant, it makes sense to add the content control for the name and address for both applicant and employee in the Word template.
Now, for example, add the applicant's name and address first. You can find the content controls for this under xrm1_applicant_employment_contract_referring. For name and address the following content controls are needed:
- xrm1_fullname OR xrm1_first_name and xrm1_last_name
- xrm1_address_private_street
- xrm1_address_private_postal_code
- xrm1_address_private_city
After adding these content controls, add the same ones for employees. These can be found at xrm1_employee_contract_referring.
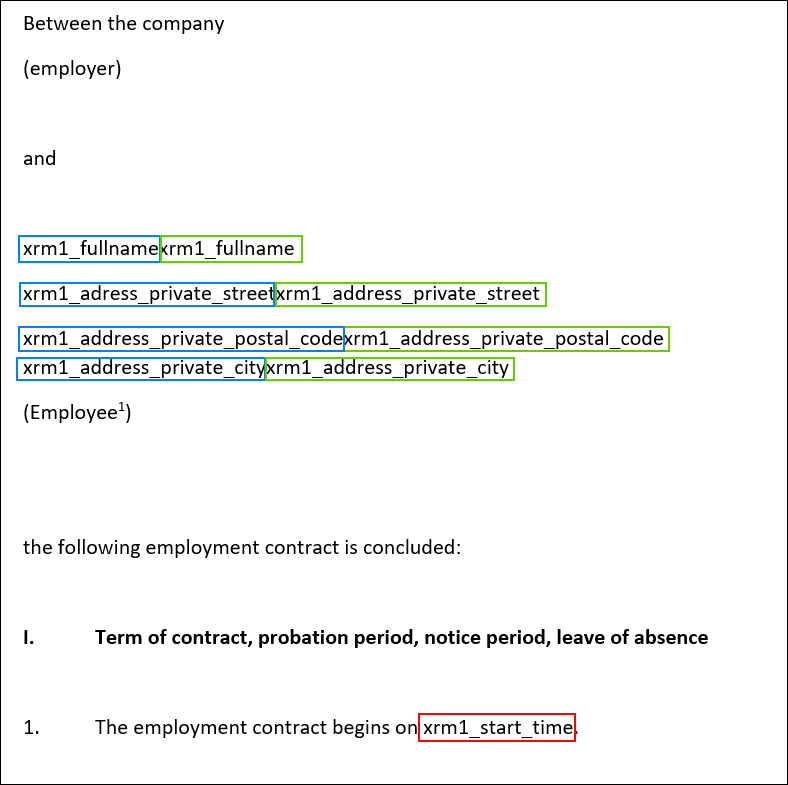
Tip: To avoid spaces at the beginning of the line (if the employee is already defined as such in the system), it is best not to leave a space between content controls in a line. Use the right arrow key on your keyboard so that you can add another content control right next to the first one.
A space has been inserted between the content controls of the postal code and the city.
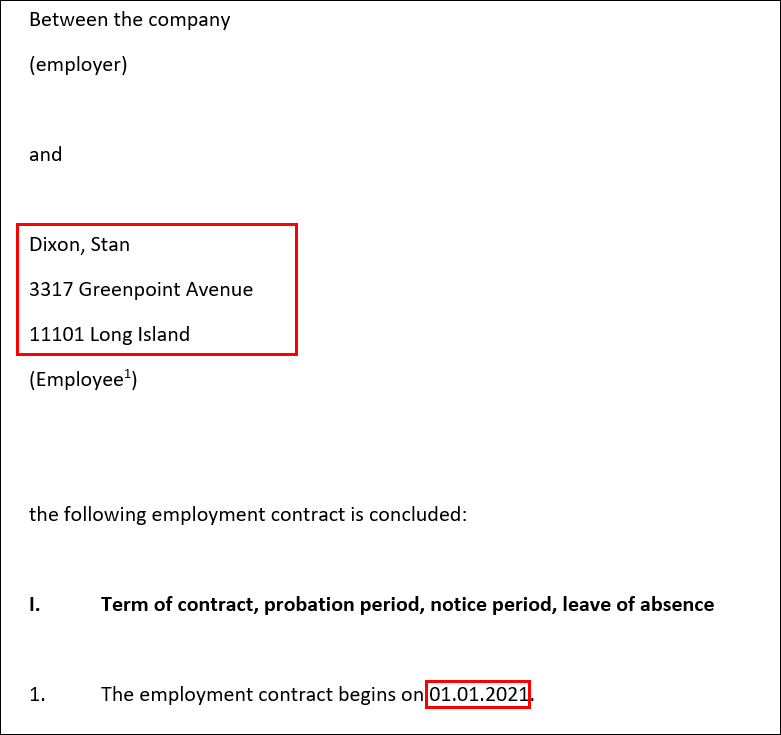
In the following screenshot, the content controls for the applicant are highlighted in blue and those for the employee in green. The start date (outlined in red) can be found under xrm1_employment_contract.
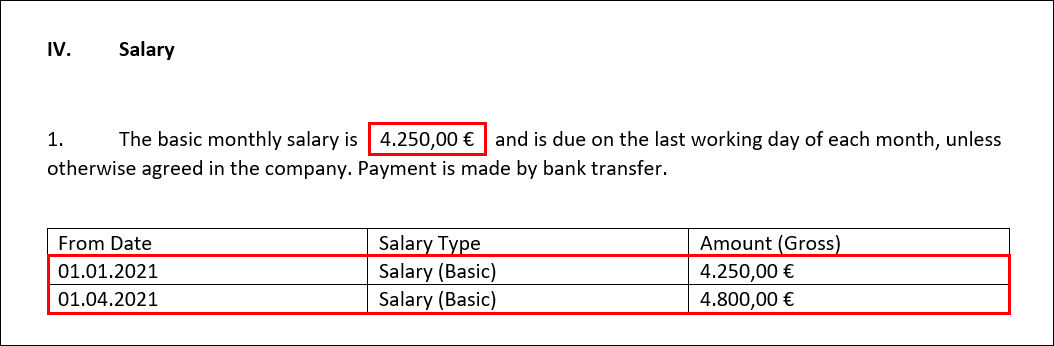
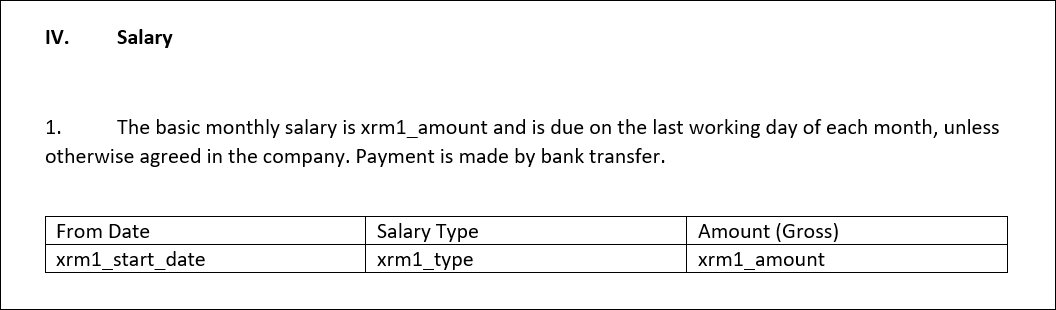
If you have a representation in a table in your employment contract, for example for the salary, this can also be filled with content controls. To do this, select the row to be filled in the table and right-click on the entity in the XML mapping window. In the compensation example, this is "xrm1_employment_contract_wage_referring". Navigate to "Insert Content Control" with the mouse and click Repeating. This will ensure that as many records as there are will be displayed later in the table.

Then fill the table with the content controls as usual. The Word document with the filled table may look like this:
Now add the appropriate content controls for your entire employment contract. An overview with the schema names of the most important content controls can be found in the following tables:
xrm1_employment_contract
Display Name |
Schemaname |
|---|---|
| Type | xrm1_contract_type |
| Start Date | xrm1_start_time |
| Payroll Period | xrm1_payroll_period |
| Weekly Working Hours | xrm1_working_hours_per_week |
| Probation Period (Months) | xrm1_probation_period |
| Probation Until | xm1_probation_until |
| Terms of Notice | xrm1_terms_of_notice |
| Terms of Notice Probation | xrm1_terms_of_notice_probation |
xrm1_employee_contract_referring
Display Name |
Schemaname |
|---|---|
| First Name | xrm1_first_name |
| Last Name | xrm1_last_name |
| First and Last Name | xrm1_fullname |
| Street (Private) | xrm1_address_private_street |
| Street Details (Private) | xrm1_address_private_street_details |
| ZIP/Postal Code (Private) | xrm1_address_private_postal_code |
| City (Private) | xrm1_address_private_city |
| Start Date | xrm1_start_date |
| Probation Until | xrm1_probation_until |
| Work Hours Per Week | xrm1_work_hours_per_week |
xrm1_applicant_employment_contract_referring
Display Name |
Schemaname |
|---|---|
| First Name | xrm1_first_name |
| Last Name | xrm1_last_name |
| First and Last Name | xrm1_fullname |
| Street (Private) | xrm1_address_private_street |
| Street Details (Private) | xrm1_address_private_street_details |
| ZIP/Postal Code (Private) | xrm1_address_private_postal_code |
| City (Private) | xrm1_address_private_city |
xrm1_employment_contract_wage_referring
Display Name |
Schemaname |
|---|---|
| Start Date | xrm1_start_date |
| Type | xrm1_type |
| Amount | xrm1_amount |
| Payment Period | xrm1_payment_period |
| Yearly Amount | xrm1_yearly_amount |
xrm1_employment_contract_time_slice_referring
Display Name |
Schemaname |
|---|---|
| Entitlement | xrm1_entitlement |
| Absence Type | xrm1_absence_type |
| Time Unit | xrm1_time_unit |
After you have completed the Word template, the next step is to upload it so that it can be used. Save your Word document and navigate back to Dynamics 365.
You can always adjust the document afterwards, in case you want to add something or make changes.
Upload Global Template
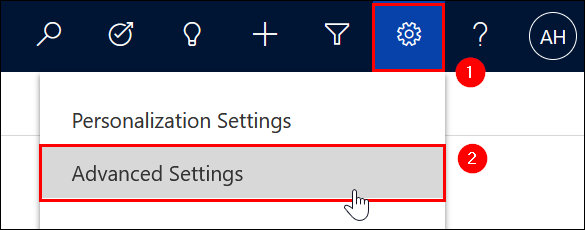
Global templates can be used for any employee in the company. To upload your already created Word template as a global template for work certificates, click on the gear in the top right corner of Dynamics 365 and navigate to "Advanced Settings".
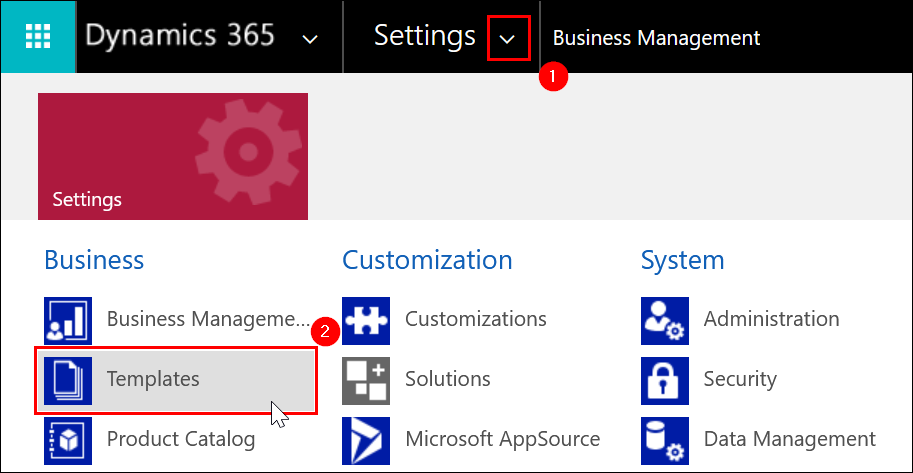
A new window will open in your browser. Open the settings here by clicking on the arrow next to "Settings". Navigate to "Templates" on the left under the item "Company".
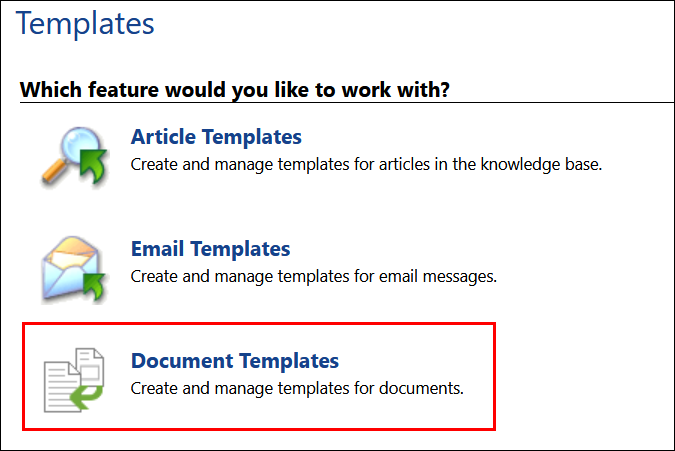
Click on "Document Templates".
You are now in the overview of available templates. Click on "NEW" in the upper left corner to add a new template. Select Word Template as the template and Employment Terms for "Filter by entity".
Click Upload and then select your previously created Word document.
Make sure that you upload the template and not an already generated document.
After the Word document has been successfully uploaded, you will see the information for the document template. You can also still change the name and add a description here.
Use a name that indicates that this is a global template.
Your template can now be used for all employees. To do this, switch back to the overview of work contracts and select the desired employee. Click on "Word Templates". The global template is now displayed.
Click on your global template and save the Word document. The work contract will now be generated automatically for your employee based on your entries stored in the system.
In the following screenshot you can see the result of the name, address and the start date.
Here you can see the result of the payment in tabular form. Since two entries are stored in the system, the table was automatically extended by one line.