
Form Editor
1. Preparation
2. Add columns
Before making any modifications to the solution, we strongly recommend that you create a Customizing solution. If you do so, you are always on the safe side in case something is not working properly.
In addition, you will be able to save your adjustments even with a major update and not have to make them again.
All details on creating and managing a Customizing Solution can be found here: Customizing Solution
Back to top | Back to table of contents
2. Add columns
The way of adjustment is the same for each view and can be used analogously to this guide:
- The necessary forms are inserted into the Customizing Solution (please see Customizing Solution)
- The form editor opens
- The view is adjusted
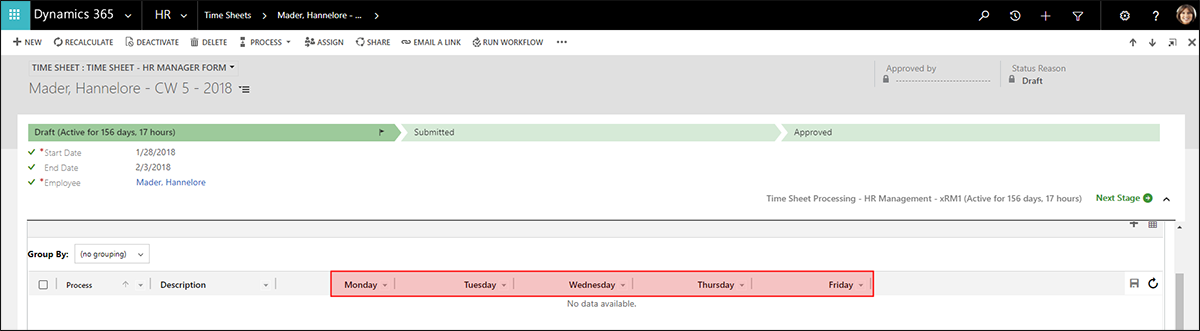
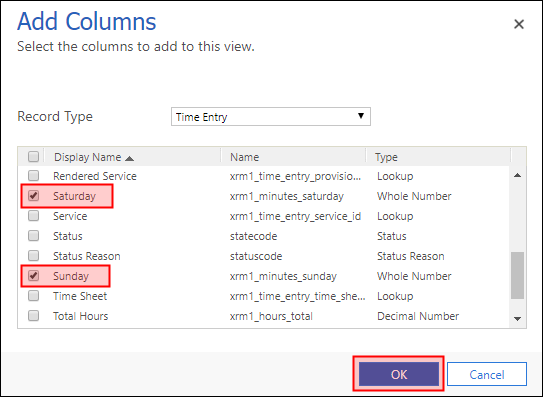
Example: The time sheets display Monday to Friday as the default week for time entries. The view should now be adjusted so that Saturday and Sunday are displayed as well for time booking on these dates.
At first, please add the following forms to the entity Time Sheets to your Customizing Solution:
- Time Sheet - HR Manager Form
- Time Sheet - Employee Form
- If available: Time Sheet - Project Employee Form
- If available: Time Sheet - Project Manager Form
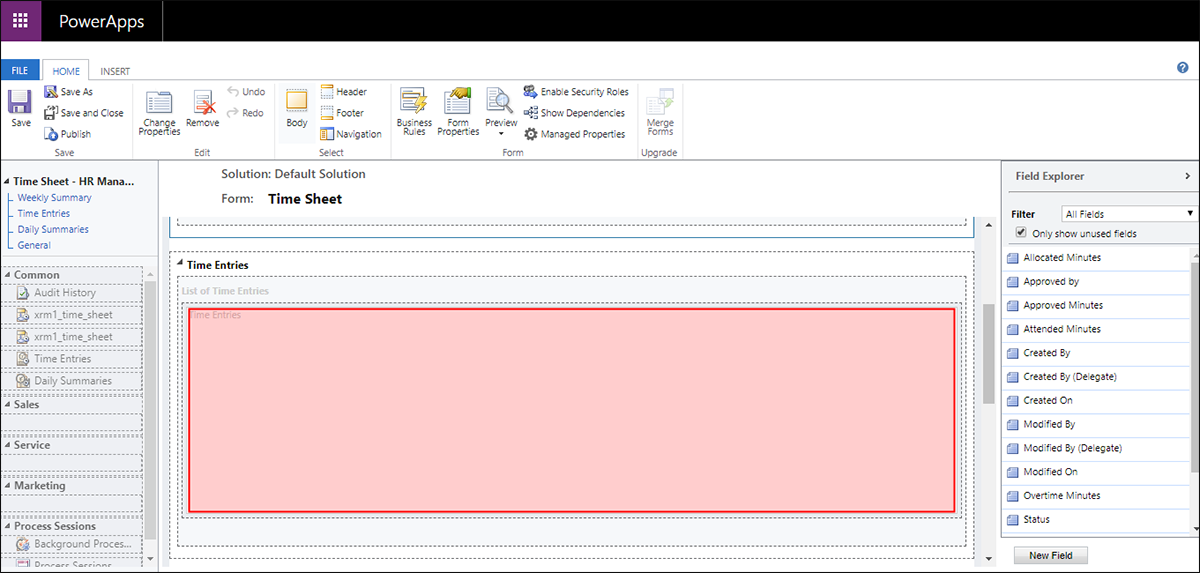
Open the first form. Now open the properties window by double-clicking on the Time Entries field.
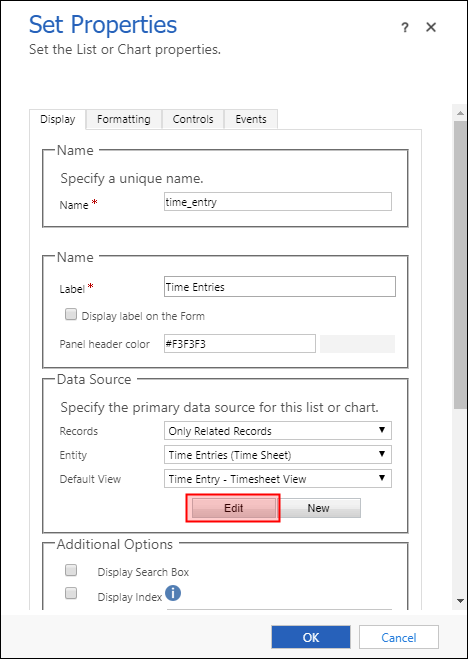
Please select Edit in the Data Source section
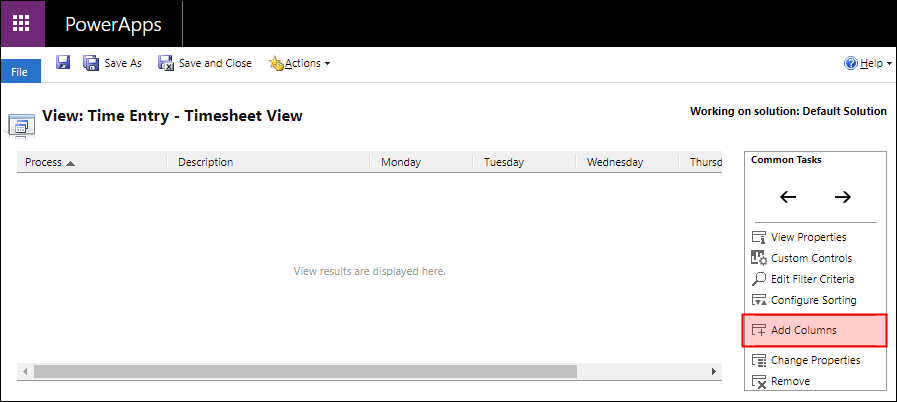
Click on Add Column
Select the two missing days and confirm by clicking on OK
You can now Save & Close the window. Confirm your change with OK.
Finally, you can make your customization available by clicking on Publish in the menu bar.
A few moments later, your customization will be available.
Repeat this process for all forms you want to customize.