Enter Receipts
Objective
Tutorial on how HR Managers and Employees can enter receipts that are business related expenses separate from a Travel record.
Click Through
- HR Managers start in HR HUB
- Employees start in HR HUB Employee Self-Services, then in the lower left corner, switch from My Time & Leave to Employee Self-Service
- Under Travel & Expenses, navigate to Receipts
- Click on +New
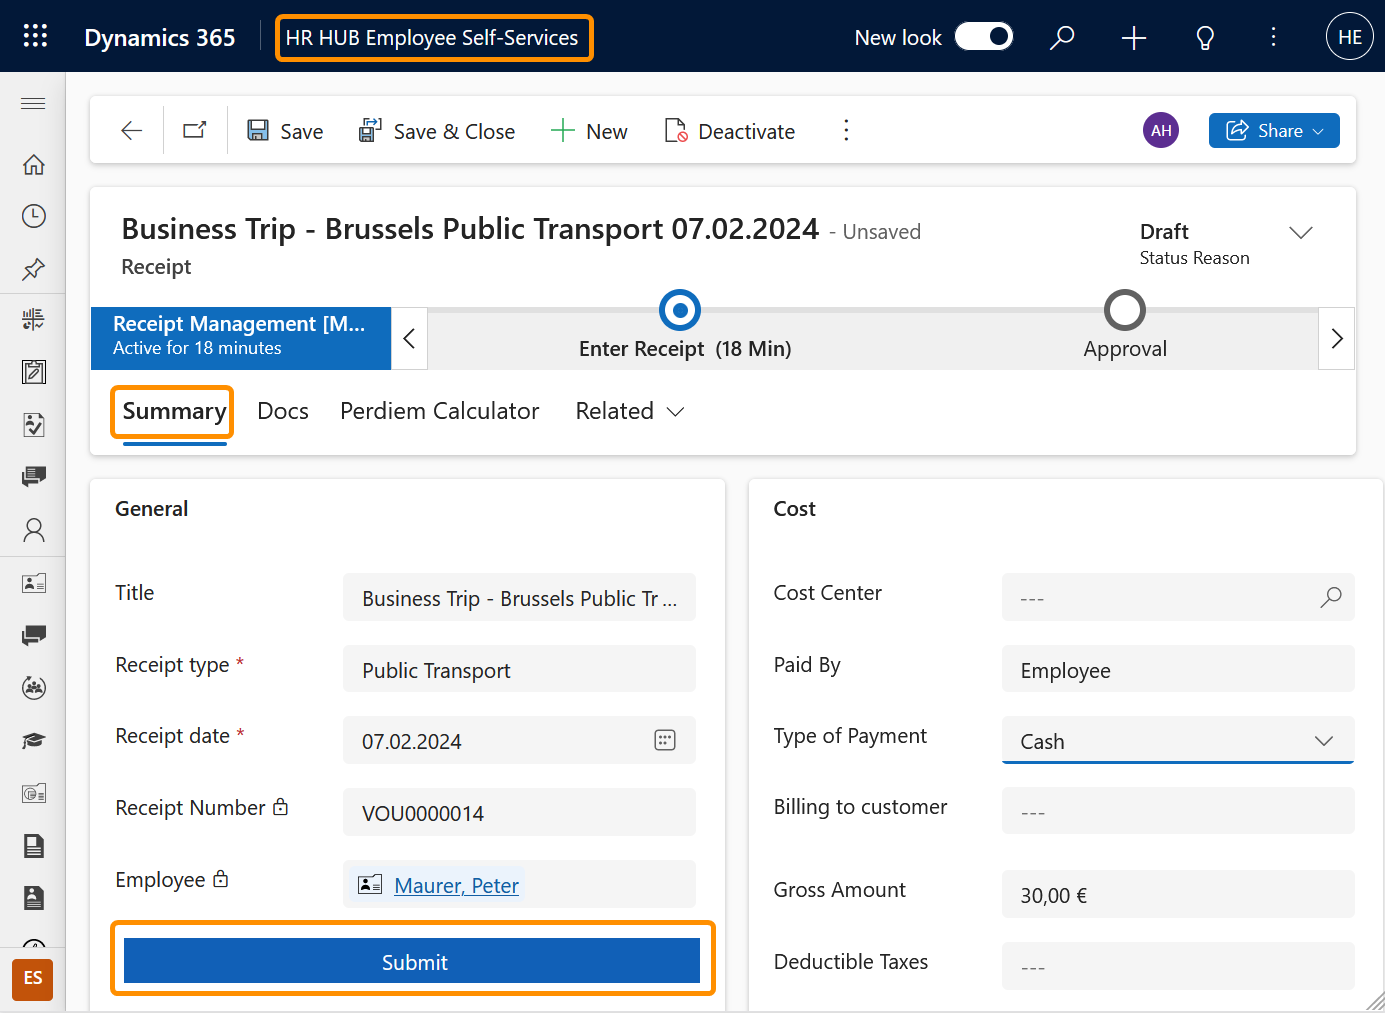
- Under the General heading, enter an appropriate receipt reimbursement Title
- In the Approval by field, enter the details of the receipt approver
- In the Receipt type field, select the type of expense relating to the receipt being reimbursed
- Use the To be reimbursed button to annotate whether the receipt is submitted for reimbursement
- Use the Receipt date field to state the actual expense date as displayed on the receipt
- [HR Manager only] Using the Employee field, select the employee the receipt is being entered on behalf of
- HR Managers can select between the Reimbursement Type options of Calculated or Flat Rate
- Calculated rates are a total value that is to be reimbursed to an employee that is based on a pre-determined percentage value for certain items, goods, or services.
- Under Cost area, if appropriate, enter the details for a related cost center for receipt reimbursement
- Enter a Type of Payment used
- Select, from options, whether the receipts is to be billed to customer in the Billing to customer field
- Select an appropriate currency
- Enter an appropriate description in the Description field (optional)
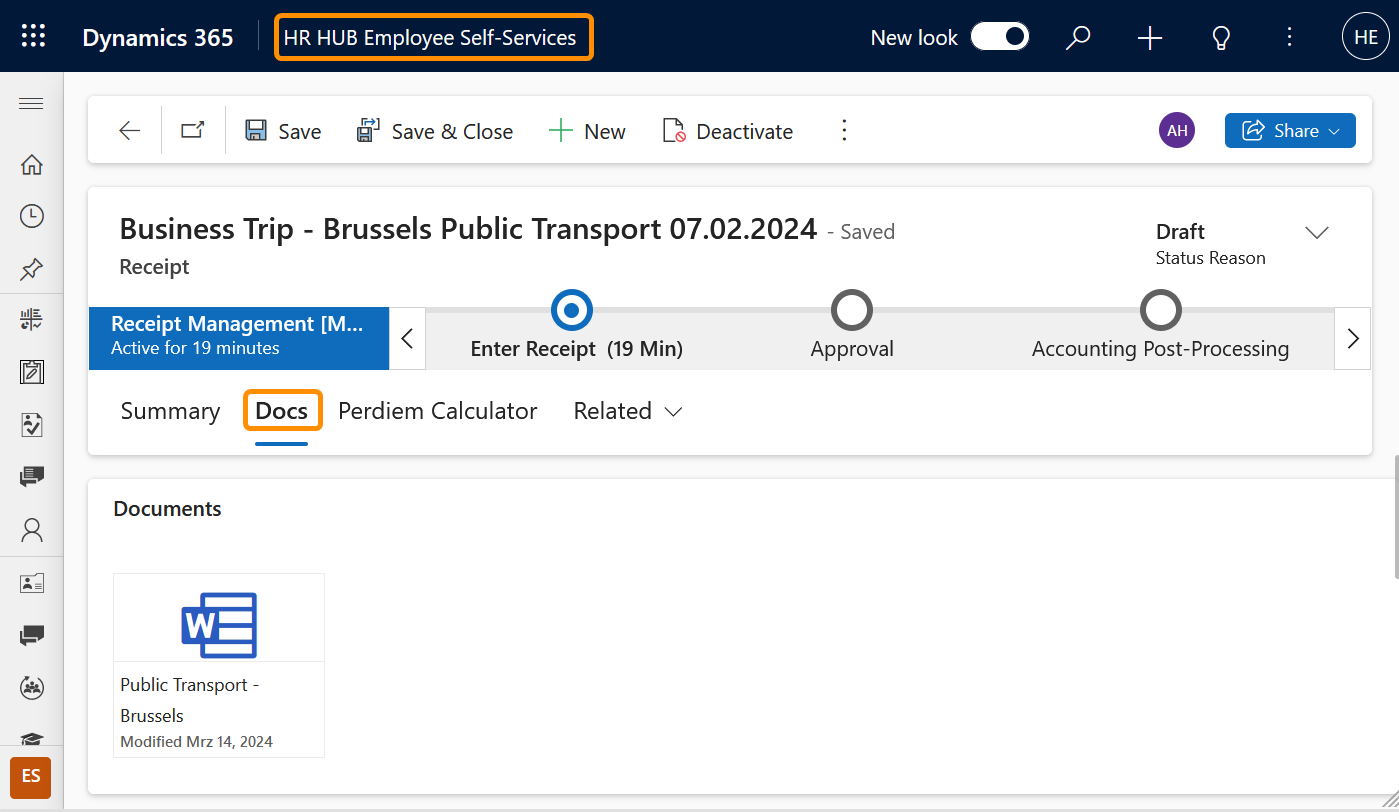
- To attach a document to the receipt record created, select the Docs Tab
- In the Timeline area, select the paperclip icon
- Locate and select the required document, then select 'open' to attach to timeline.
- When you're done, go to the Summary tab and click on Submit
- Alternatively, an employee is able to use a mobile device such as a mobile phone or tablet to conveniently enter receipts from everywhere. To do this, the employee should use the following steps:
- Take a photo of the receipt required for reimbursement, or ensure that the digital invoice, receipt, or document is saved and is available to be uploaded from the device.
- Using the mobile device, open the Employee Self-Service app, using the 'Change Area' function, select Employee Self-Service, and under 'Travel & Expenses' enter 'Receipts'
- Select +New and complete all relevant receipt information for reimbursement and select 'Save'
- Once the receipt entry is saved, enter the newly created receipt record, under the 'Docs' Tab select the paperclip icon under 'Timeline', identify and upload the digital receipt, invoice, or document photo or file and select 'Add Note'
- Under the 'Summary' Tab, ensure all information entered is accurate and select 'Submit'
Hint
- Receipt numbers are automatically generated by the system
- If the Receipt Type is 'Expenses', the Per Diem table is adjustable by the employee depending on the meals taken or requiring reimbursement
Result
Below, you can see the Mobile View for entering receipts.