
Business Data
1. Overview
2. Change Department
1. Overview
The section Business Data can be divided in 4 sectors
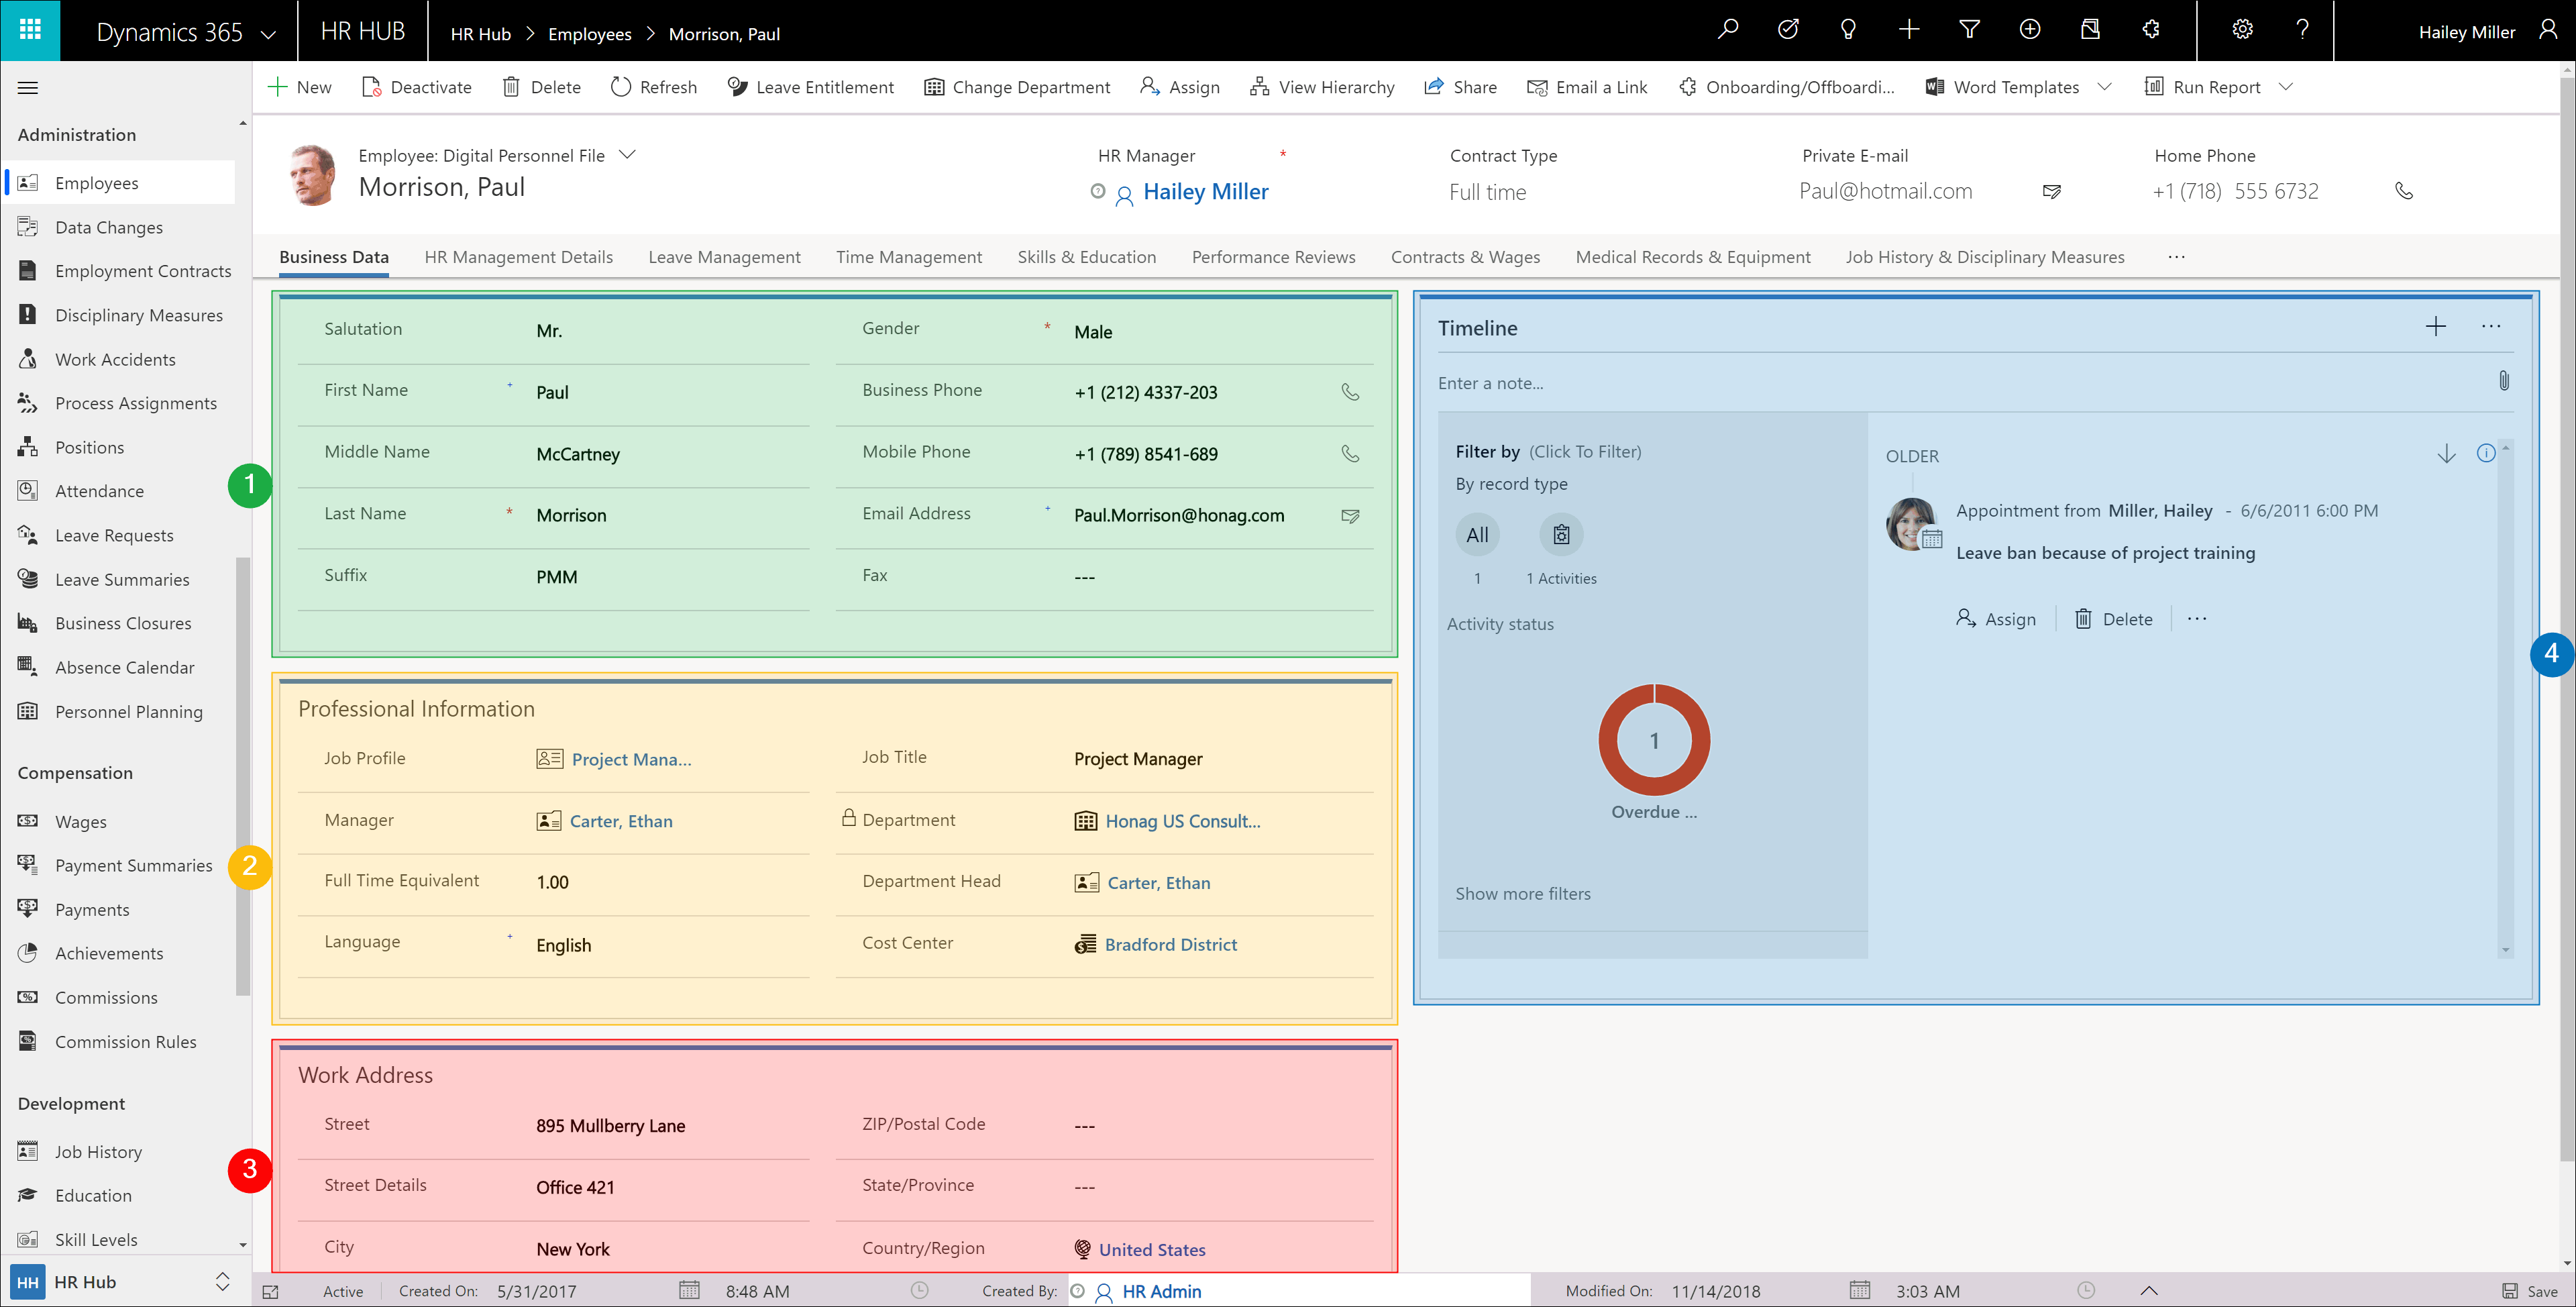
1. General Information
The fields in this section are self-explanatory and can all be filled in freely.
Please note that Last Name and Gender are mandatory fields.
2. Professional Information
In this section you can freely enter the Language, the Full-Time Equivalent (FTE) and the Job Title.
You can select the Job Profile, the Manager and the Cost Center.
Attention: As soon as the department has been selected, the field is locked and can only be changed via a dialog. Further information will follow below: 2. Change Department
3. Work Address
Here you enter the employee's business address.
Only the Country is not a free field, but offers a selection of all Areas defined in your system.
Note: The here selected Area is taken as the country of origin for expense calculation.
4. Activities & Notes
You can use Timeline to schedule or simply track activities such as phone calls, emails, or appointments.
To do this, click on the Ellipsis and select the activity you want to add
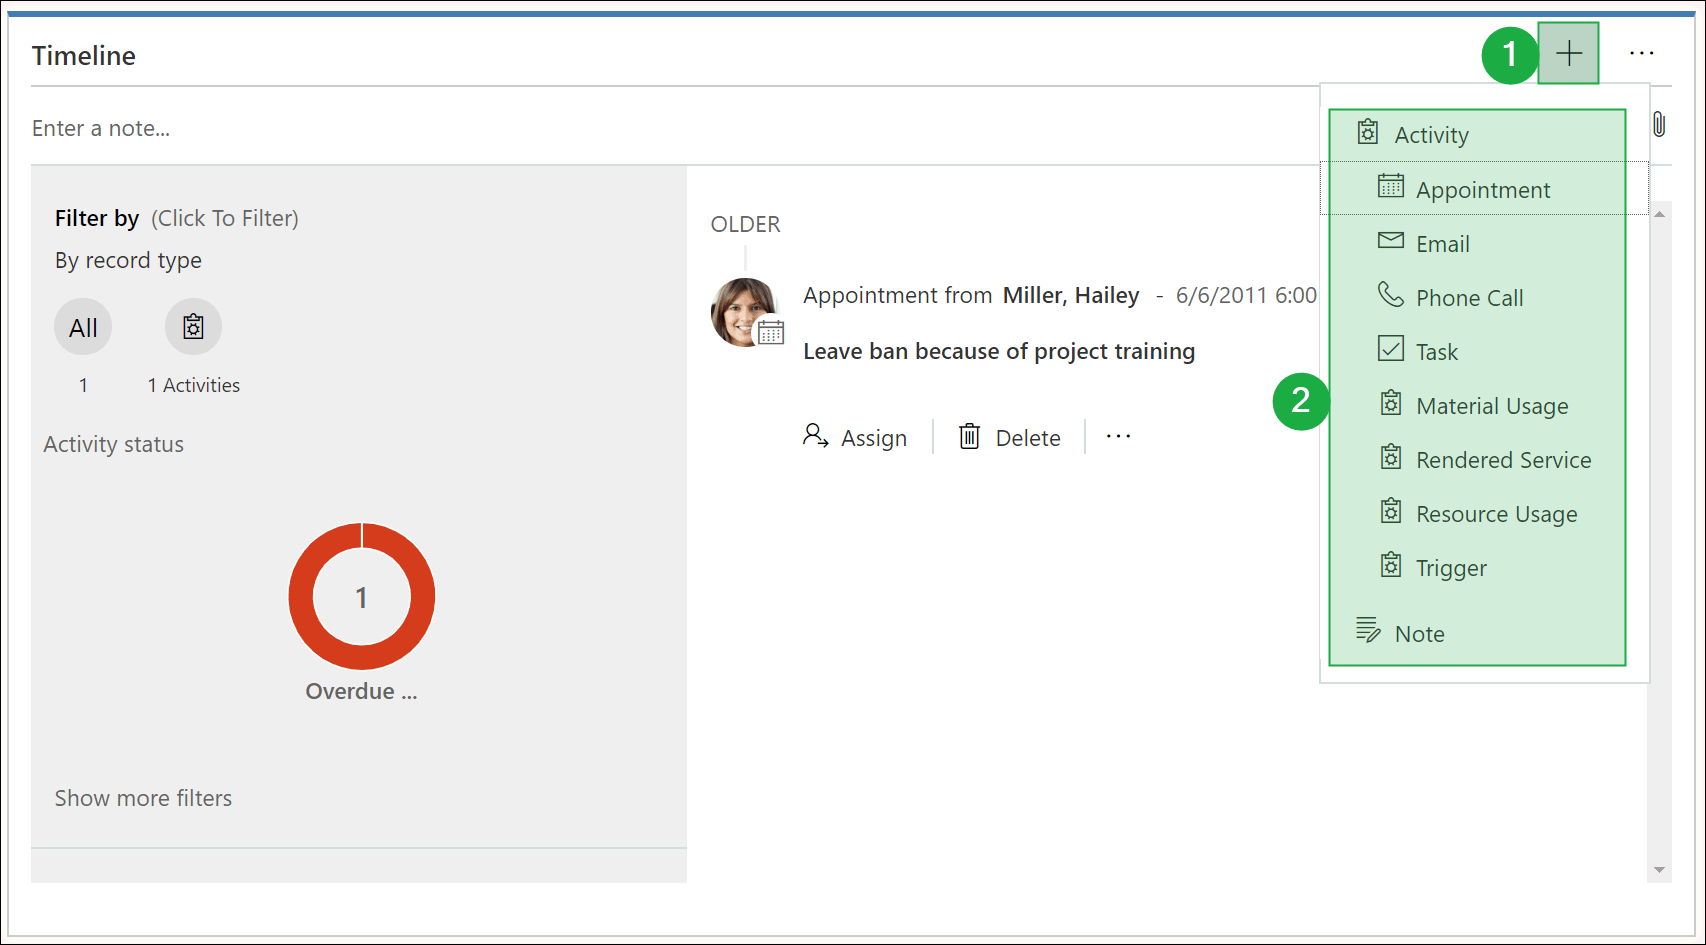
Depending on the activity, appointments are now automatically created in Outlook for the persons concerned and / or emails are sent. Replies to emails are also stored here. For new employees, for example, you can access email correspondence from the recruiting phase and access important information there.
In the notes you can enter free notes or attach documents. For example, you could scan in sick certificates or declarations of confidentiality and attach them here so that you can access them at any time.
To attach a document, simply click the paper clip
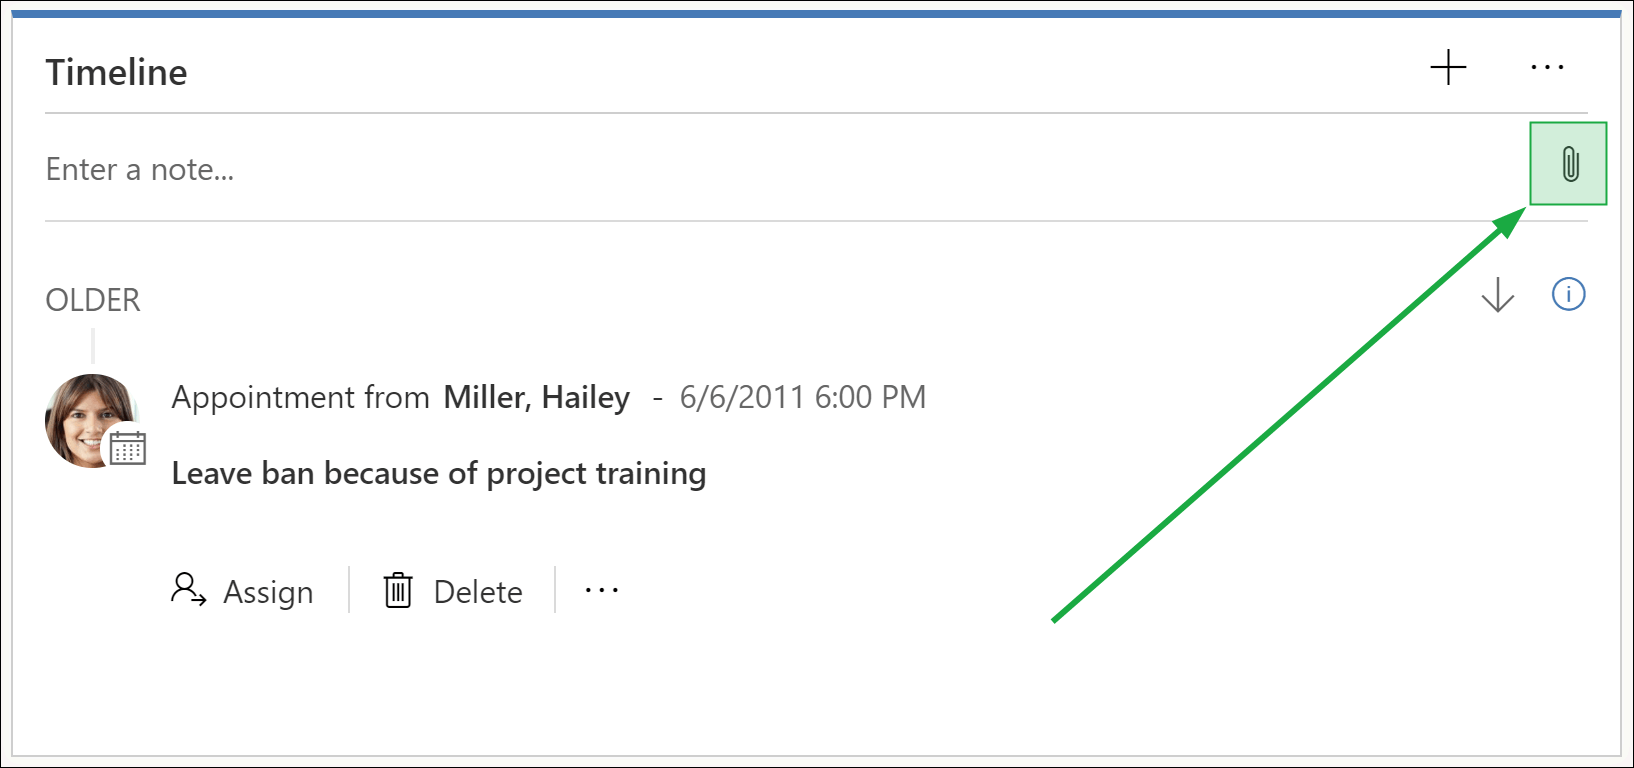
Note:
To insert documents into the timeline, you must have activated and configured document management.
Further information can be found here: SharePoint Integration
Back to top | Back to section overview | Back to table of contents
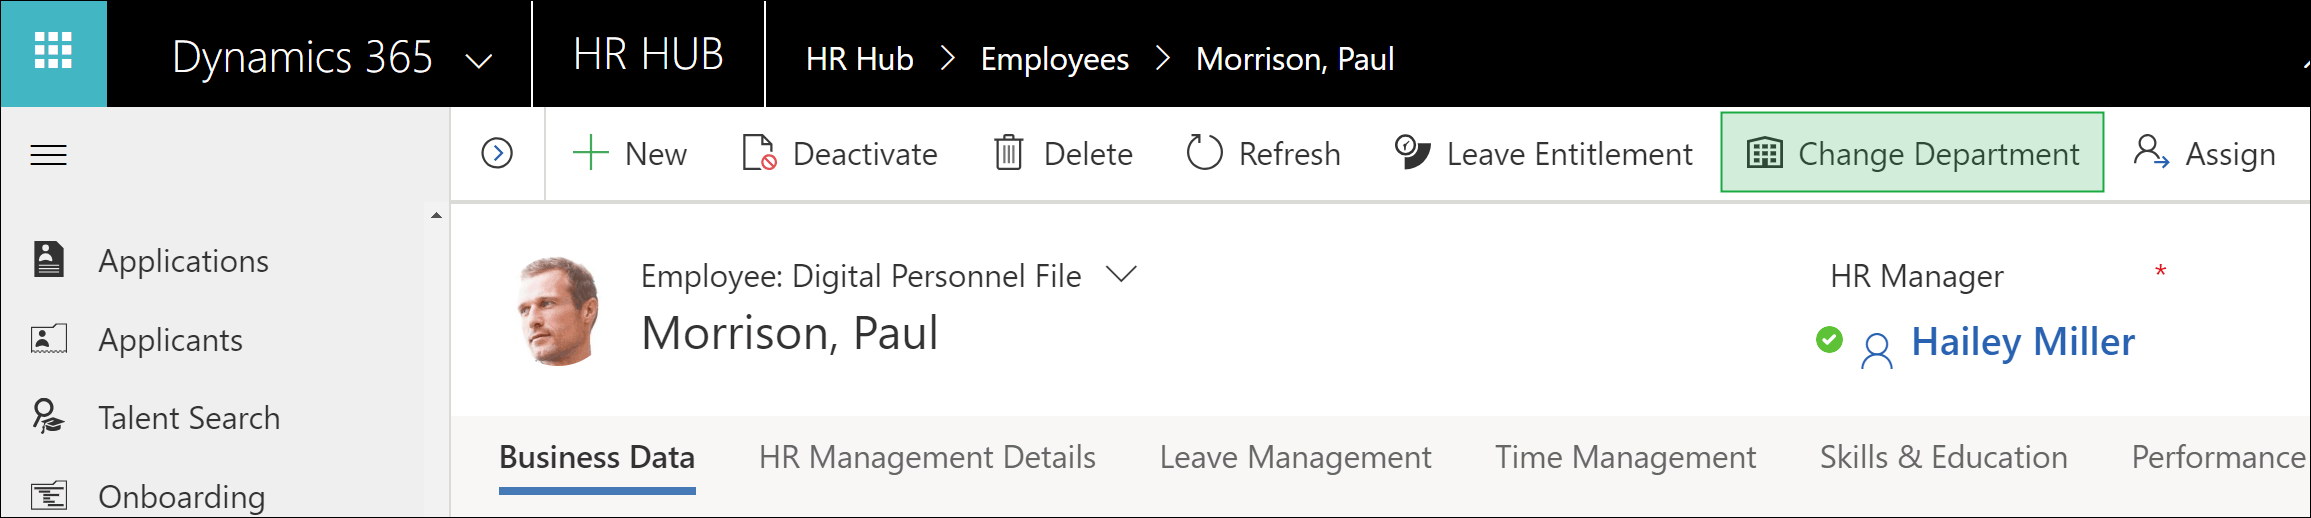
2. Change Department
The change of the department affiliation of an employee can only be changed with the help of a dialog. This change only takes a few seconds and at the same time offers you the possibility to undo already rolled out business closures in the old department and rolling out the business closures of the new department. All this runs automatically as soon as you decide to change departments.
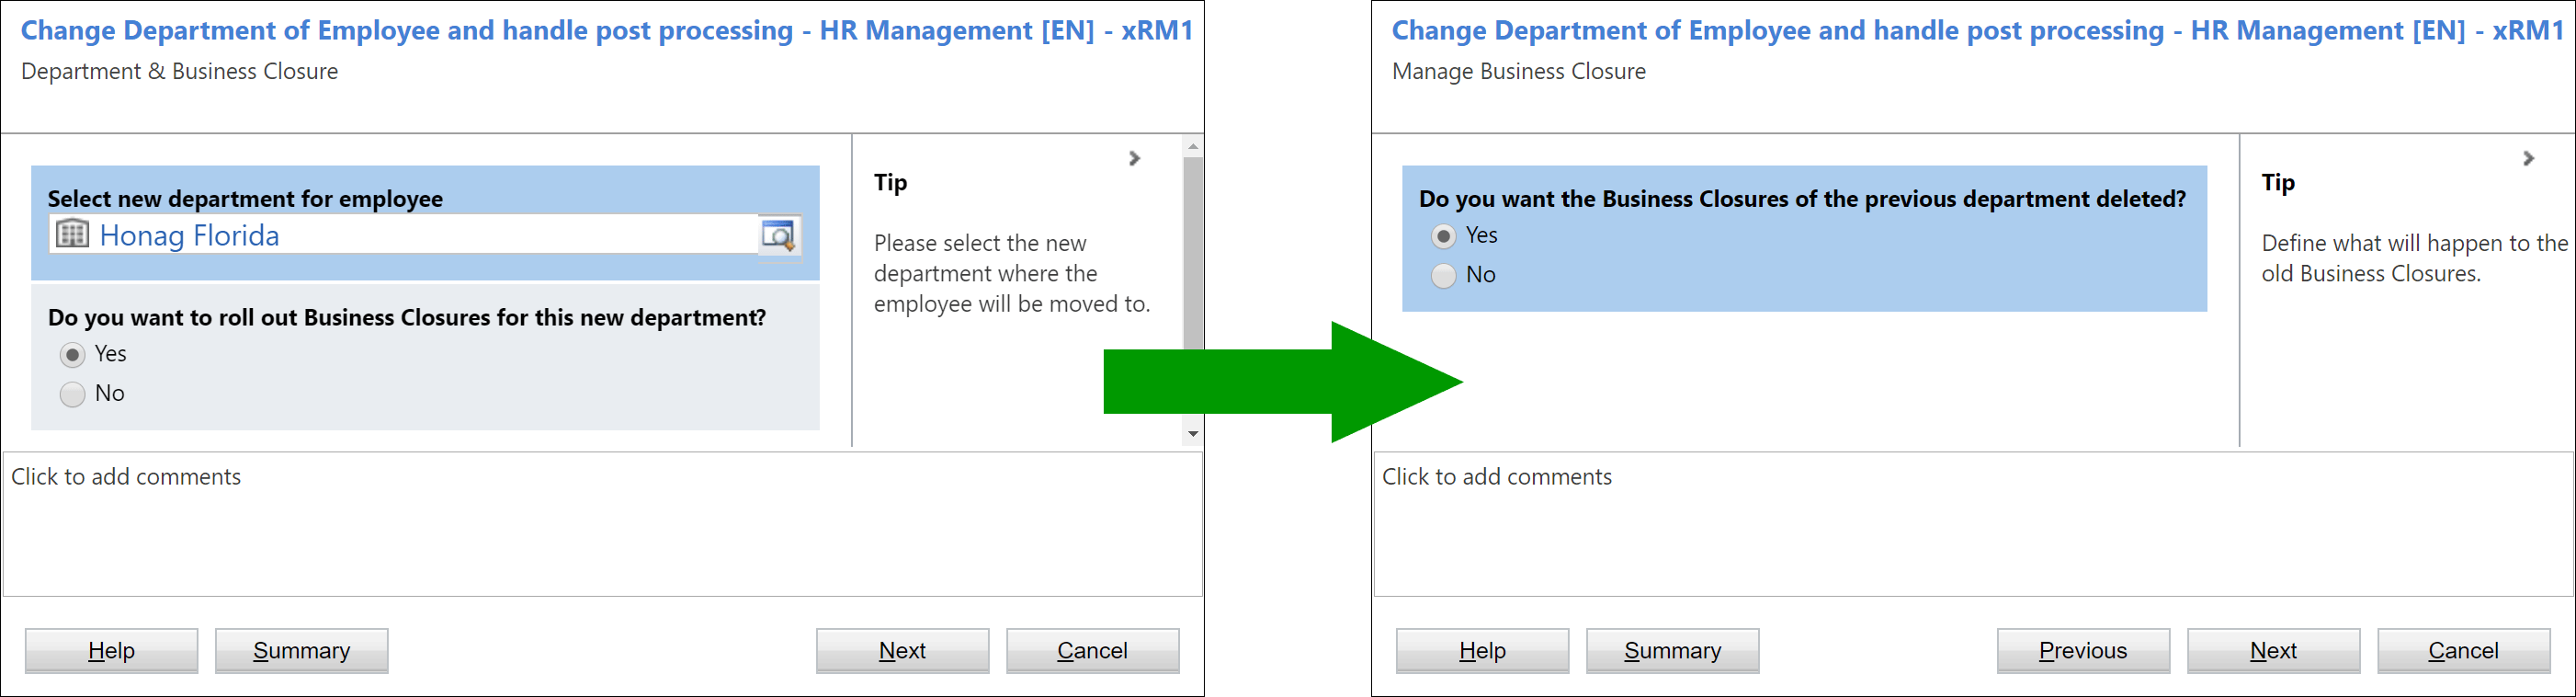
Click on Change Department in the menu bar to open the dialog.
Now select the new department for the employee, decide whether you want to roll out the business closures of the new department for the employee and confirm with Next.
If you have decided not to roll out the business closures, the department change is now carried out. If you have decided to roll out the business closures of the new department, you now have the option of deleting the old business closures that have already been rolled out. Confirm this decision with Next and the department change is carried out.
In addition to the business closures already mentioned, the department head and the manager are now also updated in the Digital Personnel File.
You can find further information on business closures here: Business Closures
Back to top | Back to section overview | Back to table of contents