
Onboarding
1. Create Onboarding Template
2. Create Onboarding Project
1. Create Onboarding Template
You can create templates for your onboarding and offboarding projects. This way, the projects only have to be completely planned once, from the tasks with the responsible persons to the scheduling you can already include everything. As soon as you generate a new project from a template, Dynamics HR Management recalculates and adjusts all scheduling to the new project start or to a given deadline.
To create an Onboarding and Offboarding project template, navigate to HR Hub - Onboarding and create a new Onboarding/Offboarding project by clicking New.

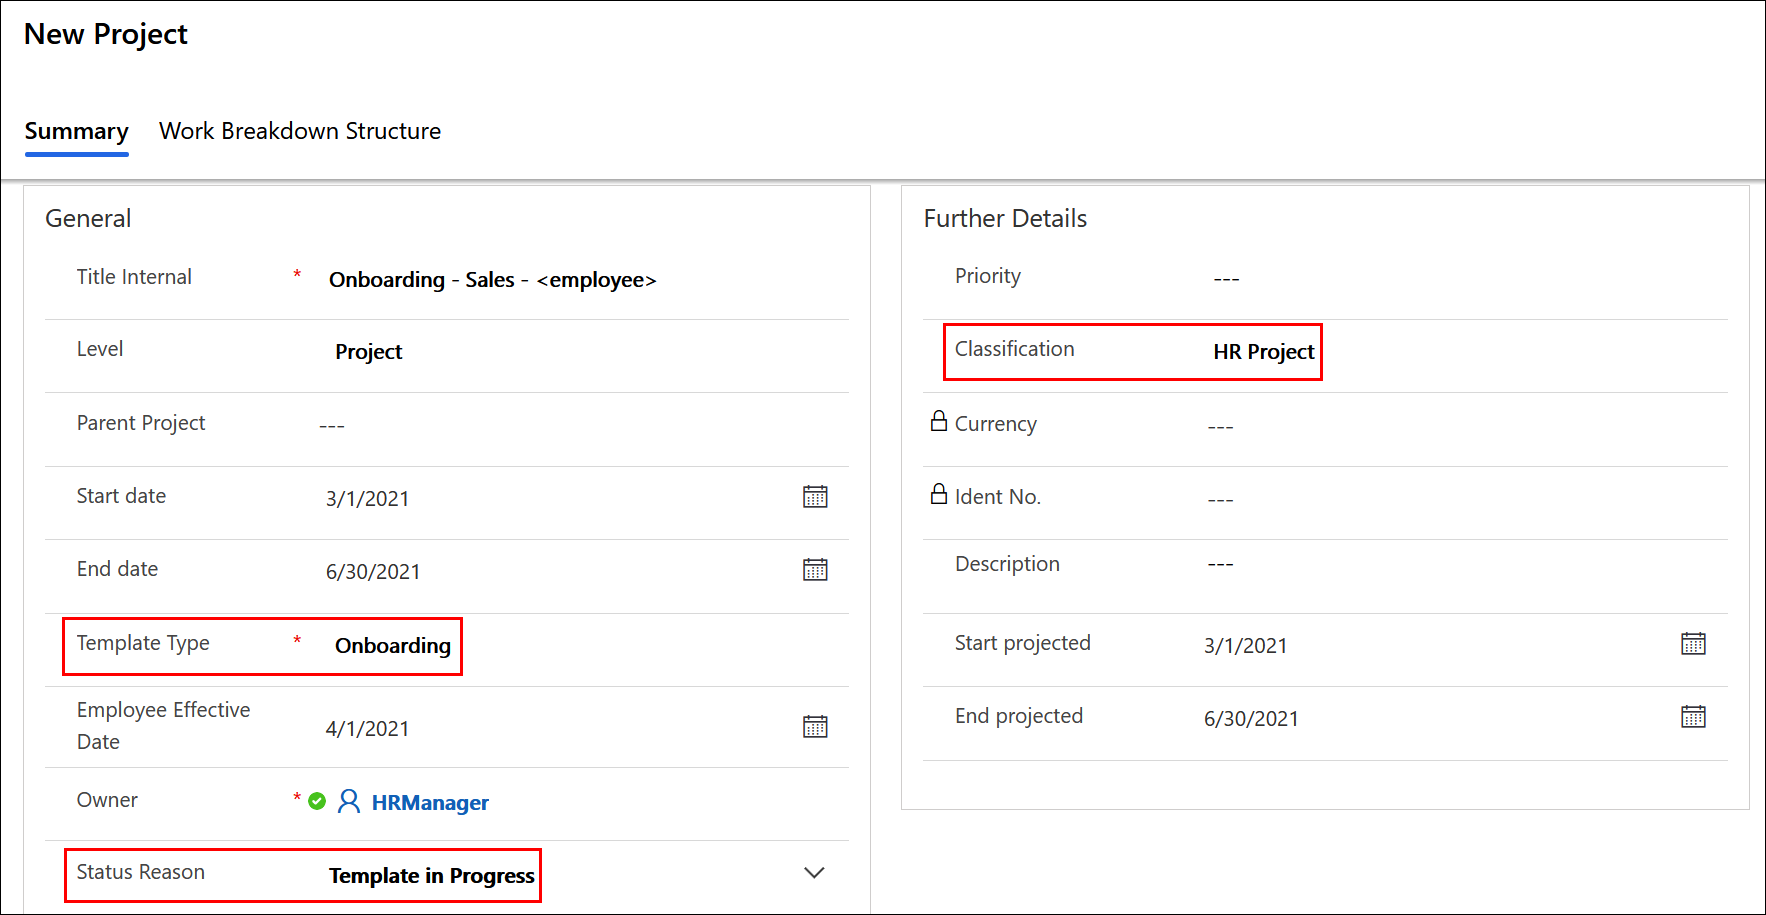
Assign a meaningful name and enter, for example, the department for which the onboarding is to take place. You can also insert a placeholder here. If you create a new project based on a template, you have the option of exchanging this placeholder and thus clearly assigning the project to an employee.
Fill out the desired fields:
- Title Internal: Enter a descriptive name. You can also use placeholders that you can replace later when creating a project
- Level: select which level you are dealing with. Usually it will be Project
- Parent Project: select a project if there is a parent for this onboarding or offboarding project
- Start Date: enter the date when the onboarding or offboarding will start
- Employee Effective Date: enter the date when the employee starts work
- End Date: enter the date when the onboarding or offboarding should be finished
- Template Type: select whether this is an onboarding or an offboarding project
- Owner: this is the owner of the record, usually the person who creates it
- Status Reason: select the current status reason for the template
To the right of the general entries, there are further details. Select HR Project here under "Classification" so that the projects created with this template are also displayed in the correct Onboarding/Offboarding Projects view.
Save your entries and please refresh this page. Then click the "Rework Template" button (under the status reason).
A new dialog opens. Select if the template should be published or set to draft state. Click Next.
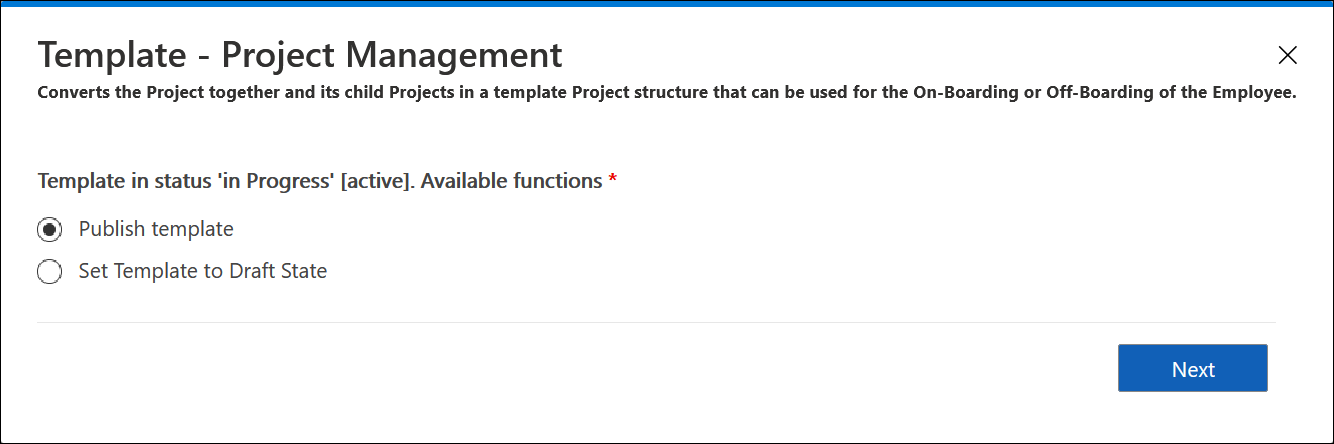
Then close the dialog and reload the page.
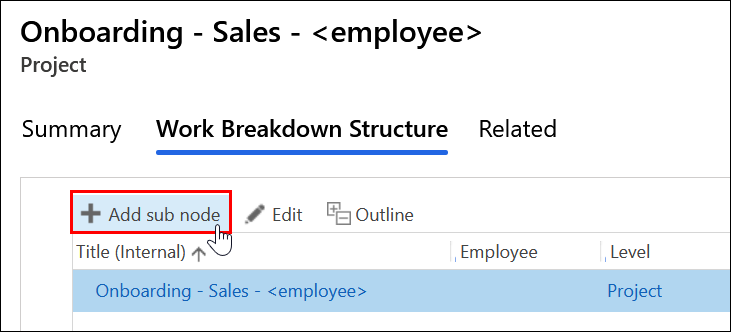
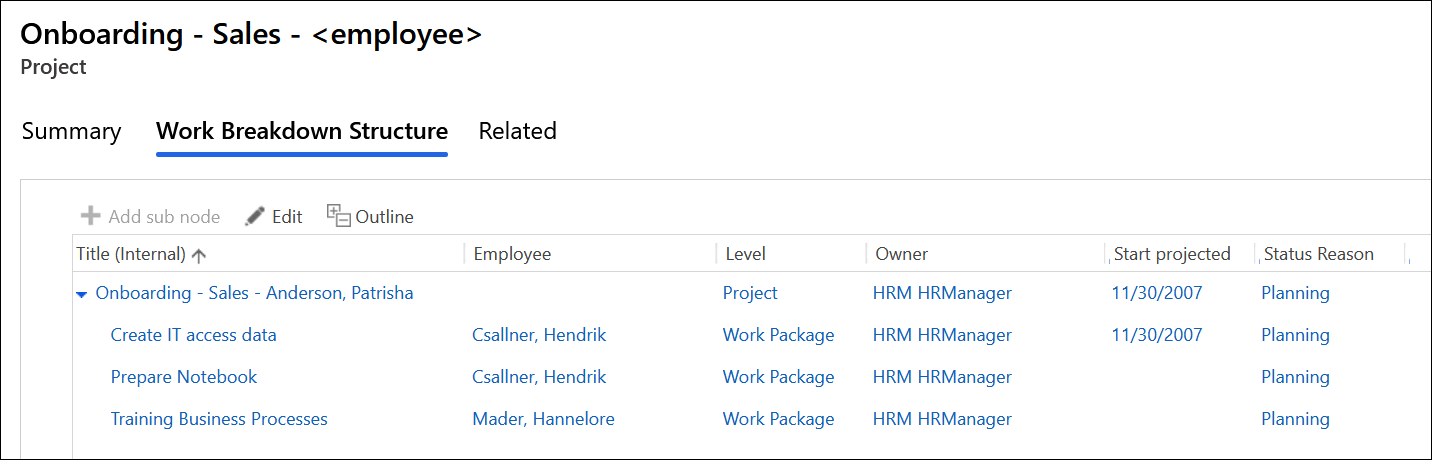
In the section Work Breakdown Structure you can plan the project, create tasks and assign the responsible persons.
Mark the line with the project's name and add a task by clicking Add sub node.
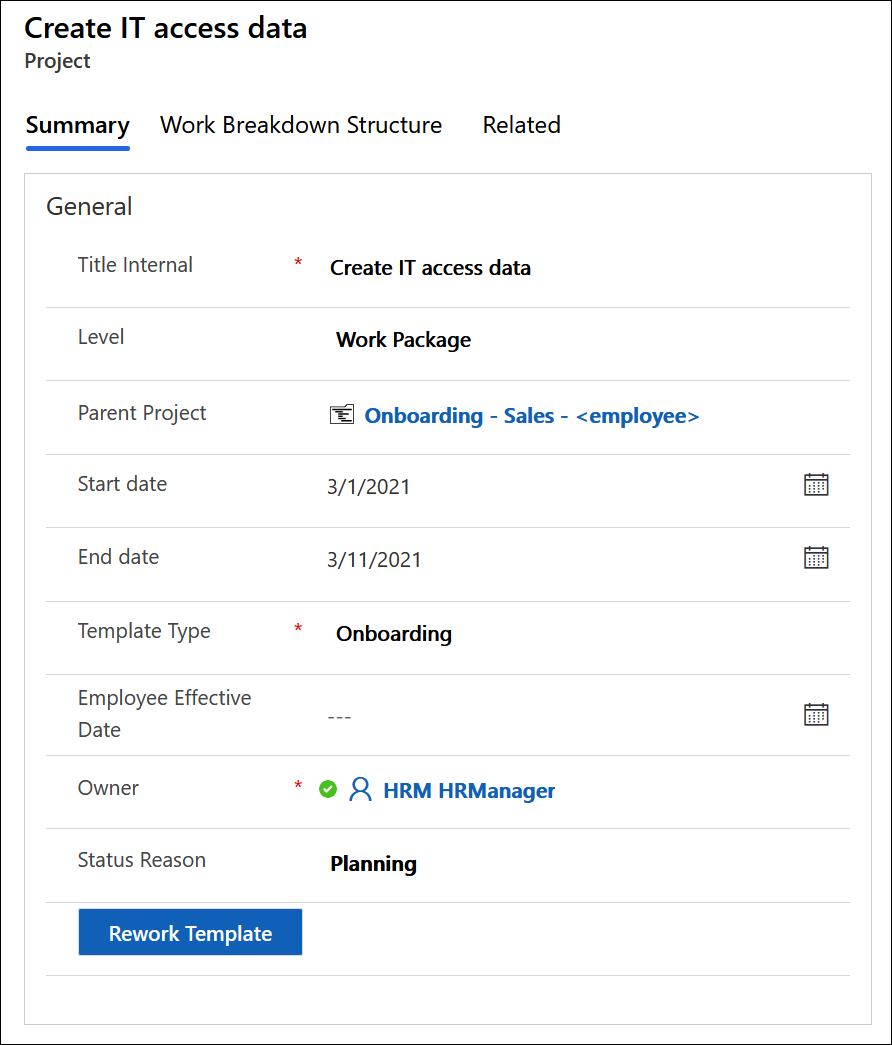
In the window that opens, fill in all the required data. The start and end dates primarily determine the scheduled duration for this task. The concrete date is recalculated for each project generated from this template.
In order to inform the person responsible for this area, you should create tasks. To do this, navigate to the Activities are (under the "Related" tab) click on New Activity and select "Task". Fill in the necessary data. Of course, the person who should complete the task is especially important here. In the subject of the task, you can also work with placeholders here. The due date will be recalculated based on this template when a new project is created and adjusted accordingly to the schedule of the new project. Add the task by confirming the entries with OK.
Once you have created all tasks, save & close the project.
This is how a part of the work breakdown structure might look like:
Once the template is ready, switch the view to "Templates approved" in the Onboarding Overview. You will find your new template ready for use.
Back to top | Back to table of contents
2. Create Onboarding Project
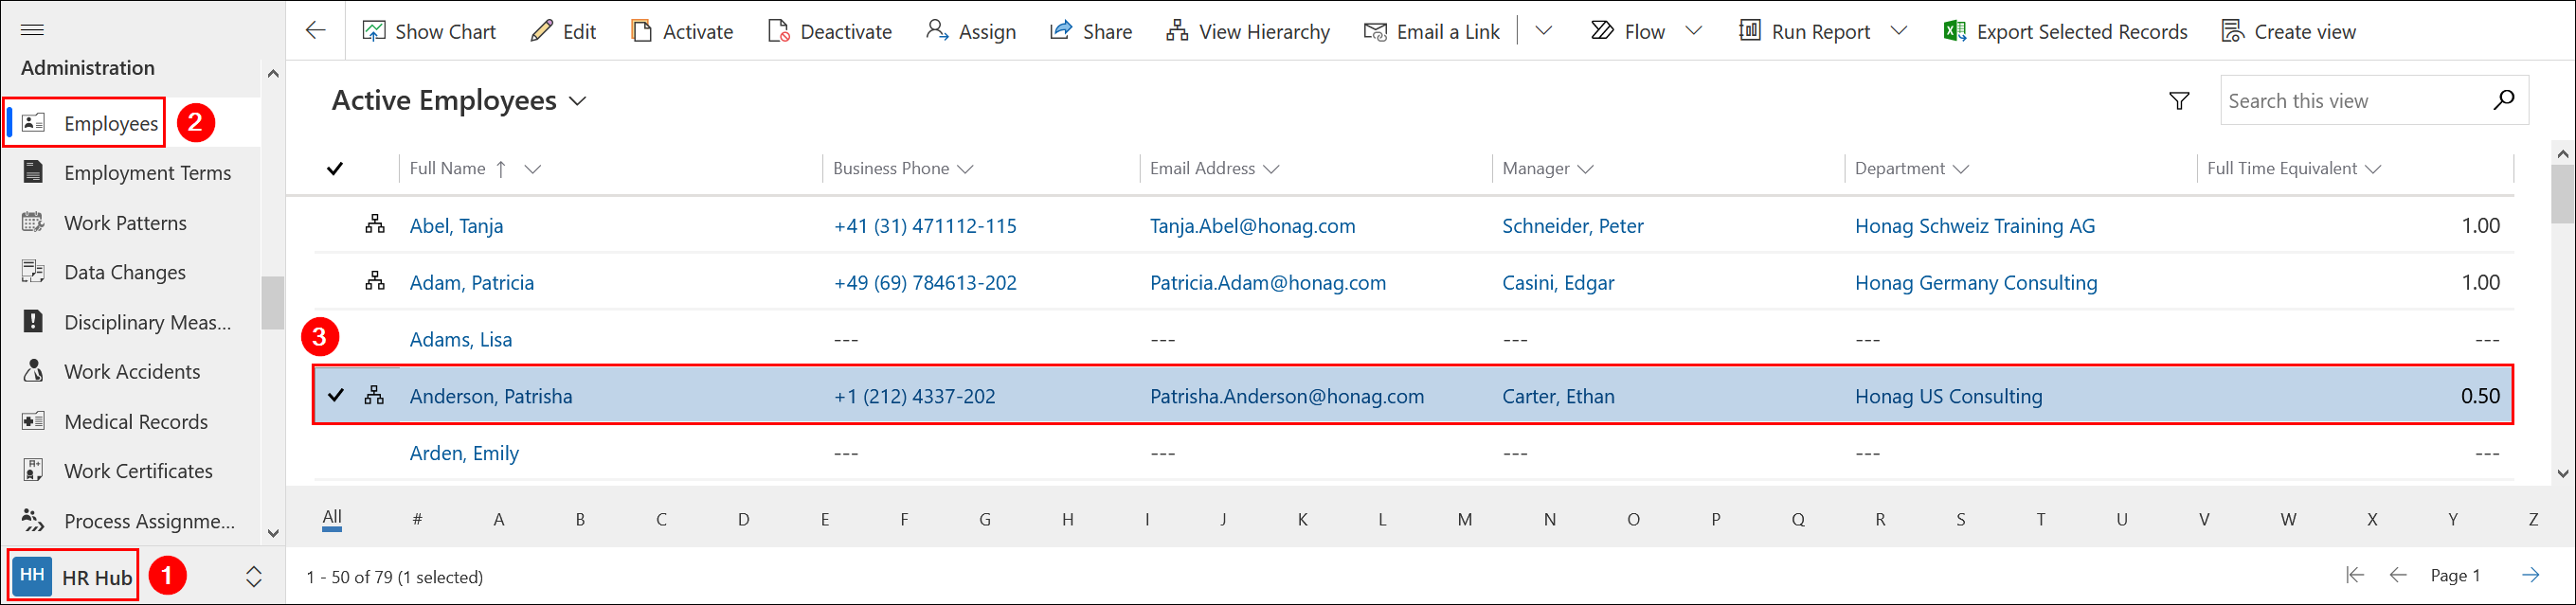
The project template you have just created can now be individualized for your employees. Navigate to HR Hub - Employees and open the entry of your desired employee by double-clicking.
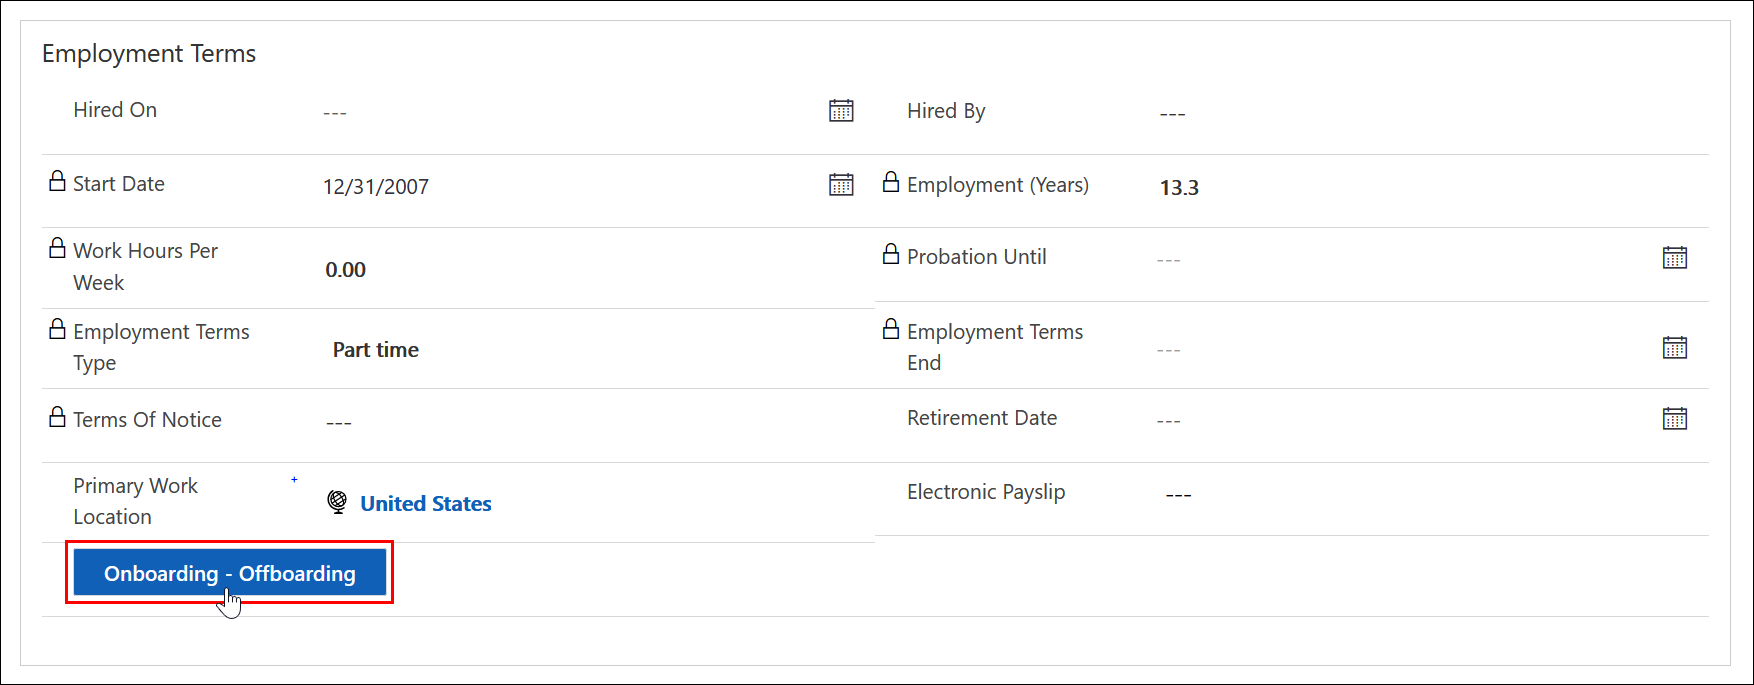
Switch to the "HR Details" tab. Click the "Onboarding - Offboarding" button under the "Employment Terms" section.
Select whether you want to create an onboarding or offboarding project structure.
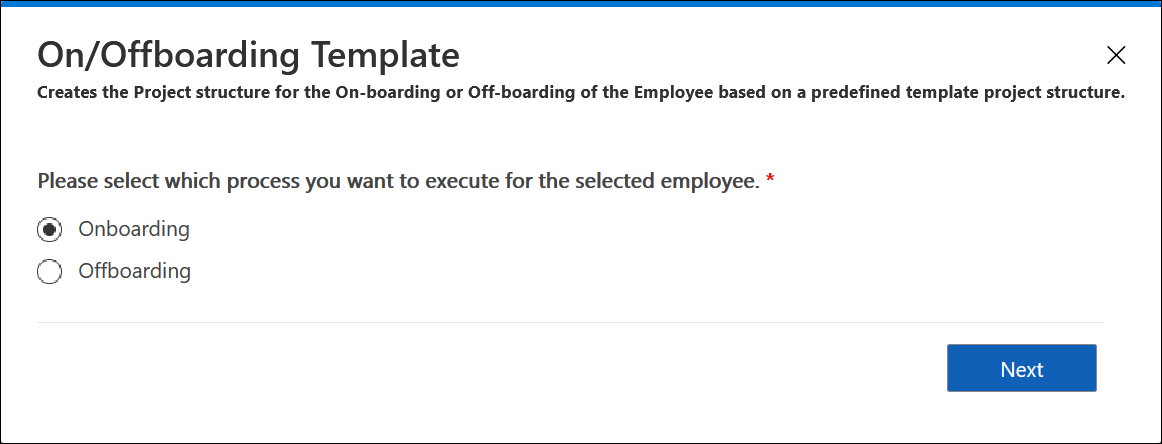
Click on Next.
Select the Onboarding/Offboarding template and fill in the fields accordingly:
- The employee is starting on: Based on this date, the time schedule of the project, as defined in the template, is calculated
- Find: If you have inserted a placeholder in the template name, you can search for it here
- Replace: Enter here with which you want to replace the placeholder
- Assignments of tasks and project nodes in the generated project: Select here whether you want to assign tasks and project nodes to the persons defined in the template or to yourself. If you assign the tasks to yourself, you can assign them individually later
- Copy notes from template: Select whether you want to copy the notes from the template or not
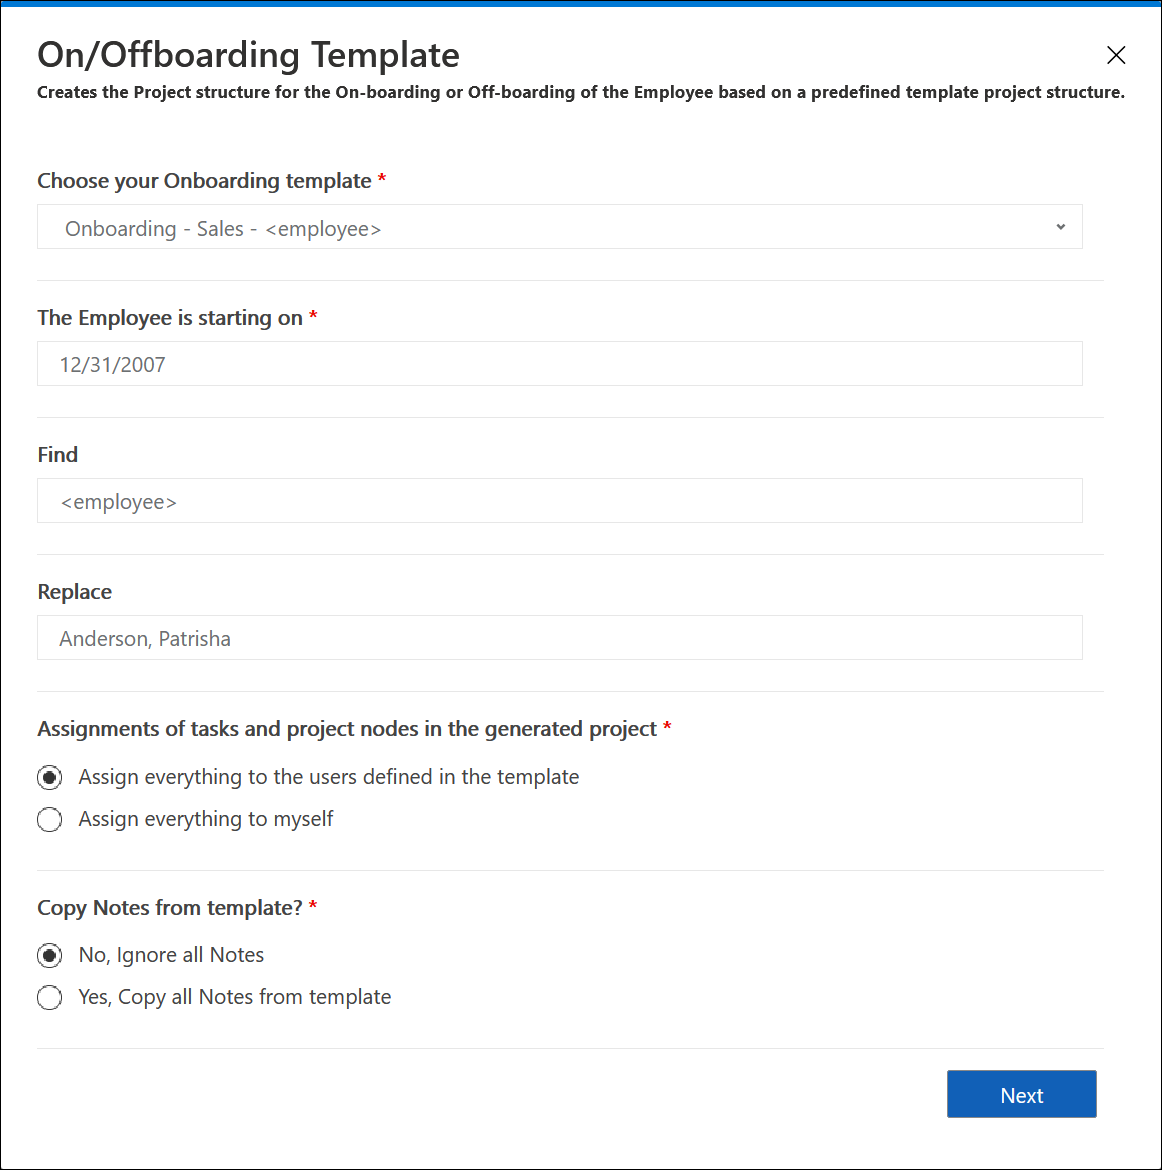
Confirm your entries by clicking Next.
The project will now be created for your employee. You will find it in the Onboarding/Offboarding projects overview.