Travels and receipts
1. Business travel
2. Reimbursement
3. Receipts
4. Scans and invoices
1. Business travel
Go to Navigation Bar -> HR -> My Travel
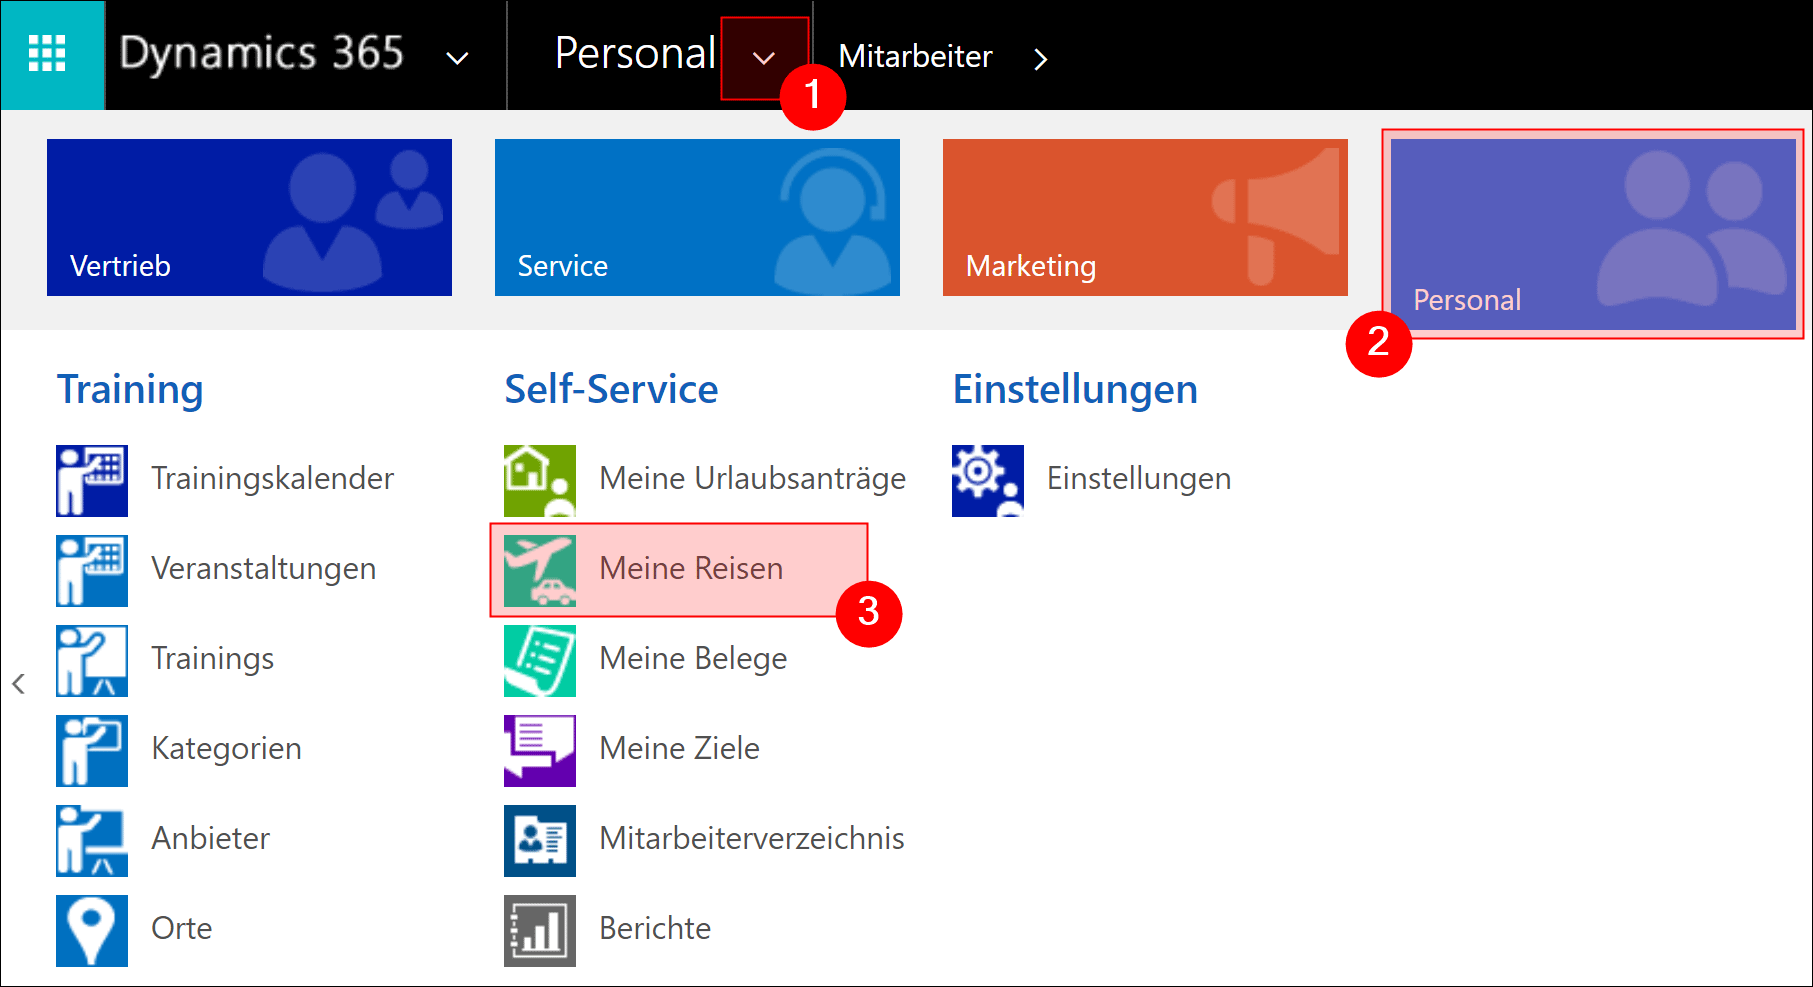
This overview shows all of your past business travels.
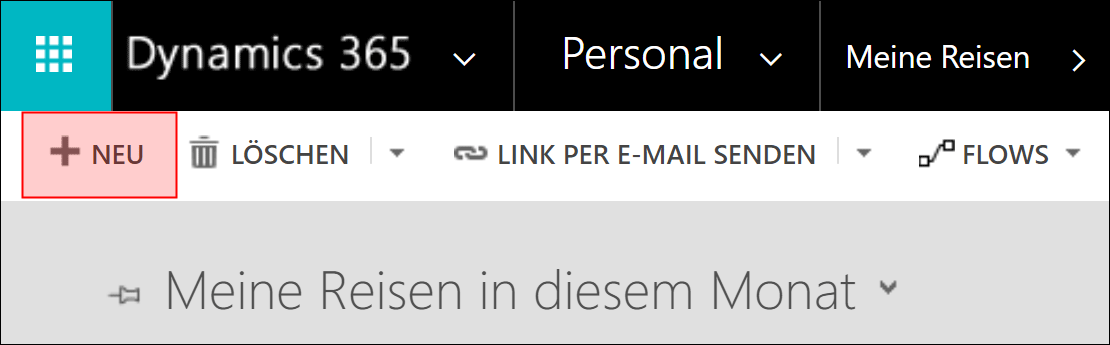
In the menu bar, press +NEW to record a new one
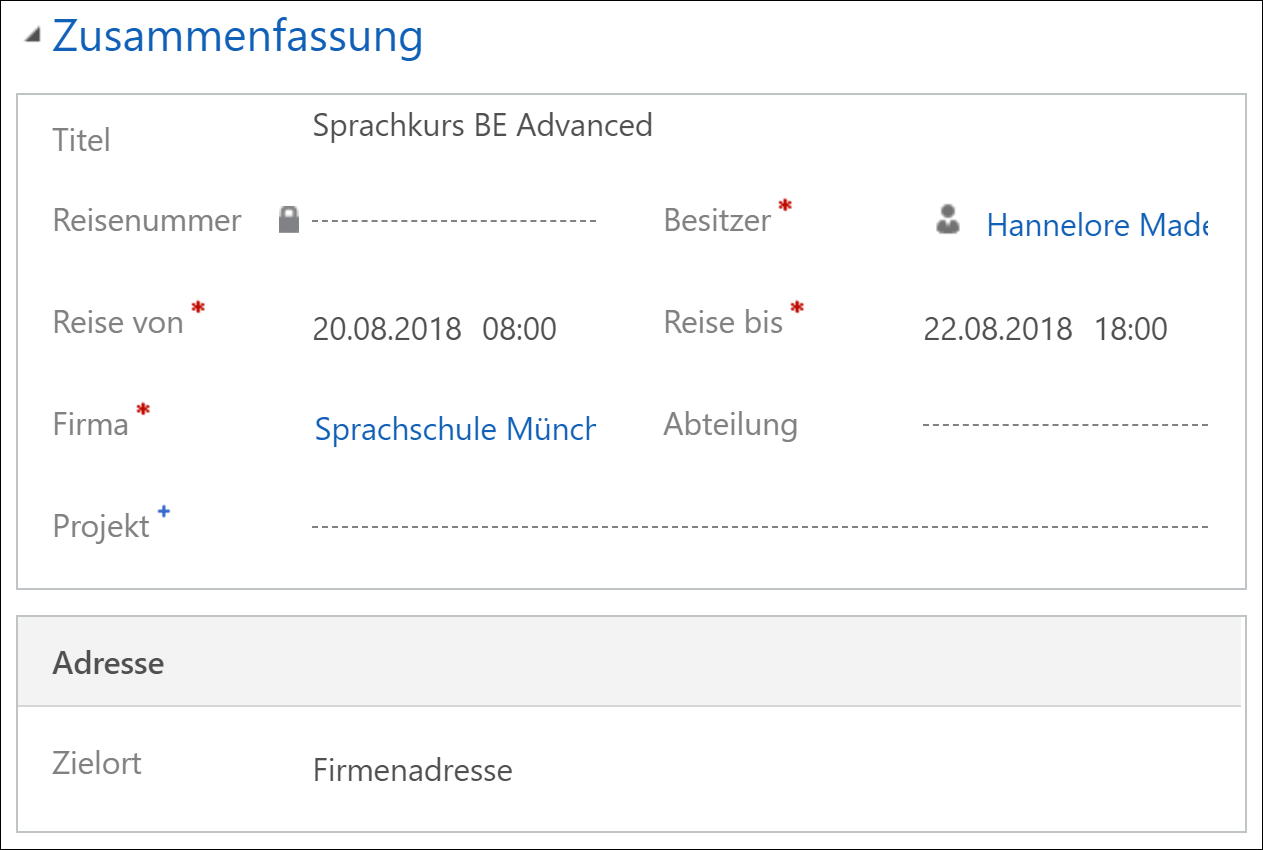
First fill in the required basic data
- Title: Enter a descriptive title
- Travel Number: This number is automatically generated when you save the record
- Travel from - until: Enter the duration of the trip
- Account: Select the customer you are traveling to
- Department: Here you can define your travel destination more precisely
- Project: If the trip is linked to a project, you can select the project here
- Destination: Here you can select if you travel to the address in the record of the customer selected above (customer address) or if you want to define a specific address (other address), which you can then enter in the fields that appear
Save the record
Back to top | Back to table of contents
2. Per diem
You can auto calculate the daily allowance. To do this, click the + Icon in the section Receipts section in the upper right corner of this section.
Note:
The correct assignment of the calculation type and the calculation values is based on the Work Address entered in the Digital Personnel File.
Out-of-the-box calculations and per-diem data is included for Germany, Austria, Belgium, USA and Singapore.

Enter a Title and a Receipt date. Here you could, for example, enter additional meals as title and choose the first day of the business trip as the document date.
Select the document type: Expenses and Save the data
In the section Perdiem Calculator, enter the travel period (from to) and select the Main Destination.
Save the data record and the additional meals will be calculated and entered automatically for you
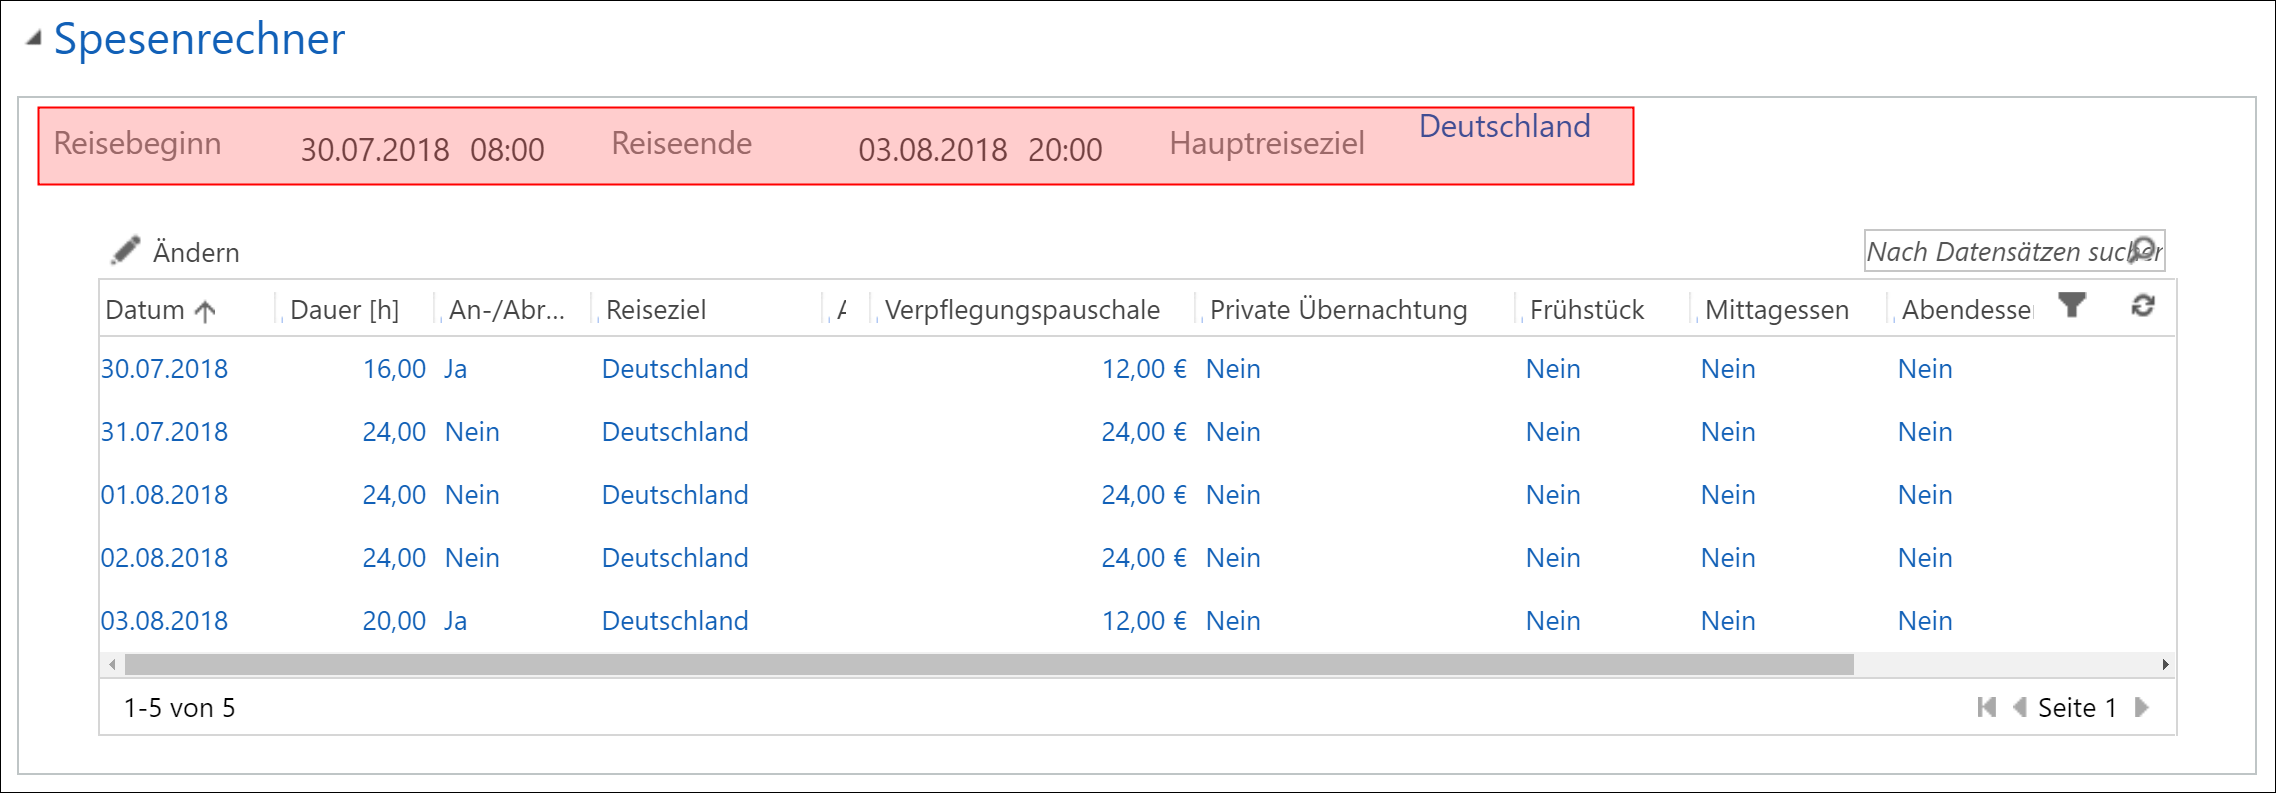
In the expense list, you can open the individual days by double-clicking and, if necessary, make adjustments, for example, if you have had breakfast on one day or stayed in a private accomodation.
Here you get a precise breakdown of the expenses. You see the duration on which the calculation is based on for this day and the perdiem amount.
Select whether or not you had a Private Overnight Stay and if you received breakfast, lunch or dinner. If you set any of these to Yes a fixed amount is deducted from the total day rate.
Save the record and continue with the other days.

In the same way, you can of course add further receipts for this trip. Click on the + Icon, fill in the required fields and save the record.
Back to top | Back to table of contents
3. Receipts
You should always add receipts directly ot of the Travel recod in the system.
But you can also submit receipts, regardless of business trips, such as when you are dining with customers or business partners, or when you have a gift for a guest.
Enter receipts
Go to Navgation Bar -> HR -> My Receipts
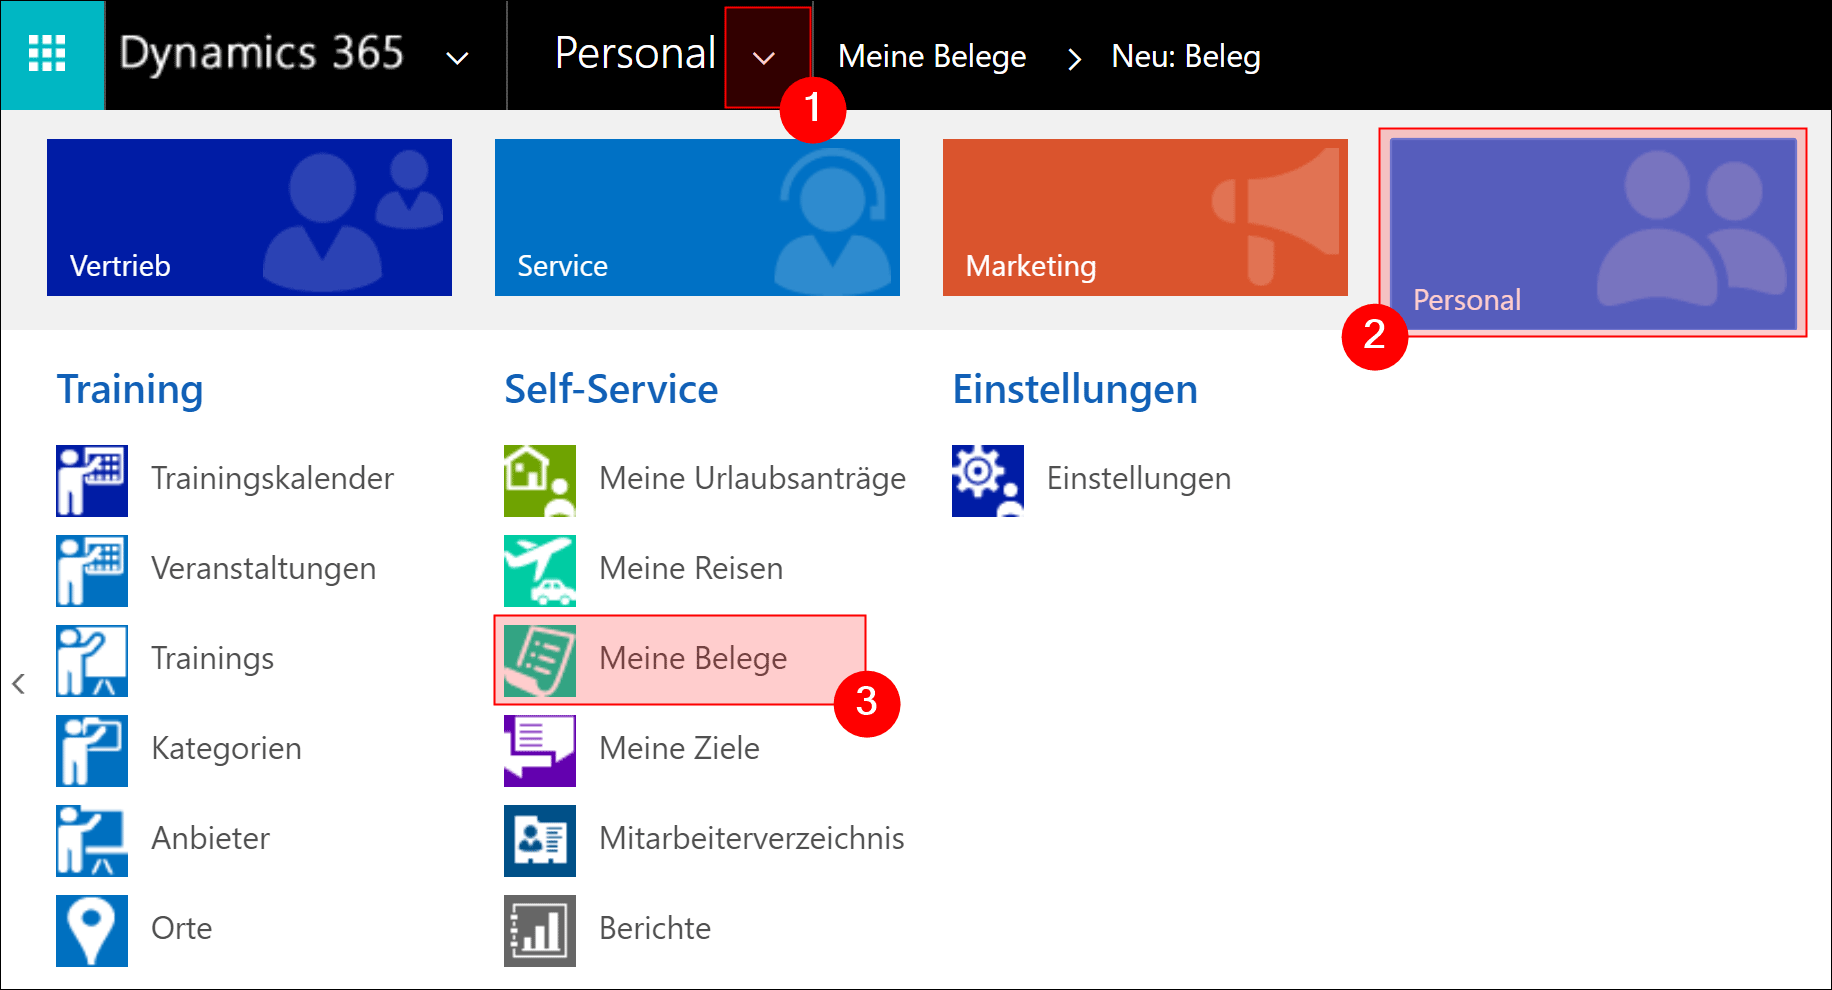
In the menu bar, press +NEW
For you, there are only three interesting sectors
- General data
- Description
- Cost
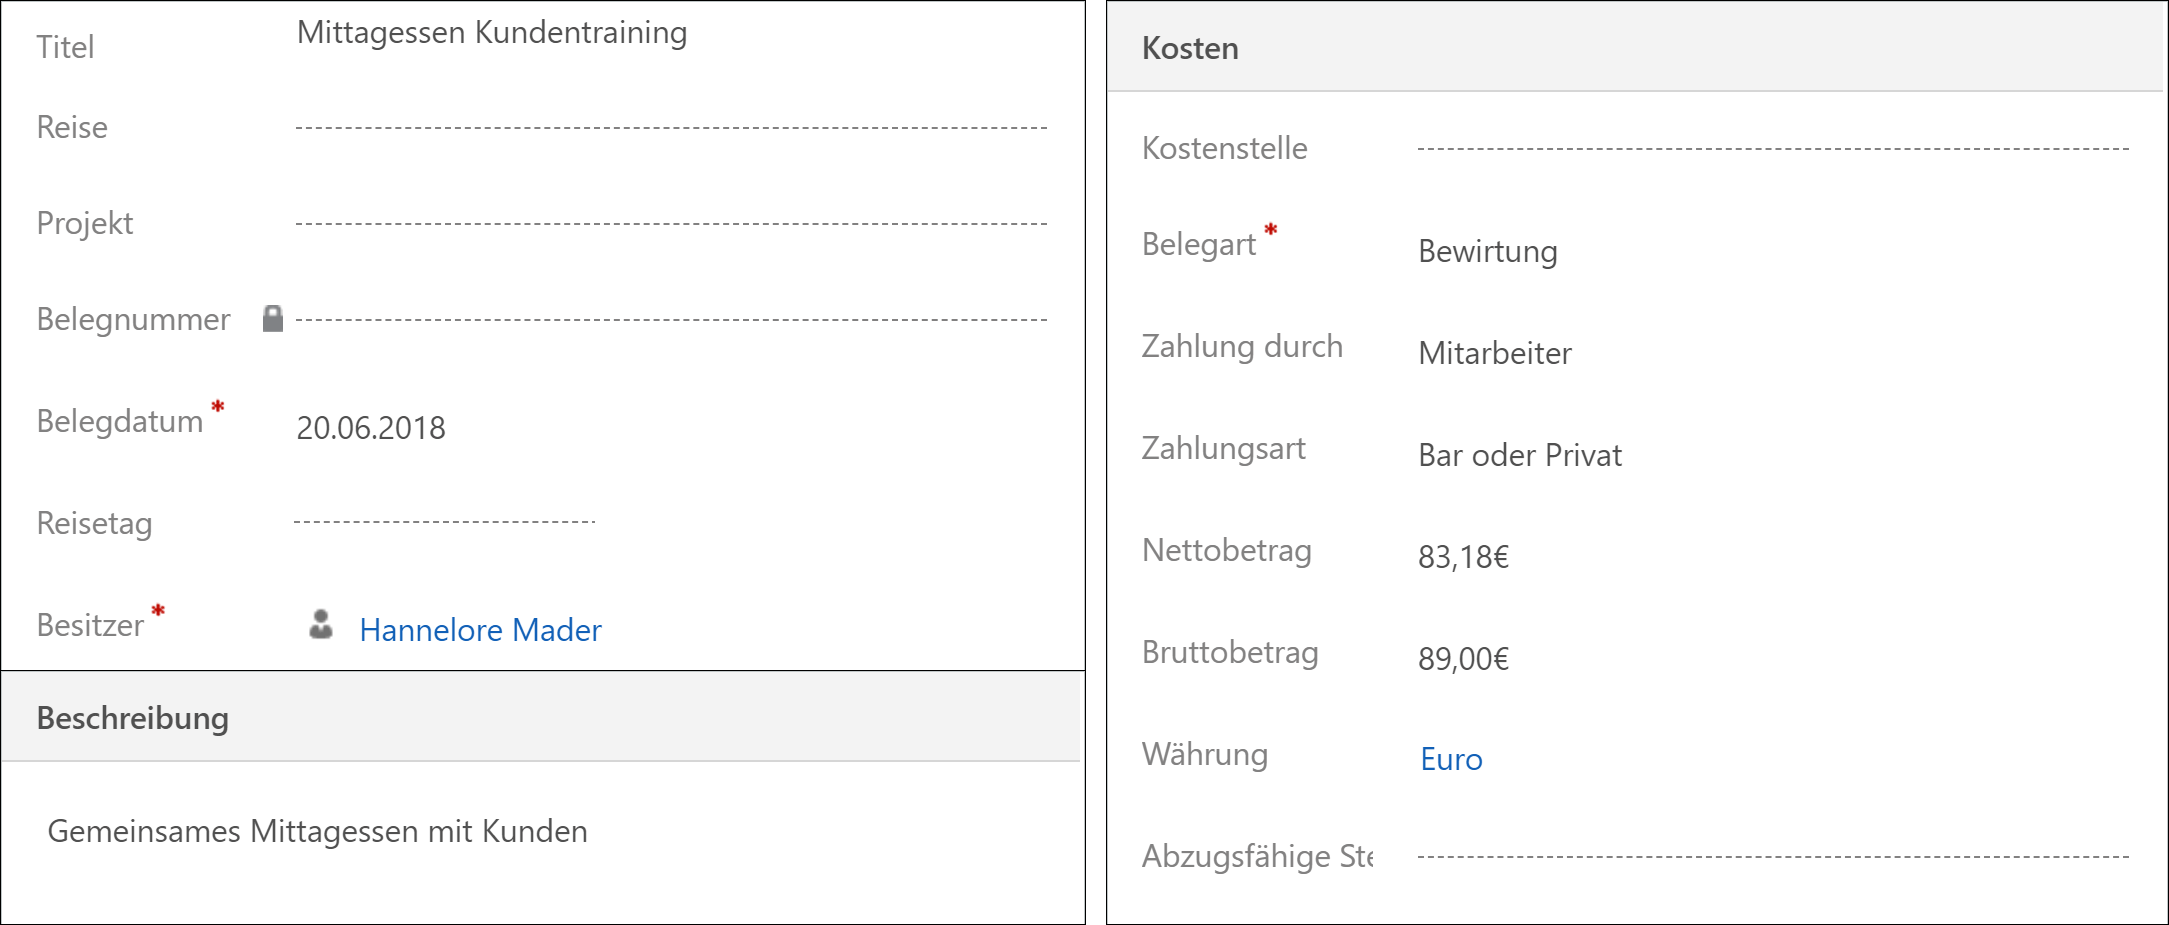
Fill in all the fields you need (* = required field)
- Title: Here you should enter a descriptive title
- Travel / Project: If the voucher is related to a trip or a project, you can select it in this field
- Voucher number: This number will be generated automatically
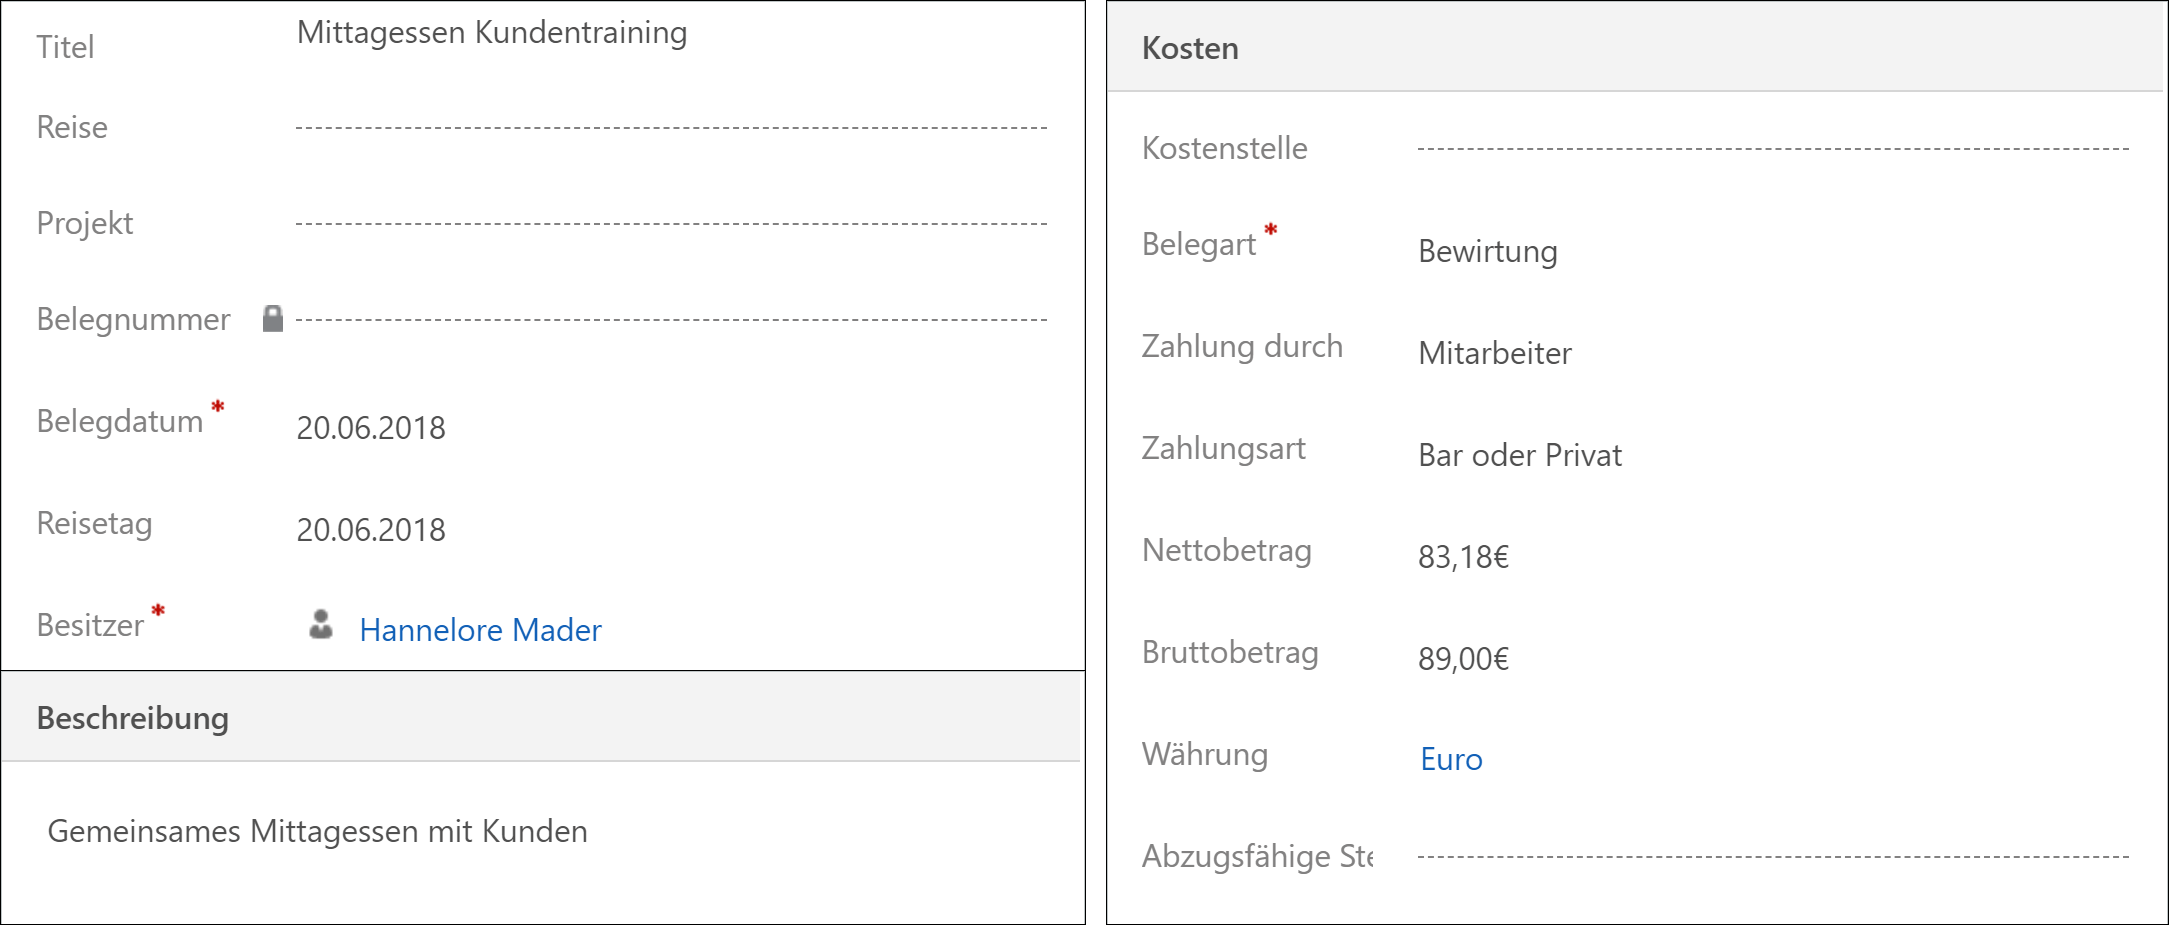
- Document date *: Enter the date on which the document was issued
- Travel Day : Here you can select the day of the trip
- Owner *: This is the creator of the record
- Description: If desired, you can enter a more detailed description regarding the receipt
- Cost center: Here you can select the cost center
- Document type *: Here you can select what kind of document this is, for example, a hospitality receipt or a taxi receipt
- Payment by: Indicate here who paid
- Net / gross amount: Enter the amount here
- Currency: Here you can select the currency in which the receipt is issued
Save to finalize the recording of the receipt

Back to top | Back to table of contents
4. Scans and invoices
You can save invoices and receipts within Dynamics HR Management. You can use upload almost every file type to the Notes sector.
Just follow these steps: