This page describes how to test the connection between Hubdrive and the azure configuration that was previously done. This test should be done by the system administrator.
Run a Test
Objective
Process
System Admin
Create test data in Hubdrive
System Admin
Go to Azure Portal
System Admin
Test if calling the host works
System Admin
Create a test-timestamp
Prerequisites
- You are System Administrator
- Datafox App Registration is done
- Datafox App user has been created
- Datafox Function App has been created
- Publish profile has been sent to Hubdrive
- Hubdrive already contacted you informing that the integration is done
- Test employee in your Hubdrive system must have a valid Employment Term
Click Through
Part 1: Create test data in Hubdrive
- Start in HR HUB
- Under Administration, click on Employees
- Open the file of the test employee (or create one by clicking on + New)
- If you created a new employee for the test, fill the mandatory fields, connect a valid employment term and save
- Go to the tab HR Details
- Add the Badge ID (for the test: e.g. 123)
- Save
- In the lower left corner, switch from Overview to Time & Attendance
- Under Settings, click on Time Tracking Terminals
- Click on + New
- Add a description
- As Terminal ID add the serial number of your Time Tracking Terminal
- Add the correct Time zone
- Save and Close
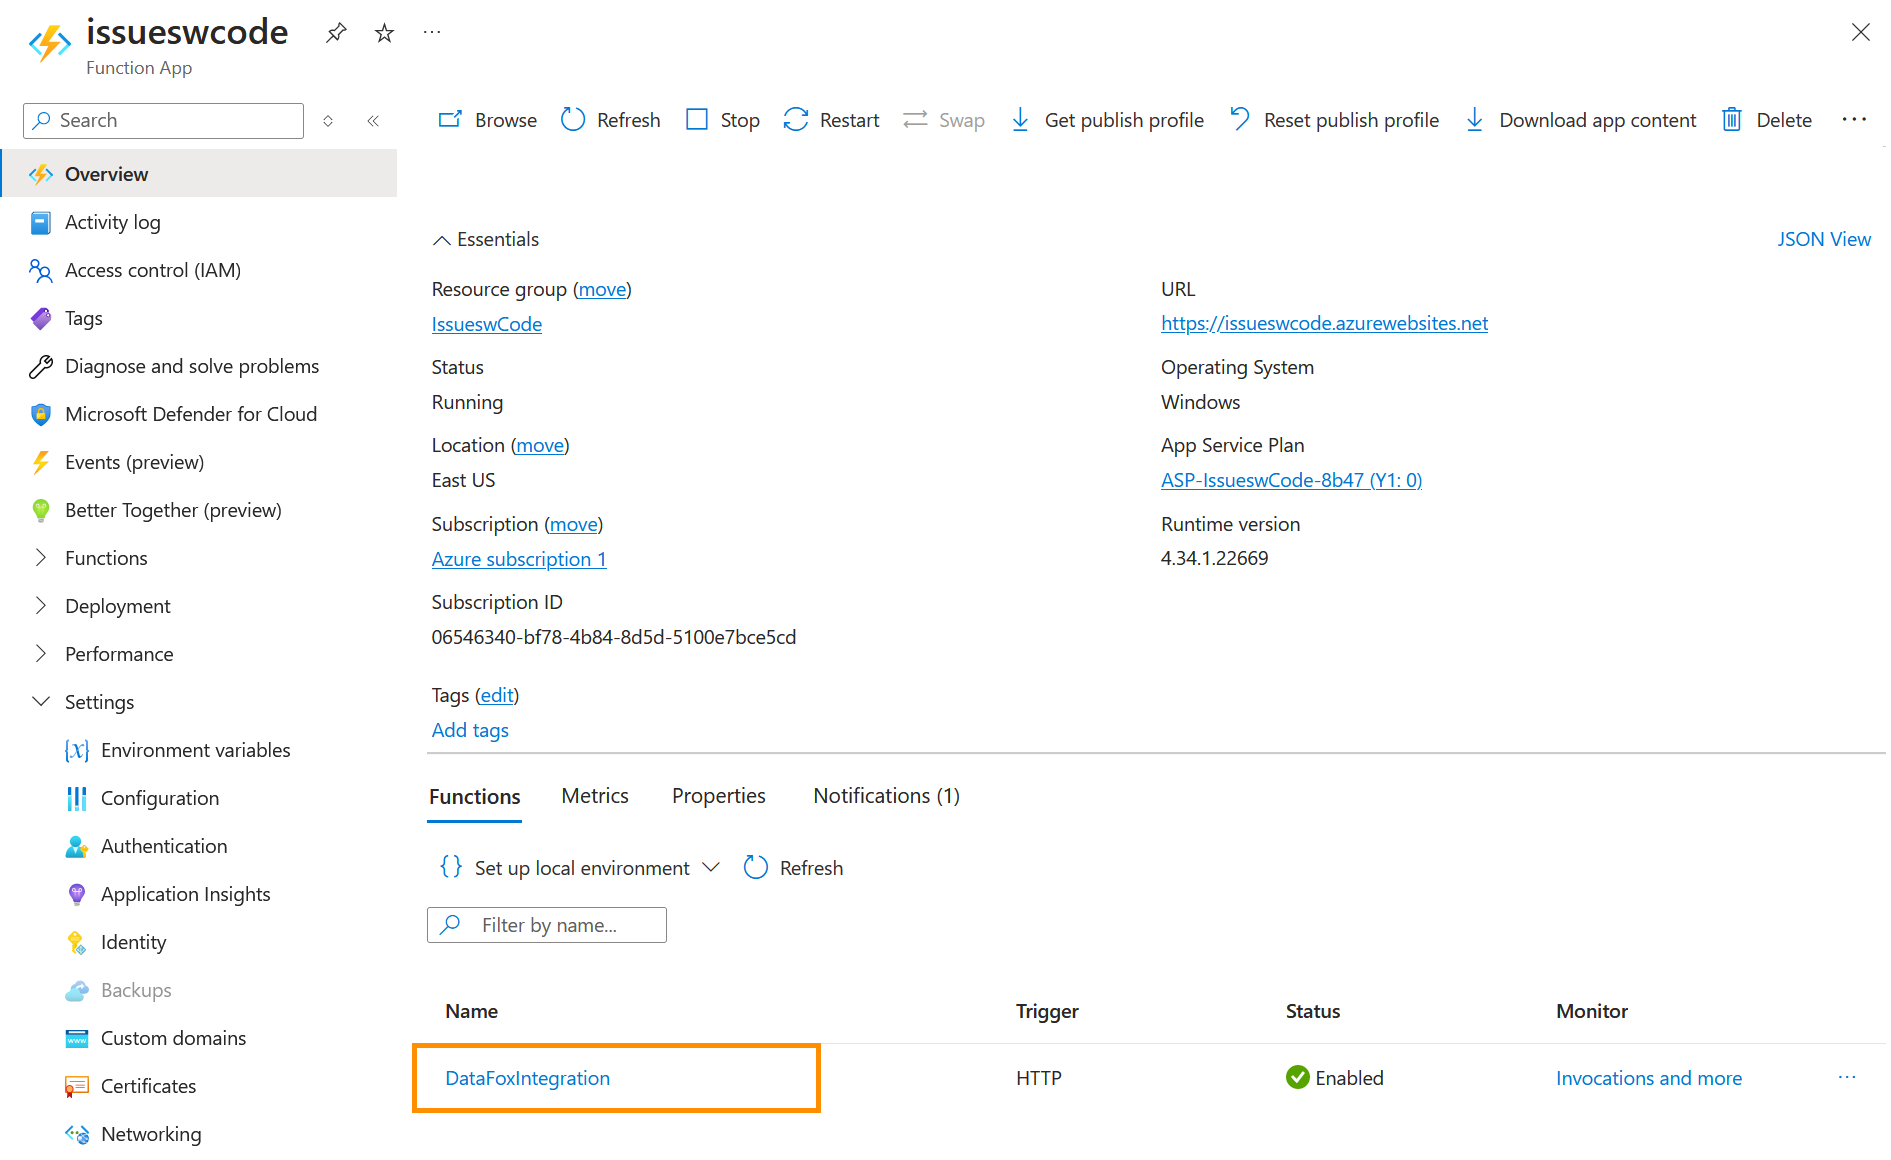
Part 2: Navigate to Azure Portal
- Go to portal.azure.com
- Open the Function App you created
- In Overview, click on the Datafox integration you made (Screenshot)
Part 3: Test if calling the host works
- Under the Tab Code + Test, click on Test/Run
- For HTTP method, select GET
- In Key, select _master (Host key)
- In Query parameters, add
- Name: df_api - Value: 1
- On the bottom, click on Run
- In the black textbox on the bottom, two messages should show up:
- The first one is displayed in blue and tells you the function was programmatically called via the host APIs
- The second one is an Error message displayed in red that tells you executing the integration failed.
The error message is anticipated at this point because no Employee, Terminal ID etc. has been added yet. We do this in the next test.
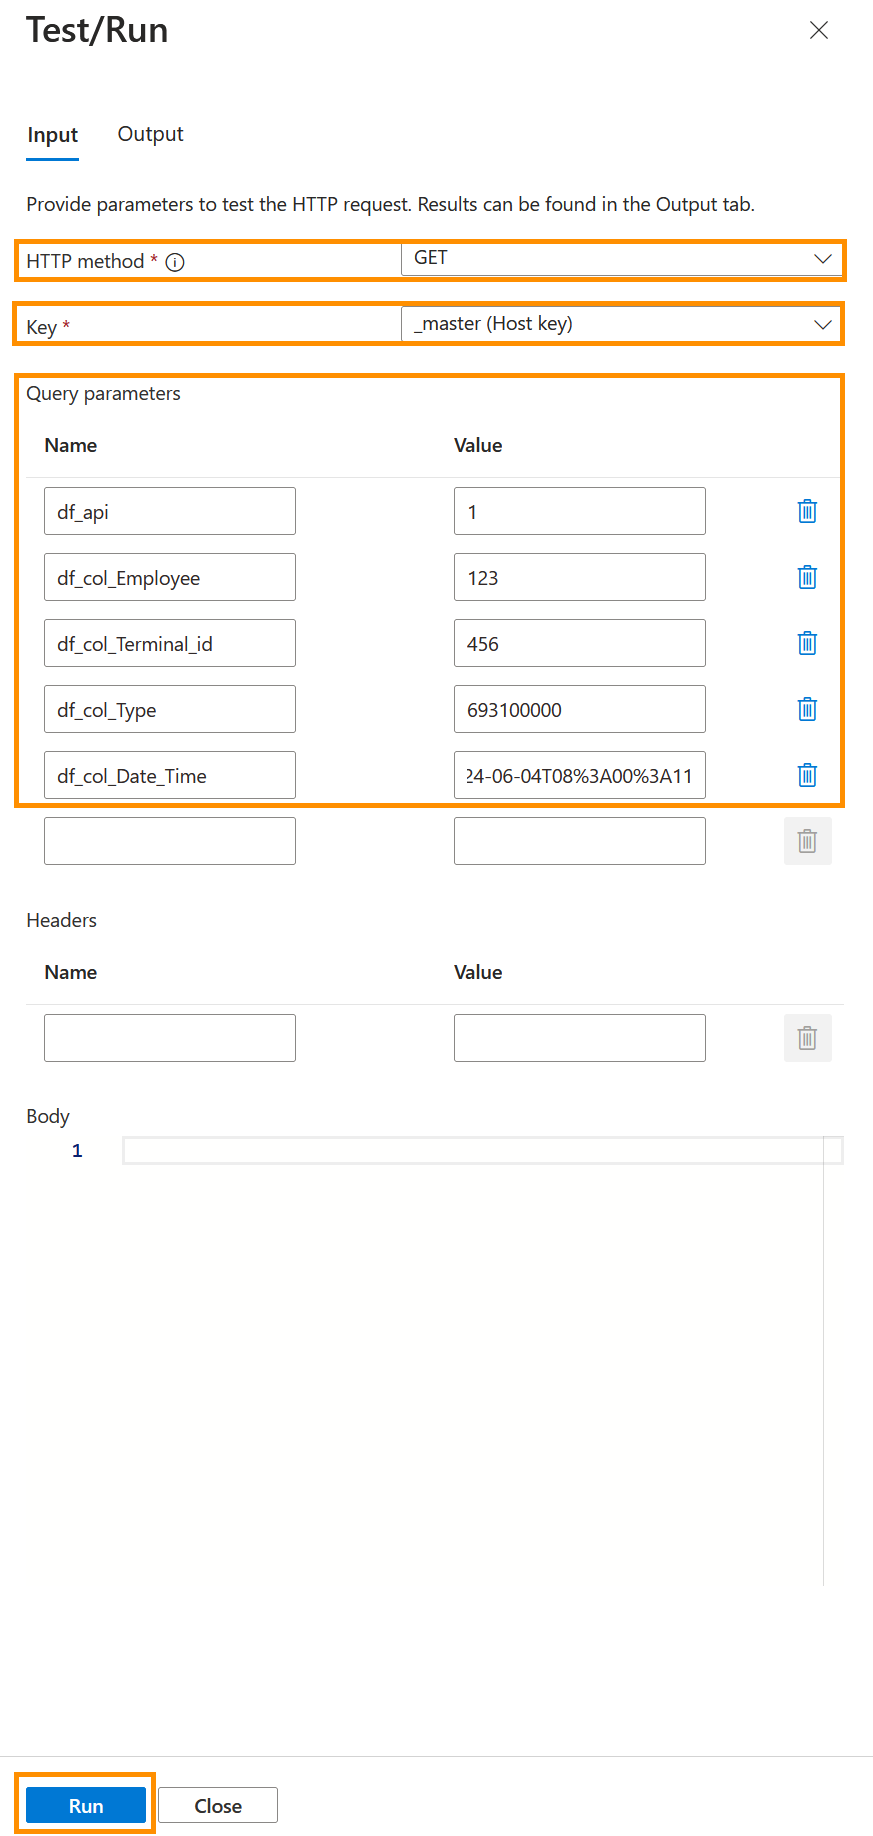
Part 4: Create a test-timestamp
- After finishing the first test, go back to the Input tab
- For HTTP method, select GET
- In Key, select _master (Host key)
- In Query parameters, add
- Name: df_api - Value: 1
- Name: df_col_Employee - Value 123 (same as Badge ID of the test employee)
- Name: df_col_Terminal_id - Value (terminal serial number)
- Name: df_col_Type - Value 693100000
- Name: df_col_Date_Time - Value (Time and Date of the Test-Timestamp, format: YYYY-MM-DDTHH%3AMM%3ASS )
- On the bottom, click on Run
- In the black textbox on the bottom, you should get a message telling you that the test was successful
Hint
- The serial number of the Datafox terminal can be found on the back of the terminal.
- The Badge ID for this test case is just an example, and to be used only for test purposes. For the real employees, please add the correct value.
- The df_col_Type is the attendance record type, e.g. Start Work, End Work, Start Break, etc.
- The last line of the Query defines the Time and Date the Test-Timestamp will have. The time should be in the format of hours, minutes and seconds and are added in front of the percentage symbol (%) the seconds are the last 2 digits after the letter A.
- If this operation takes too long, it will end in an error.
- The test results can be seen in Hubdrive under 'Attendances'.
Result
The following screenshot shows the configuration for the test. As soon as the query is done, you should be able to see the time stamp in Hubdrive. For that, go to the attendances, and look for the test employee.