Configure badge for Time Clock Terminal
Objective
This tutorial explains how you, as an HR manager, can configure the badge your employees use to track time on Time Clock Terminals. The badge has to be configured once upon first use for every employee.
Process
HR Manager
Collect the badges with your supplier
HR Manager
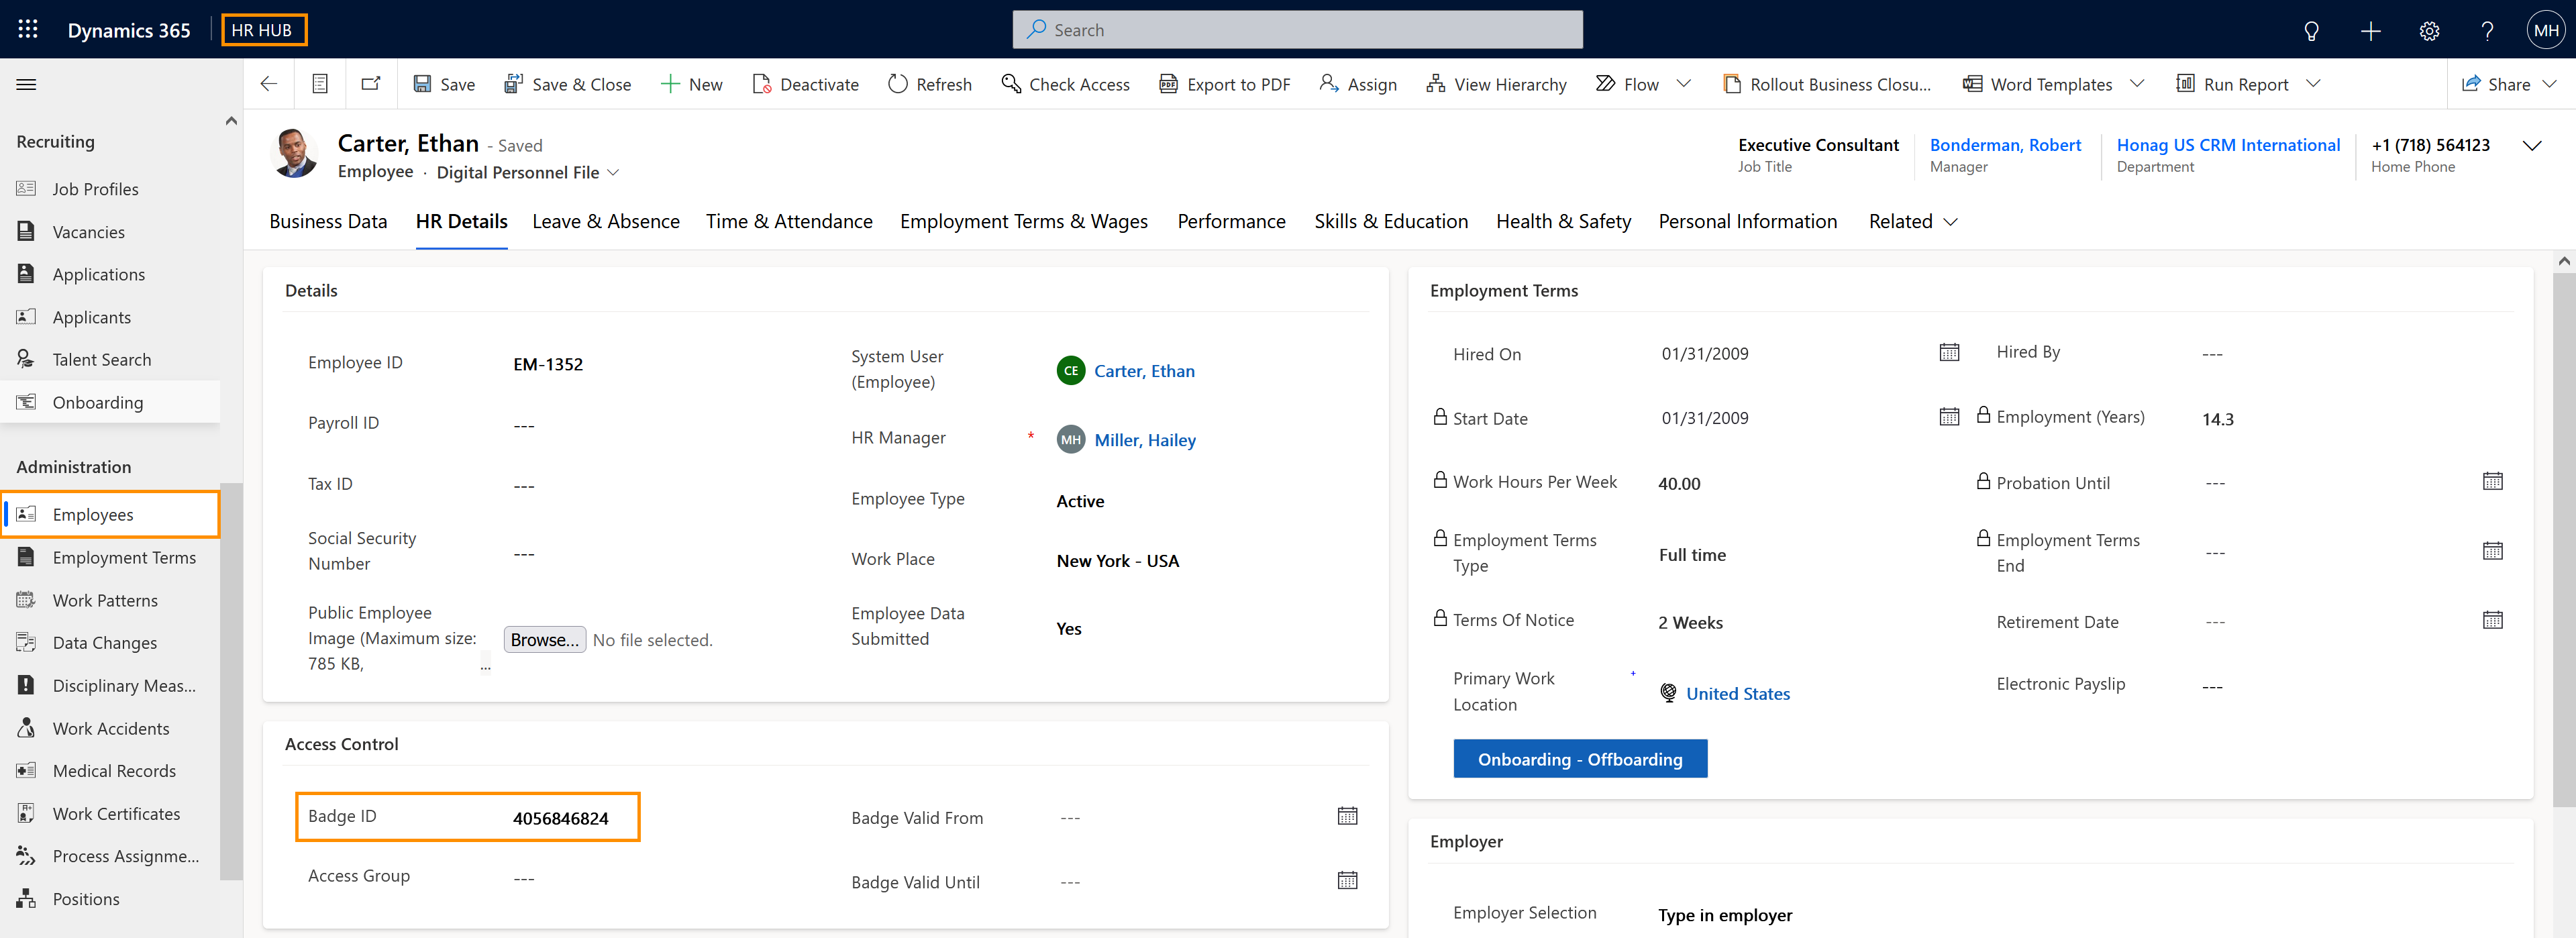
Add the Badge ID into the employee´s Digital Personnel File
Employee
Use the badge on a Time Clock Terminal to track the attendance
Prerequisites
- The HR Manager has a valid license assigned
- Terminals are correctly installed and connected to the HR for Dynamics system (you can find tutorials for this in technical resources)
Click Through
- Start in HR HUB
- Navigate to Employees
- Open the file of the employee for whom you want to configure the badge
- Go to the HR Details tab
- In the table Access Control
- Add the Badge ID
- If you don't know the Badge ID, refer to the Hints section
- Save and Close
Hint
- If you don't know the ID of the badge, go to the terminal and try to punch in, using the unknown badge. The system will then create a time stamp, with HR Request, showing the identification number of the badge.
- The entry then can be seen in the HR Request entity, on the left side menu under My Work, with the ID number and the time of the creation.
- Now simply copy the serial number and paste it in the Badge ID field.
- If the employee is deactivated (e.g. due to termination), the Badge ID field will be erased from their file automatically, enabling you from this point to assign the same badge to another employee.
The fields 'Access Group', 'Badge Valid From' and 'Badge Valid Until', are only relevant if you are using Dormakaba Terminals. Dormakaba will control if you are part of a specific group, and if your attendance details are inside the period informed.
Result
Once the correct Badge ID is added to their Digital Personnel File, employees can use their badge to track their attendance using the Time Clock Terminal.
