
Leave Management
1. Overview
2. Rollout Leave Entitlements
3. Carry Forward Leave Entitlements
4. Edit Leave Entitlements
5. Ad-hoc Absences
6. Record Leave
7. Edit Leave
8. Business Closures
9. Leave block
10. Automation
1. Overview
Leave Management is a very comprehensive area in Dynamics HR Management. Therefore, you first get an overview of what is possible, where the similarities and differences between the individual functions lie, and finally a detailed guide on how to use the functions effectively.
A distinction is made between Ad Hoc Absences and Planned Absences. Planned absences include vacation and overtime, while ad hoc absences are unplanned and unexpected, such as sickness or a work accident.
A distinction is also made as to whether the absence can also be requested by the employee, such as leave, or whether it can only be entered by the HR Manager, such as unexcused absences.
In addition to the absences of individual employees, HR Managers also have the option of rolling out and automatically approving absences for several employees, individual departments, or even for the entire company. This option is used for business closures, for example.
However, you can not only enter absences for employees, but also block absences for certain employees in certain periods. You could use this, for example, if important tasks are due for which certain persons are absolutely necessary.
As soon as you manage absences, many recurring tasks occur automatically in the background, without you having to repeat them manually. You can find a more detailed overview of this below: Automation
Back to top | Back to table of contents
2. Rollout Leave Entitlements
The rollout of leave entitlements is an easy process and can be performed by using a dialogue.
This dialogue affects all employees of a department and the employees of the departments that are hierarchically beneath.
For detailed information on how to use the dialogue, please follow this link: Rollout Leave Entitlement
Back to top | Back to table of contents
3. Carry Forward Leave Entitlements
You can carry forward remaining leave entitlements of your employees with an easy to use dialogue.
The most time saving way is to carry forward the remaining leave entitlements for a whole department or even the whole company at once.
If you want to carry forward the remaining leave entitlement of a single employee, open his Digital Personnel File and click Carry Forward Leave Entitlement in the navigation bar.
For detailed information on how to use the dialogue, please follow this link: Carry Forward Leave Entitlement
Back to top | Back to table of contents
4. Edit Leave Entitlements
You may have to change an employee's leave entitlement. It does not matter whether you want to deduct the employee's entitlement or grant him or her a new entitlement.
Instead of renewing the current employment terms with the entitlements, you can use a dialog available in the Digital Personnel File.
To do this, open the Digital Personnel File of the employee concerned and click on Leave Entitlements in the menu bar

Now select the absence type and the number of days you want to add or subtract. The value for the entitlement is specified in days. Whole days and half days are valid. For example, 2.5 is allowed, whereas 2.7 is forbidden.
If necessary, select a start and end date for the validity and, if required, a description of why the entitlement is assigned.
As soon as you have entered all information, confirm with Next and the claim will be added / subtracted.
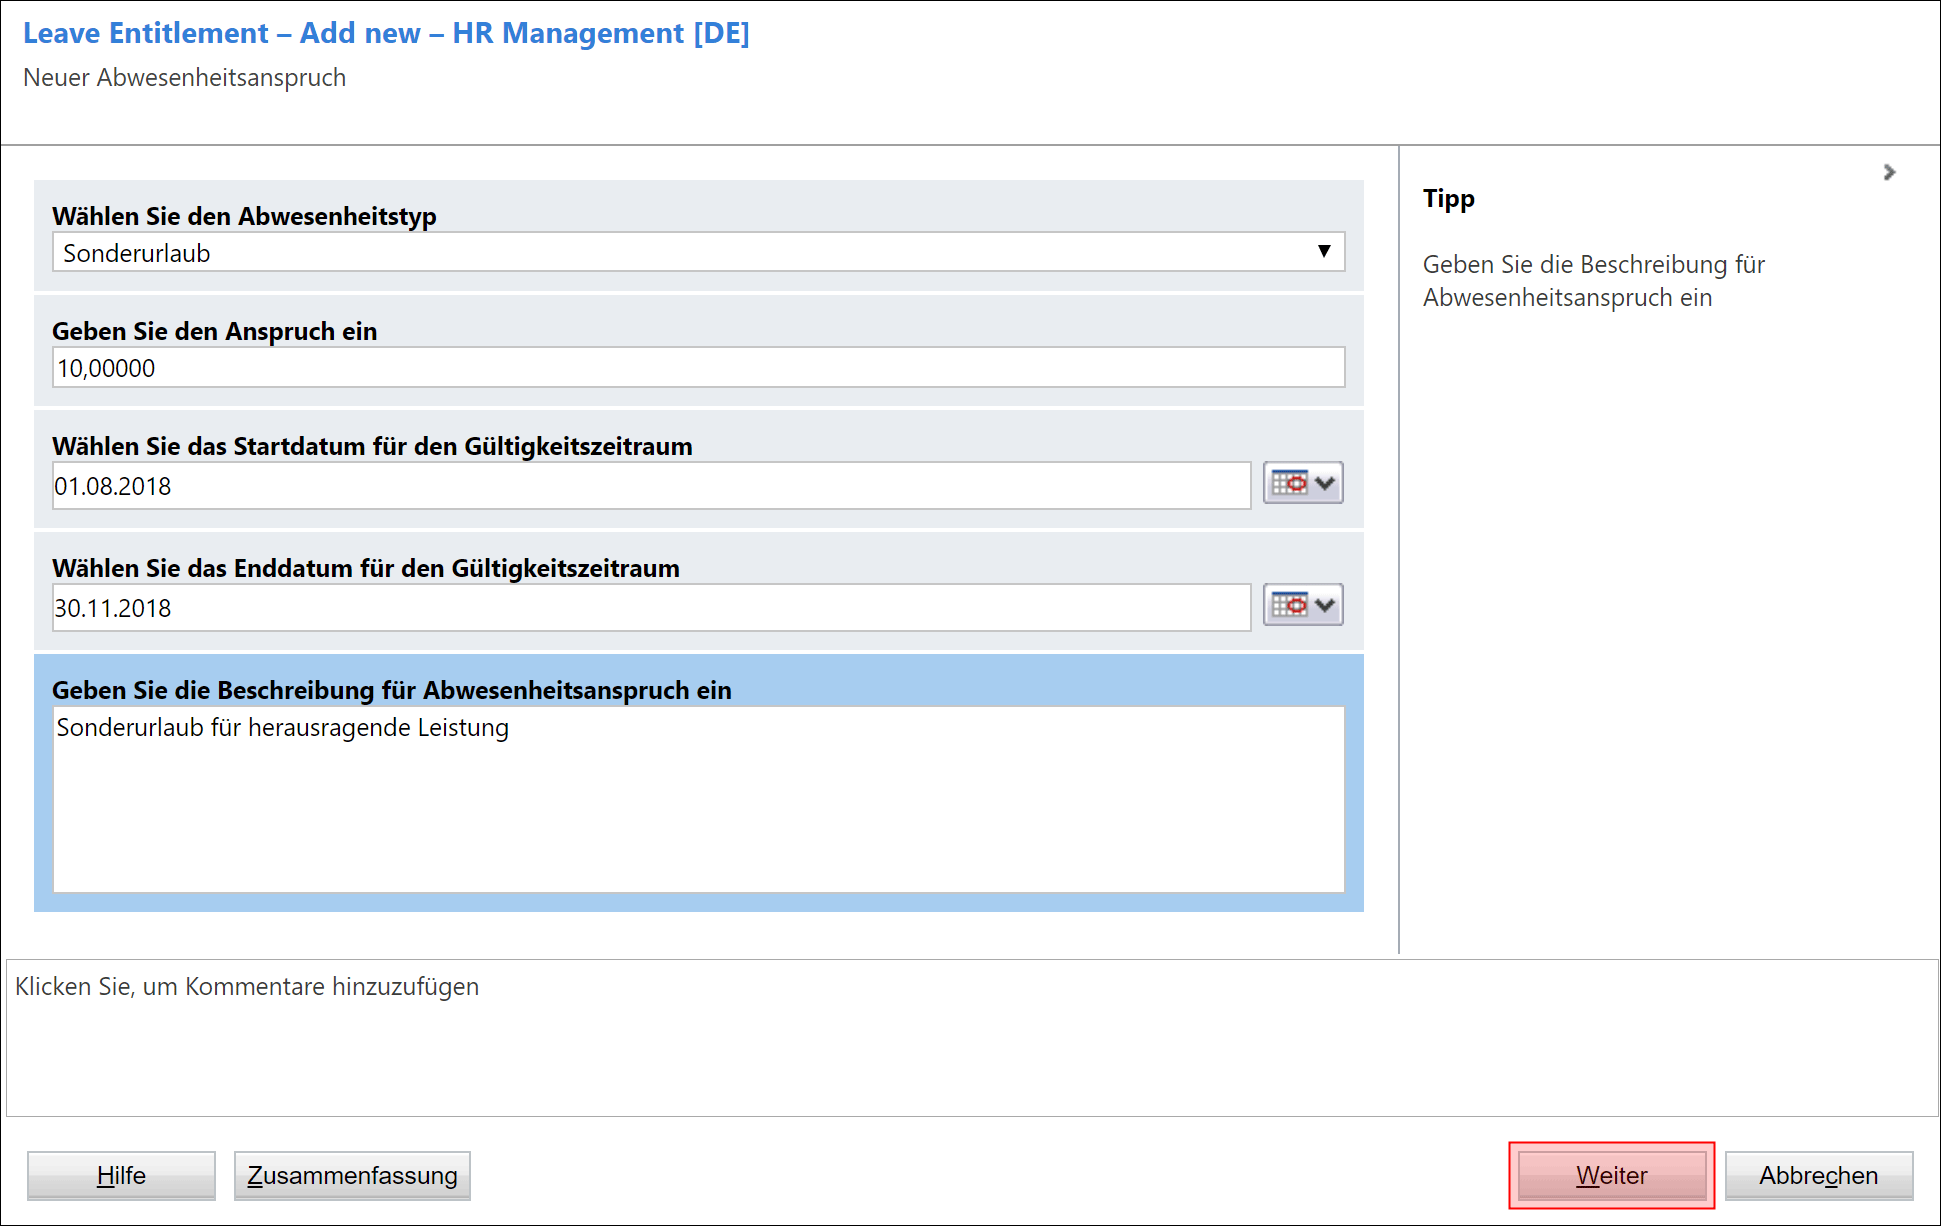
Close the dialog with a click on Finish.
Back to top | Back to table of contents
5. Ad-hoc Absences
Ad-hoc absences can be recorded by HR managers or supervisors using the Digital Personnel File.
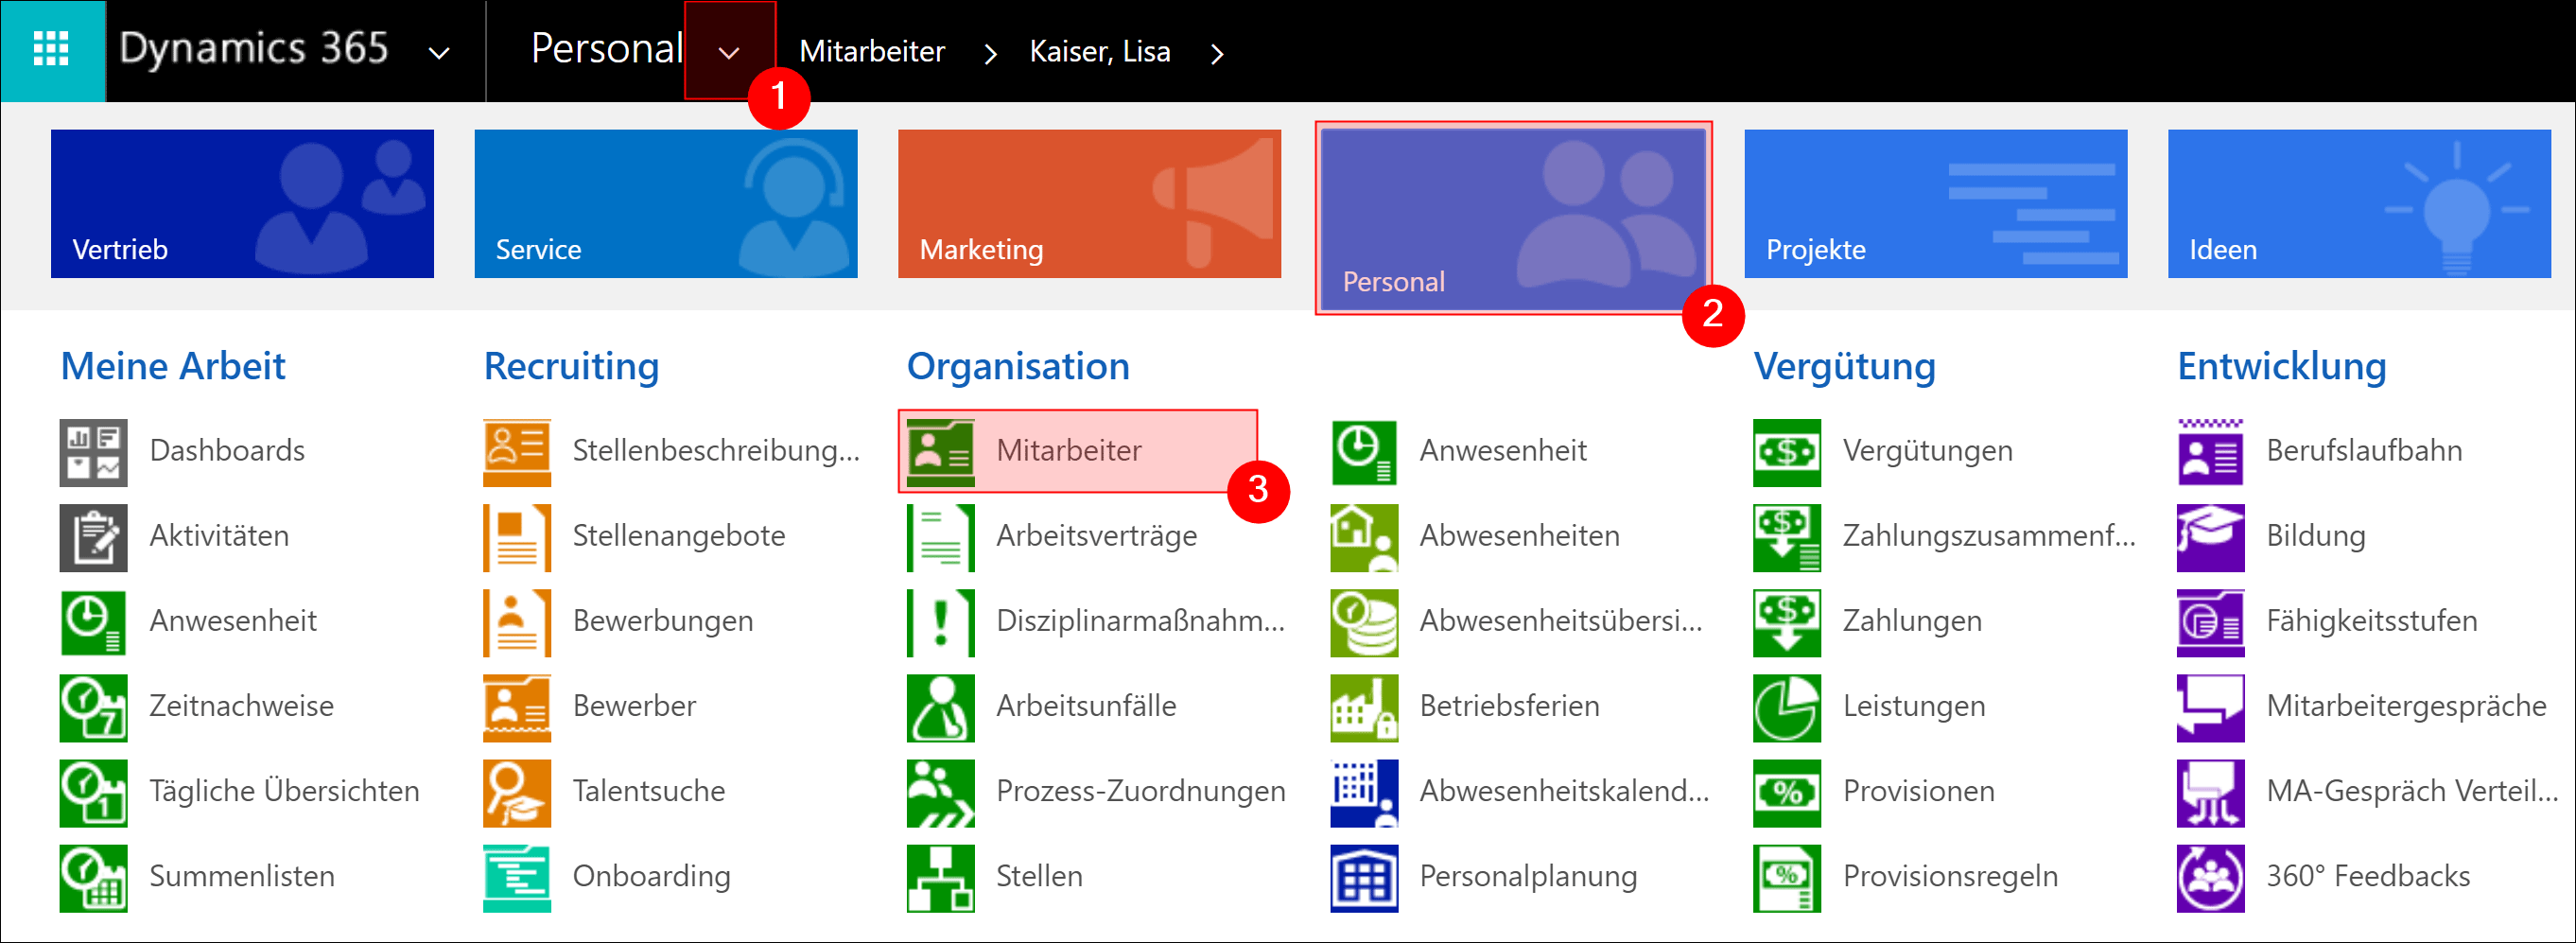
Go to Navigation Bar -> HR -> Employees and open the digital personnel file for the employee for whom you want to record an ad hoc absence.
Open the section Leave Management. In the Leave Requests or Sick Days section, click on the + Icon to enter a new absence.
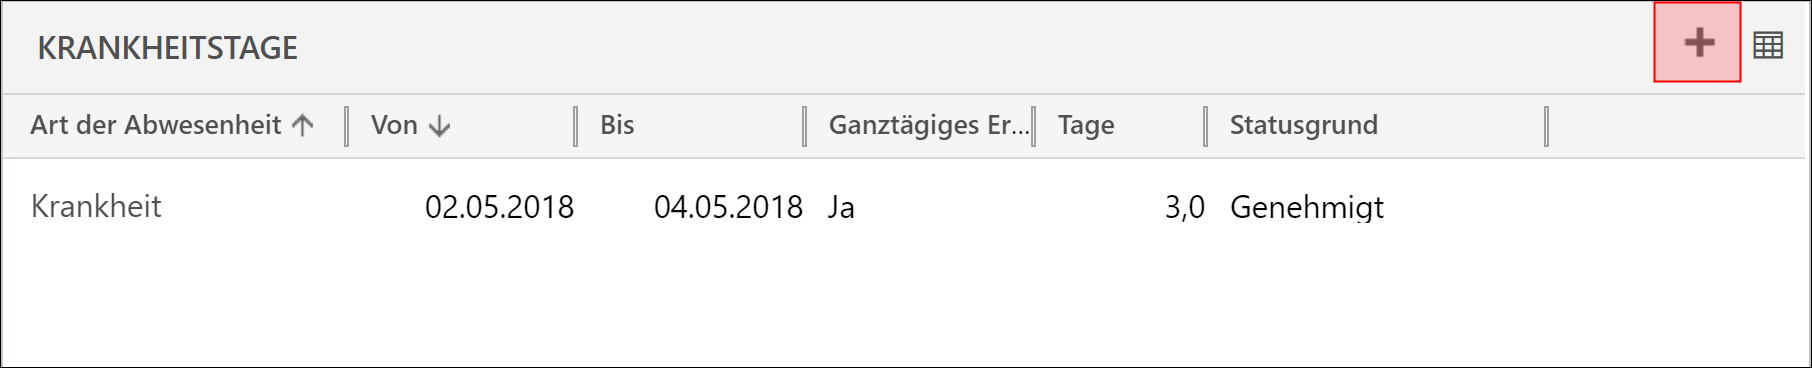
The process for leave requests opens. The employee's name is already copied from the personnel file. Now select the Type of absence, the Start Date, and the (expected) End Date. You can also document whether the absence is for a full day or only half of a day. Then Save the data record

After the first saving, the absence days are calculated automatically, the department calendar is loaded and the absence is visible in the status reason draft. This makes it easy to see whether the absence of the employee can lead to capacity bottlenecks.
Then click on Next Phase
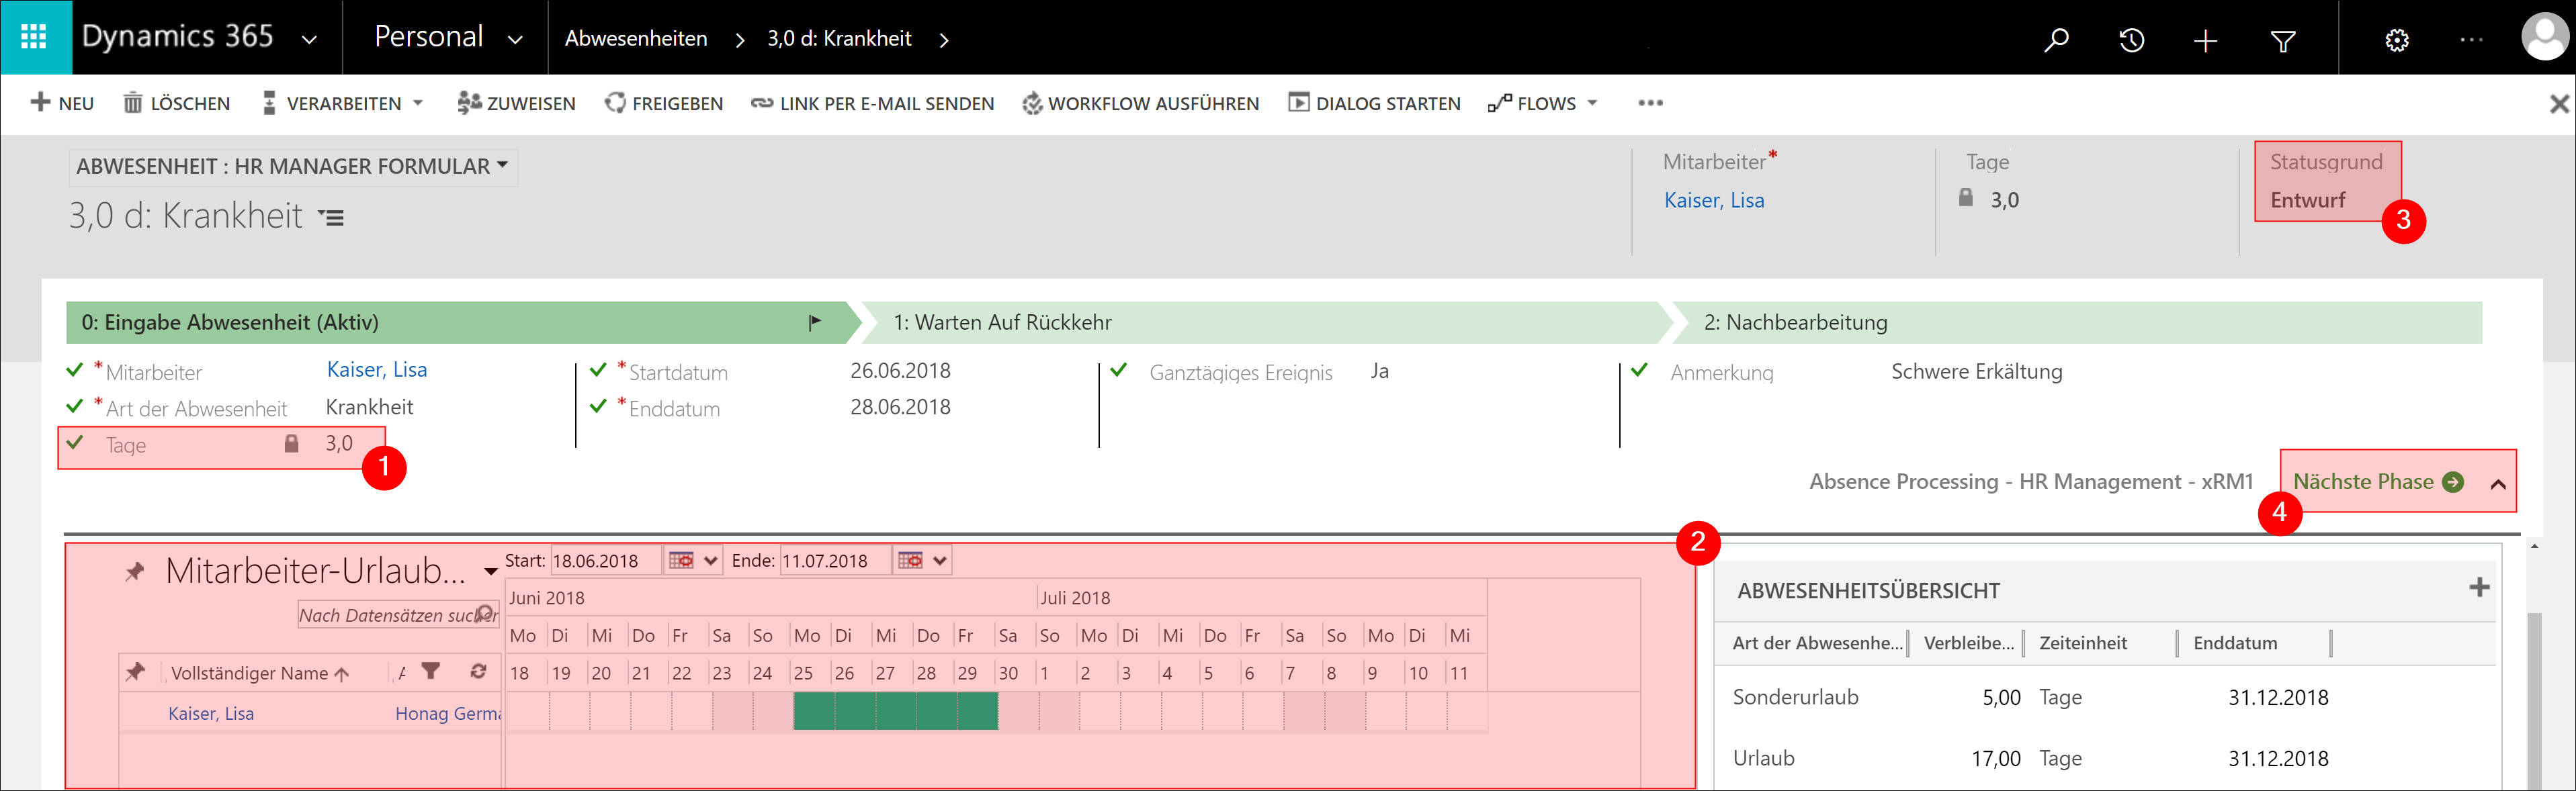
The data record remains in this phase until the employee has returned to work. If necessary, the expected end date can be updated again and again during this time. As soon as the employee has returned, the end date can be finally adjusted and the field Employee Back at Work can be set to Yes again. Depending on the duration and type of absence, the Follow-Up phase is added.
Click Next Phase
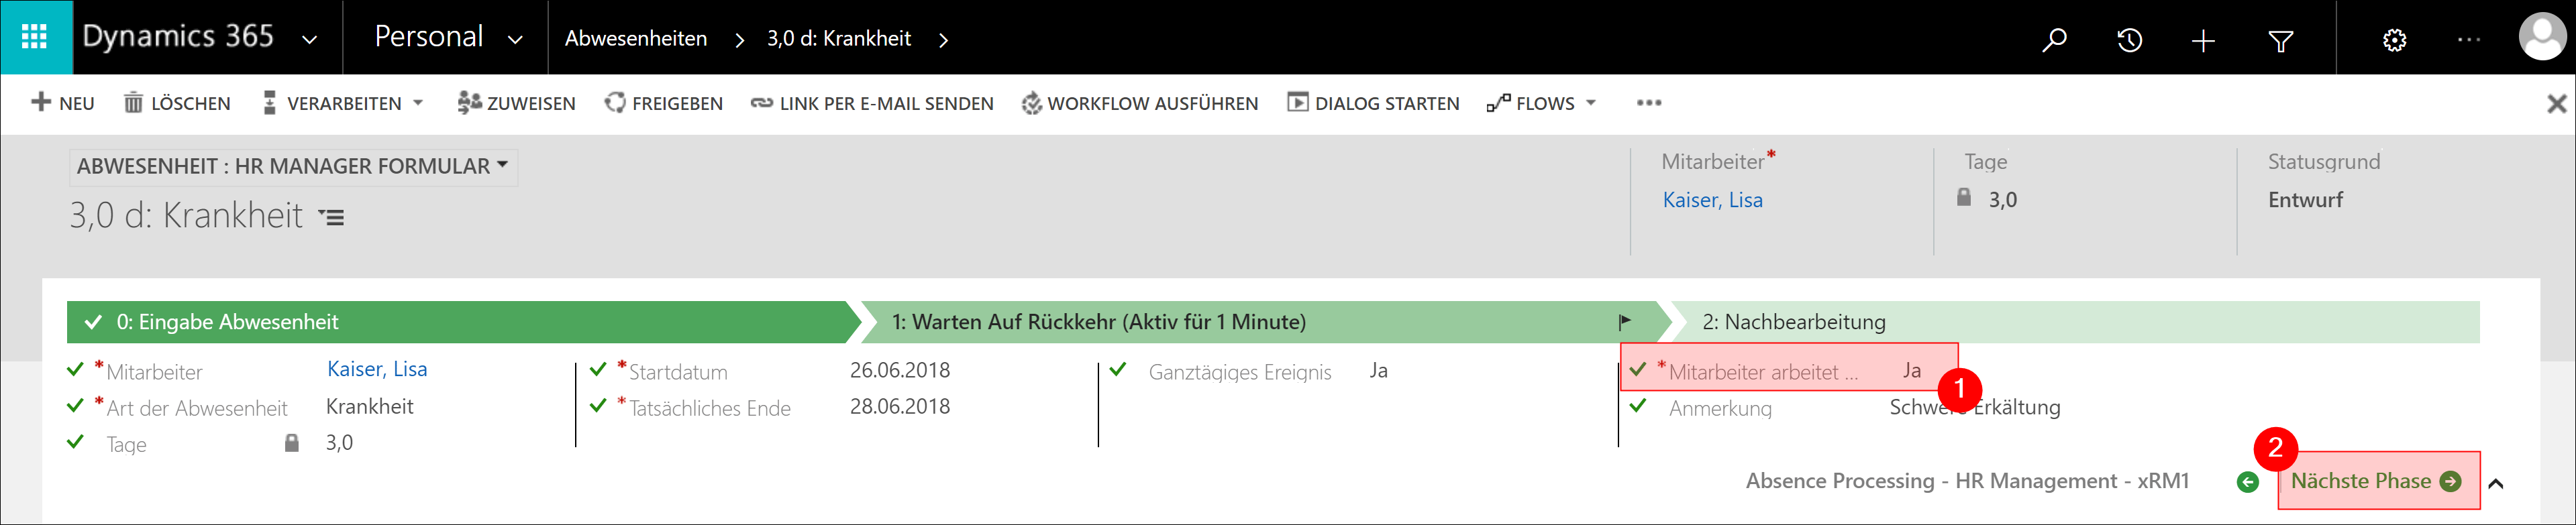
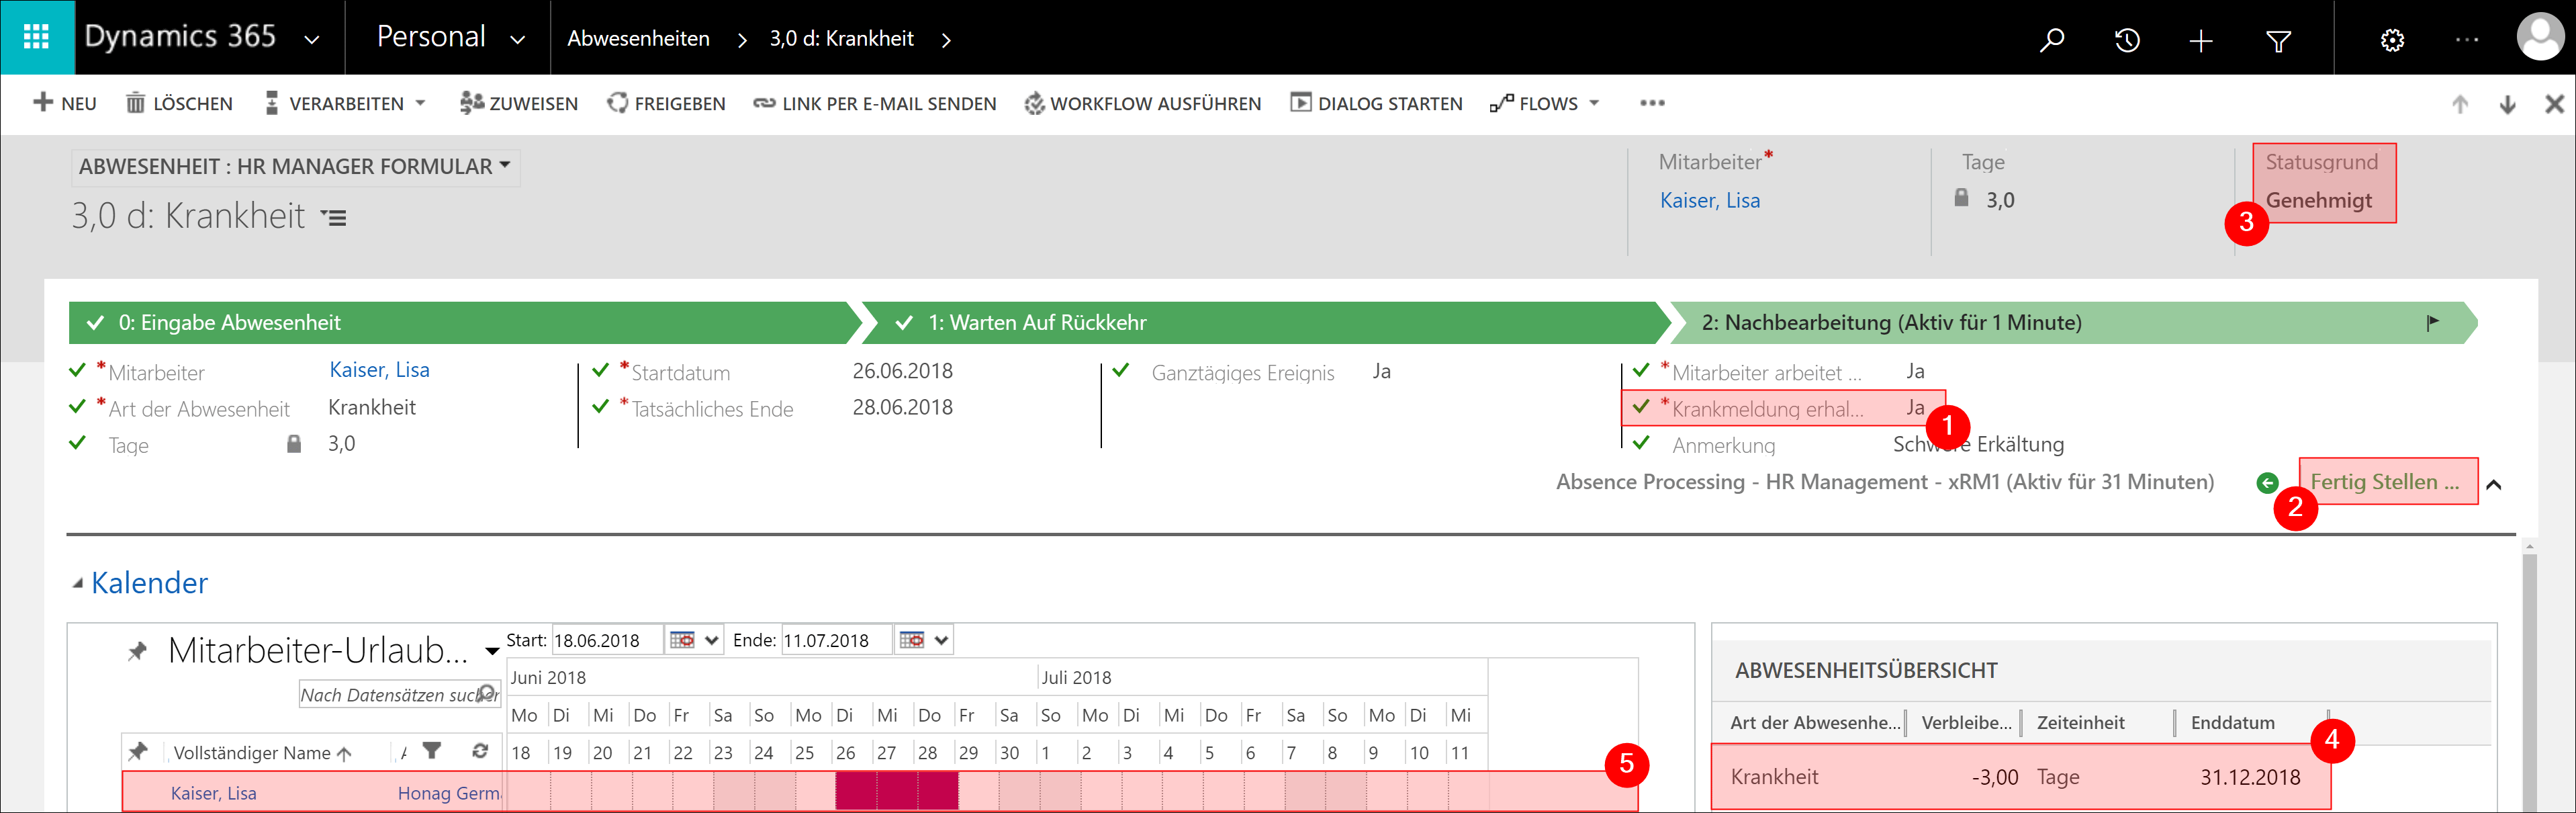
In the last step, you can now enter whether a sick certificate that may have been necessary has been received. Set the field Sick Certificate Received to Yes and confirm with a click on Finish.
The status reason changes to Approved and the record is saved as write-protected. In addition, an entry appears in the leave summary and in the absence calendar.
Back to top | Back to table of contents
6. Record Leave
Leave can be entered both by the HR Manager and by the employee in self-service. It may be necessary for the HR Manager to enter the leave data, for example, if the employee is part of the staff and does not have access to the system. It is, of course, preferable for employees to enter their own leave request without the help of the HR manager.
This section deals with data entry from the HR Manager's point of view. For more information on Employee Self-Service, see the relevant section: Employee Self-Service.
In Dynamics HR Management, two leave request processes are available out-of-the-box: Leave Request with Substitute or Leave Request Without Substitute.
Out-of-the-box the default process is the one without substitute, but you can of course change the default process.
Note:
Both processes are available in parallel. Either one or the other process can be selected for each new leave request.
Often, however, only ONE of the two vacation processes is used in a company. To avoid confusion, simply deactivate the process that you do not need.
Enter a leave request without a substitute
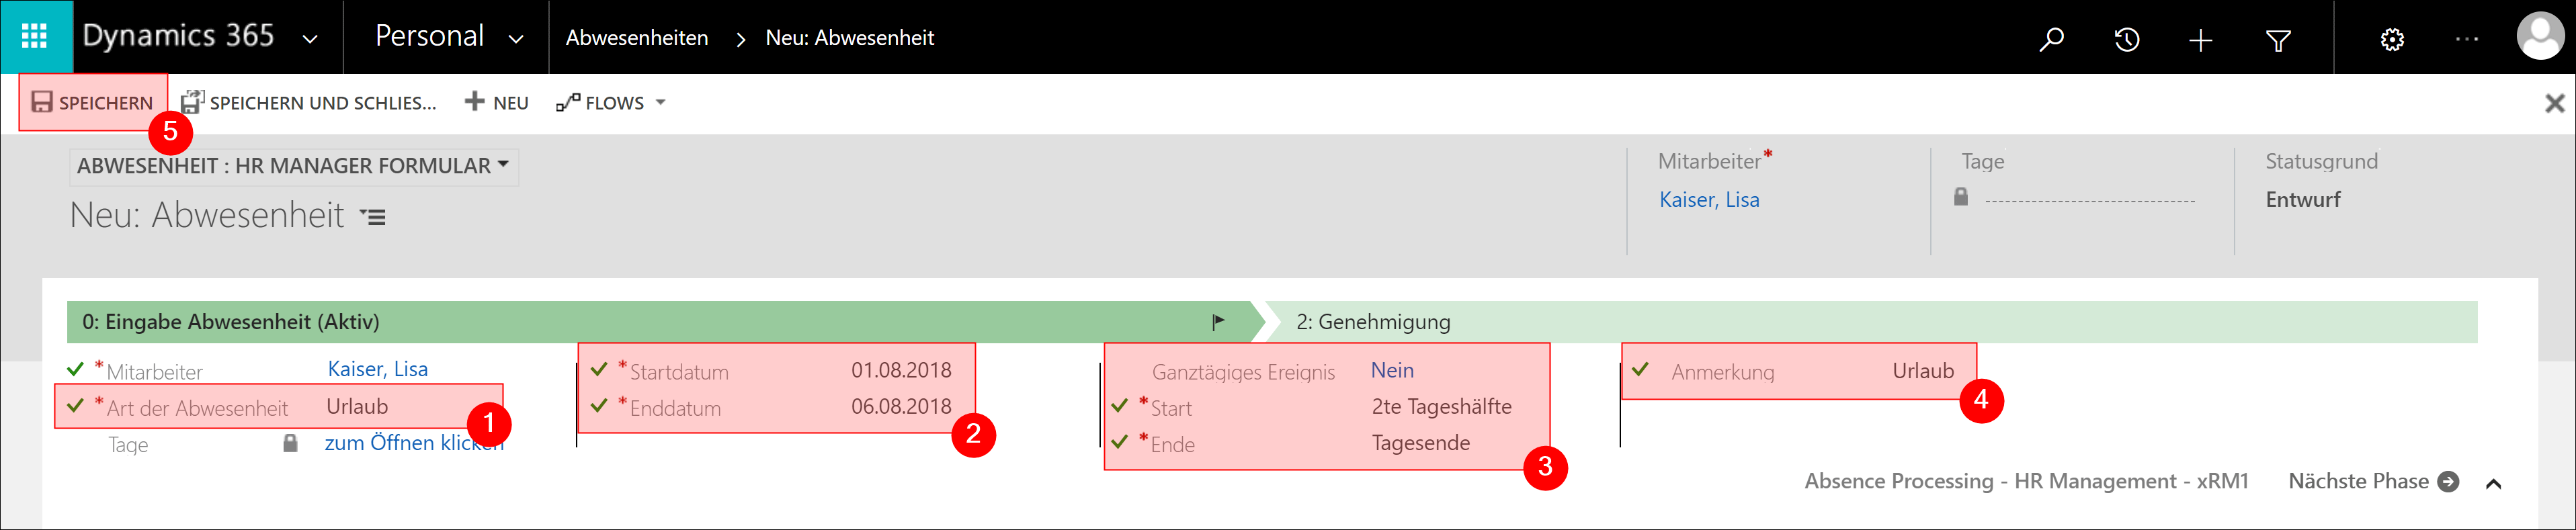
Go to Navigation Bar -> HR -> Employees and open the digital personnel file of the employee for whom you want to enter a leave request
Open the section Leave Management and click the + Icon in the sector Leave Requests

Choose Vacation as the Type of absence and enter the Start and End date of the leave. Now select whether it is an all-day event or not. If not, you can choose whether the leave starts on beginning of the second half of the start day or ends after the first half of the last day.
Depending on your decision, only half a day will of course be deducted from your leave entitlement.
If you wish, enter a comment and Save
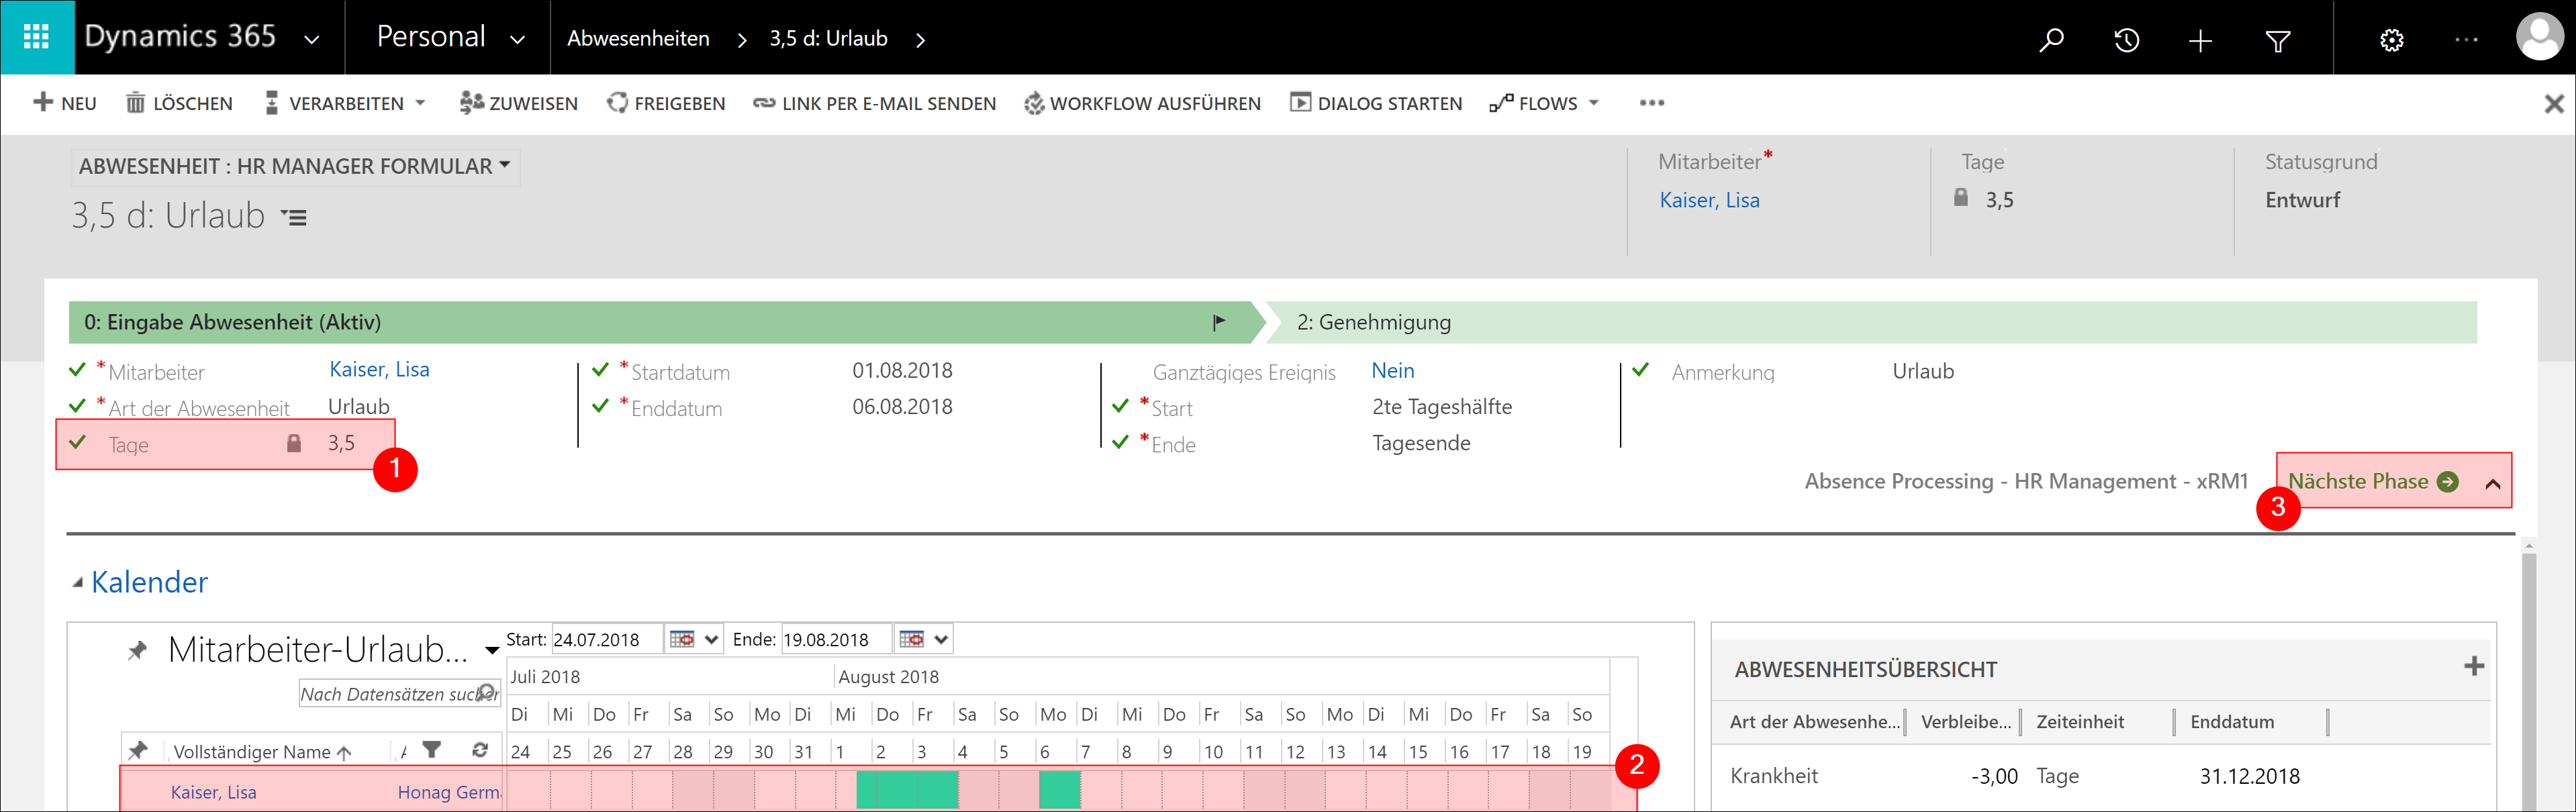
The total duration of the leave was calculated during the saving process. Also note that the calculation of the required leave days depends on the employee's Calendar. For example, weekends or regional holidays are only taken into account if they are entered in the corresponding Calendar.
In addition, the absence calendar was displayed, in which you can see the current leave draft as well as the department-wide absences. This enables you to estimate at a glance whether the leave could lead to bottlenecks in the department.
As soon as everything is in order and you want to continue, click on Next Phase
The progress into the next phase now automatically triggers an information process for the supervisor. The supervisor now automatically receives an email informing him or her that one of his or her employees has requested leave. This e-mail also contains a link to the request.
The request also appears in the supervisor dashboard and in the HR deadline dashboard. This ensures that the supervisor is also informed if he has not read his emails and the HR manager can send reminders or intervene himself decisively when decisions are pending for a long time.
If the supervisor clicks on the link, he is taken directly to the request, which he can check. Here he will find all information at a glance. When the vacation should take place, how long it will last and how the staffing level of the department is at that time?
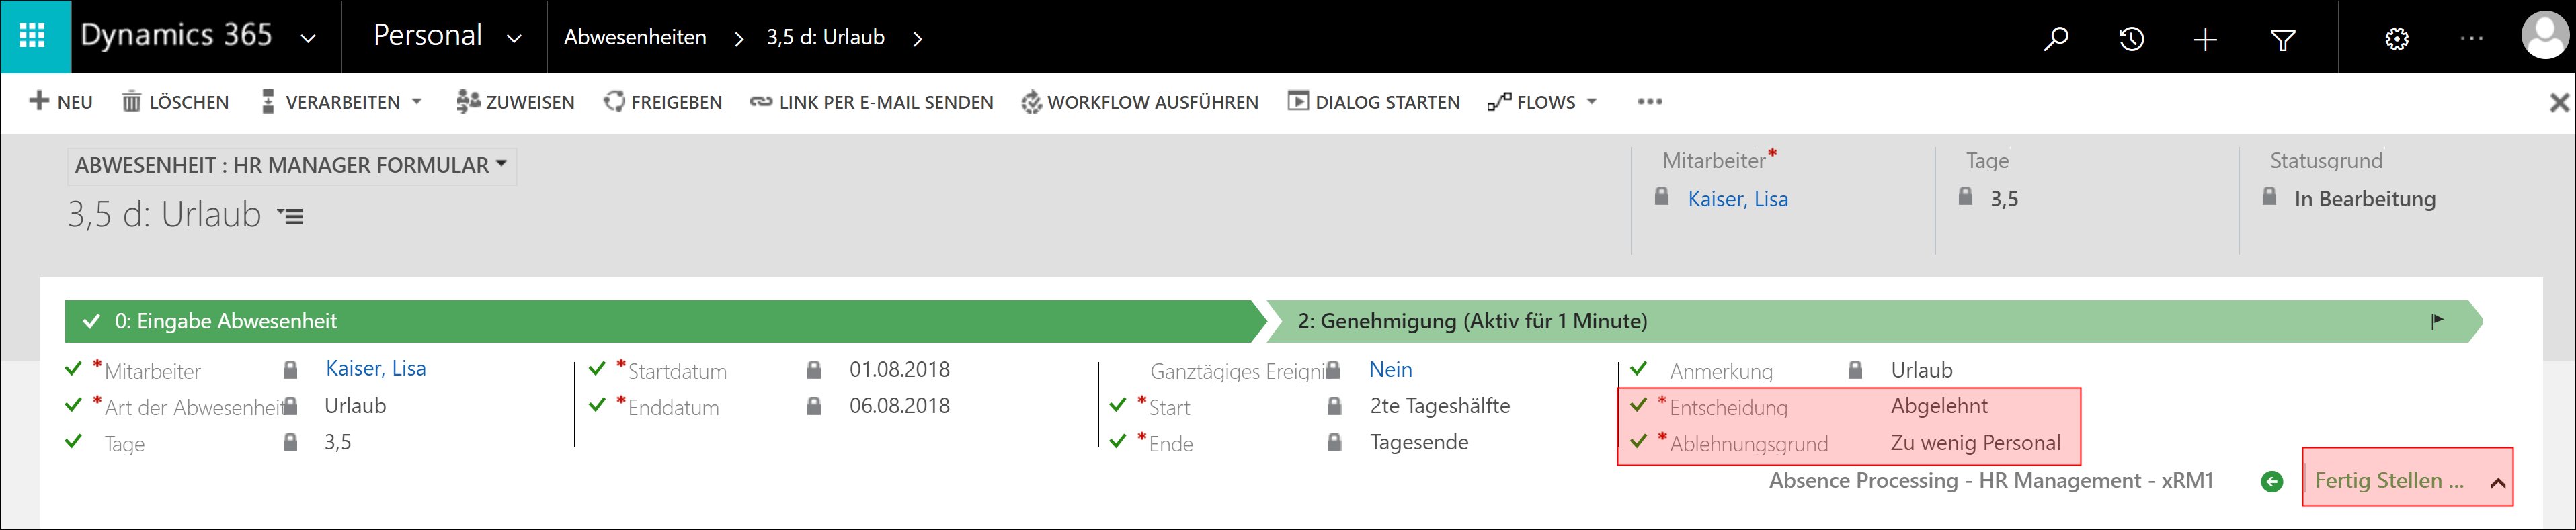
The supervisor can now make a Decision and enter it in the system. If the application is accepted, he or she clicks on Finish and thus concludes the process. If he decides not to approve the request, he must justify this in the field Reason for Rejection that appears before he can click on Finish.
Note:
The request can also be approved by the HR Manager. This ensures that requests can also be processed if a supervisor is not available.
When the process is completed, an information process is automatically triggered again. This time, the employee receives an email informing him or her of the outcome of the decision on his or her request.
You can see which other automatisms are triggered from this table: Automatisms
Enter a leave request with substitute
Out-of-the-box, the leave request process is always opened without substitute. After the first saving process, the process can be changed. First fill in everything as in the request without a substitute and Save the request.
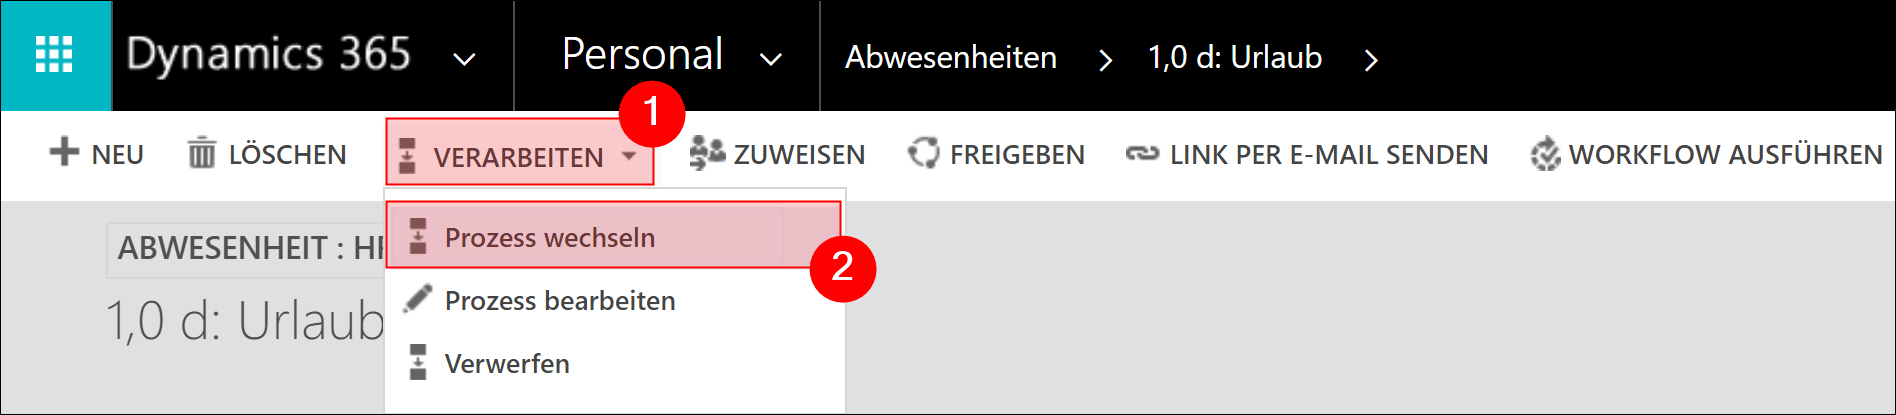
Now click on Process in the menu bar and select Change process.
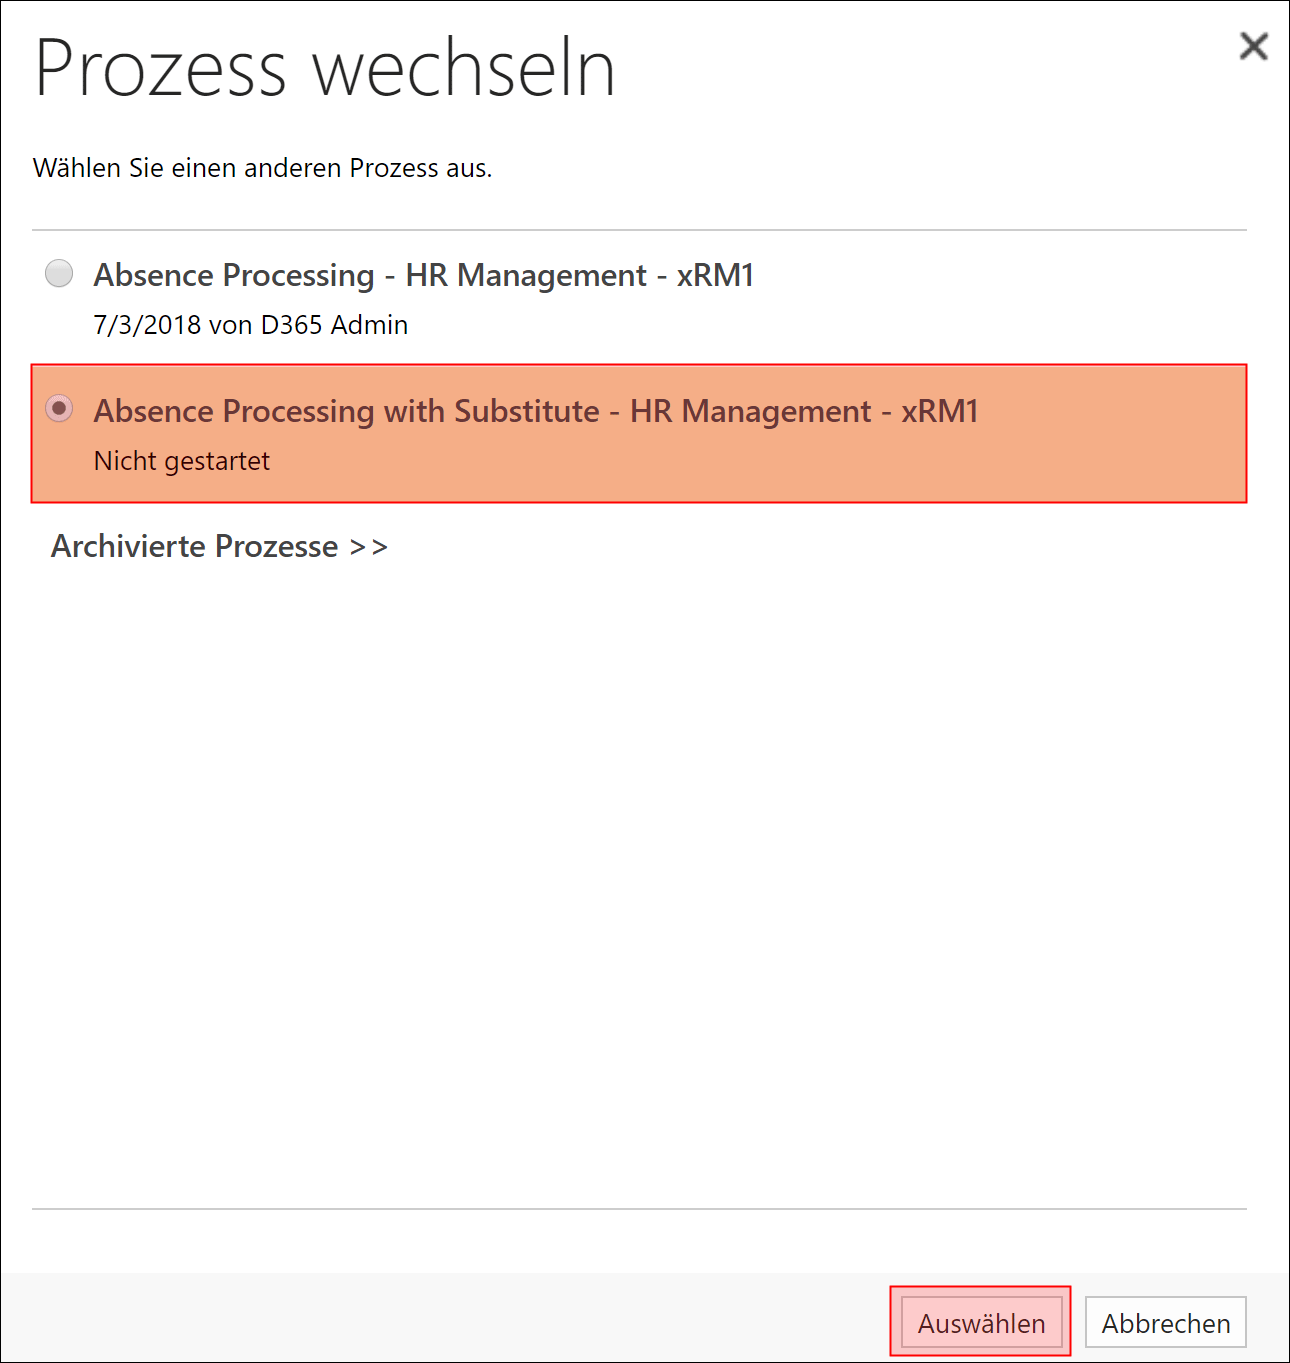
Select Absence Processing with Substitute - HR Management - xRM1 and confirm with Select
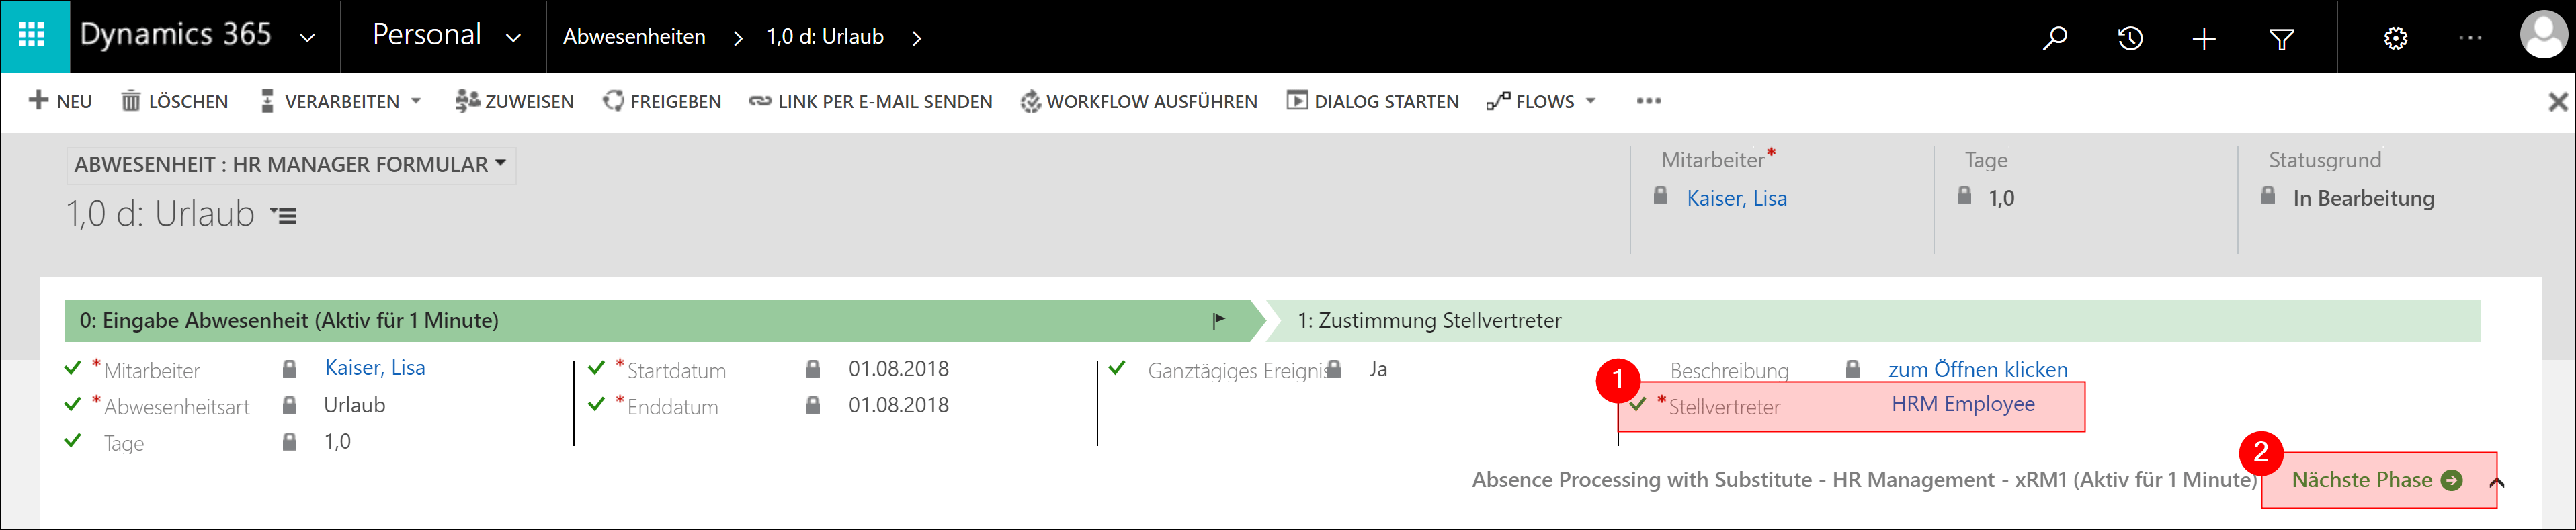
An additional phase was added: Approval Substitute
You now need to select a Substitute, before you can go to the Next Phase
An automatic information process is now triggered, which sends an email to the substitute informing him of the request. If he clicks on the link contained in the email, he is taken directly to the request and can accept or reject the substitution there.
If he accepts, the rest of the application process is the same as the process without a representative. The supervisor is informed with the request for approval. The employee is then informed of the decision.
You can see which other automatisms are triggered from this table: Automatisms
Back to top | Back to table of contents
7. Edit Leave
Whether vacation or sickness, as soon as the absence process is complete, the data record receives the status Approved and is write-protected to rule out subsequent changes.
In practice, however, it can happen that approved leave has to be postponed or that employees become sick during their vacation.
In these cases, the HR Manager can change absence entries that have already been approved and deactivated.
To do this, open the Digital Personnel File of the employee concerned and double-click the required absence record in the section Leave Management.
Now click on Start Dialog in the menu bar

Select Modify Leave Request - HR Management [EN] - xRM1 and confirm by pressing Add
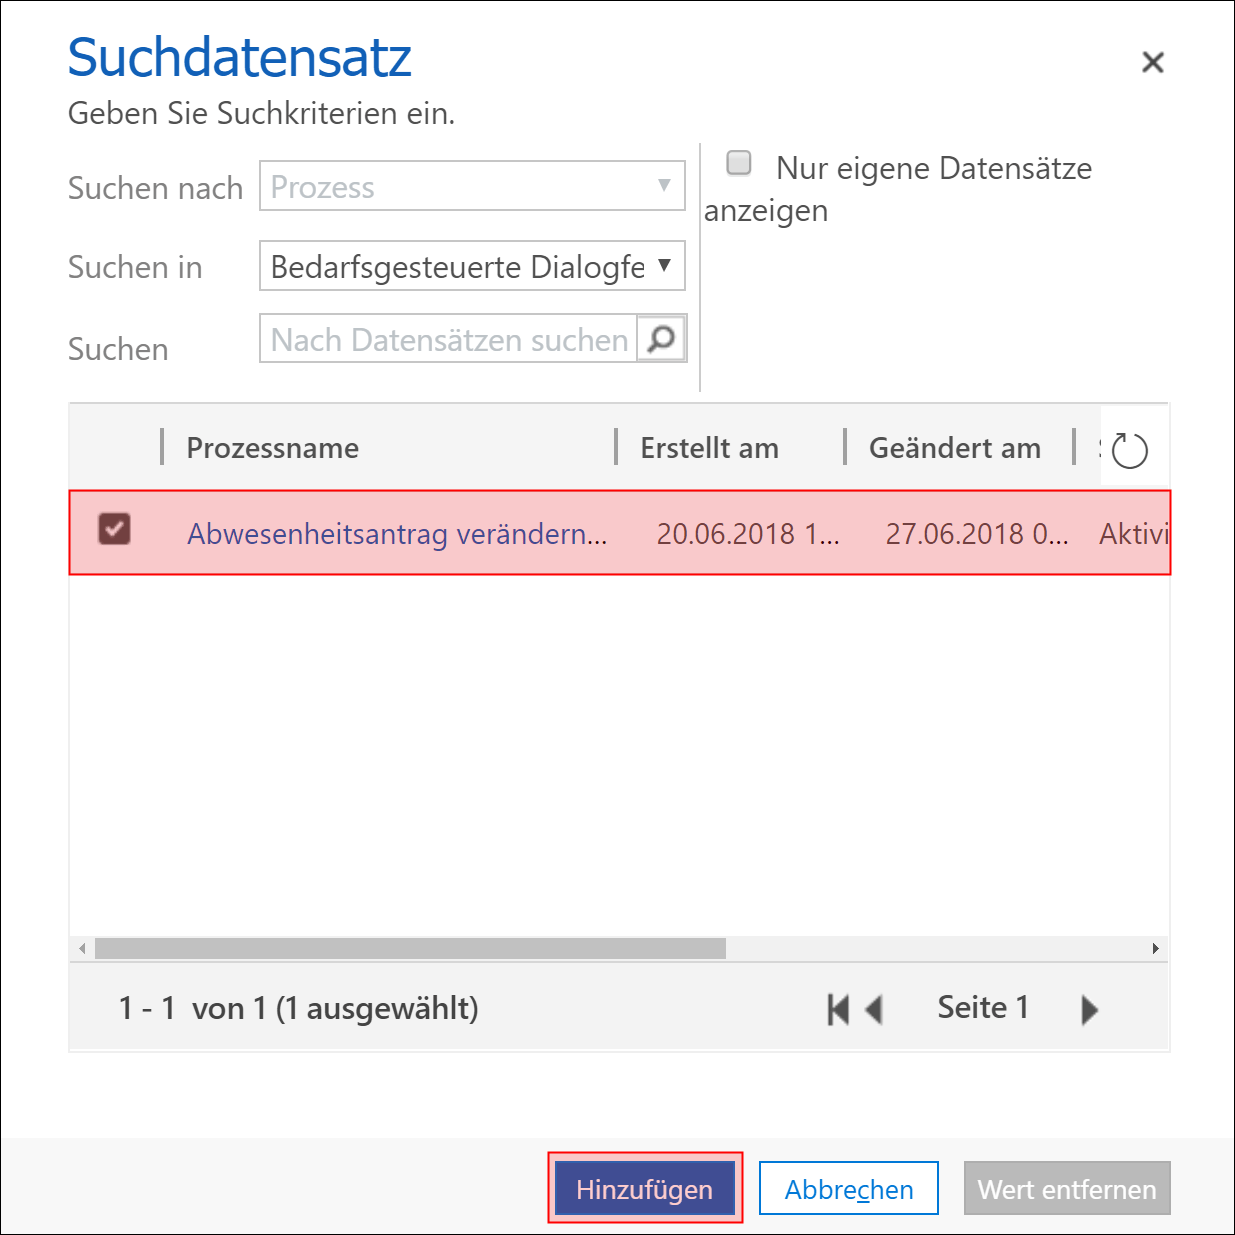
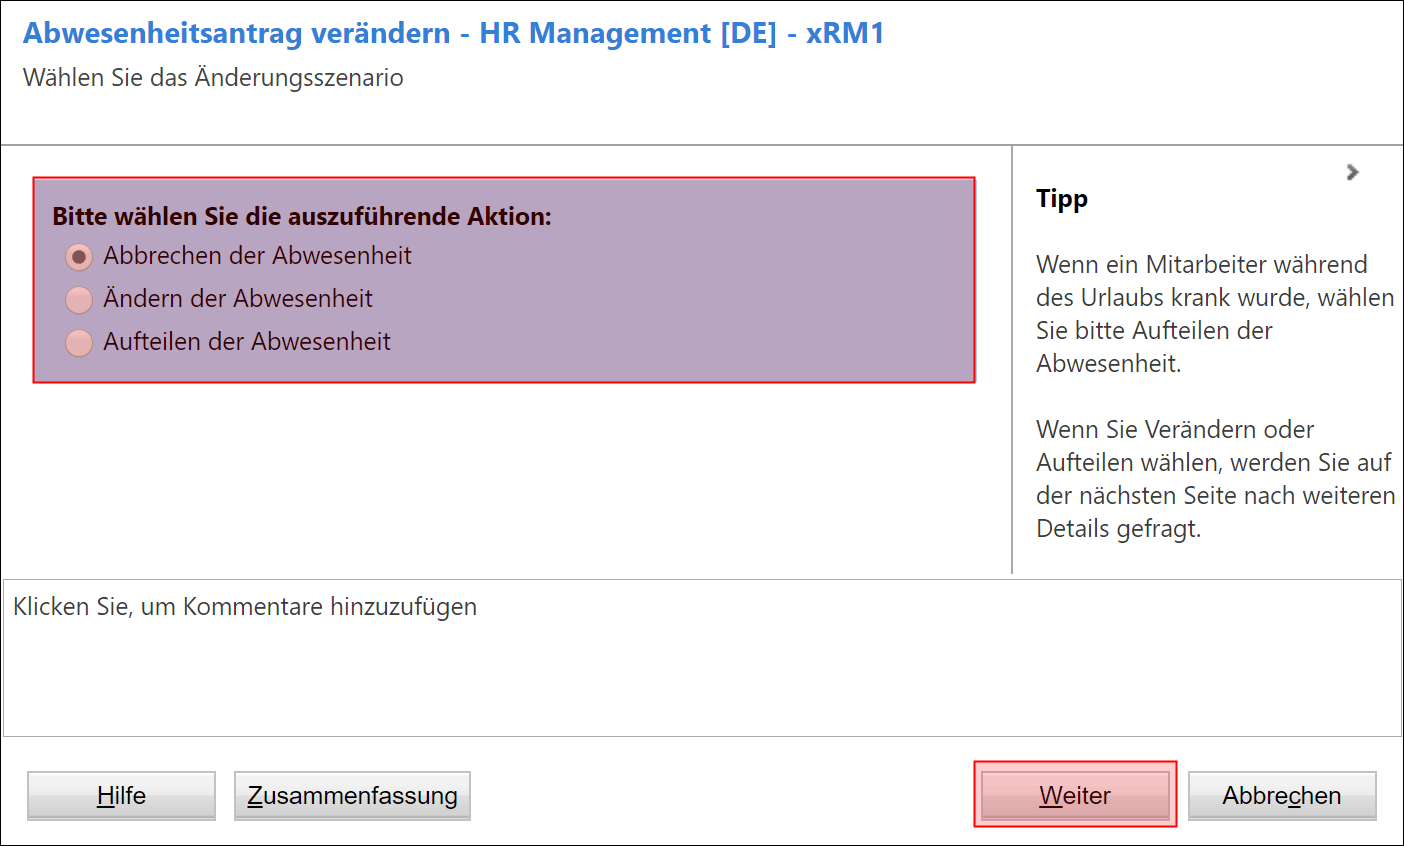
You now have the option to Cancel, Modify or Split the leave request
Cancel Leave Request
Choose this option and confirm with Next to cancel the leave request completely and without substitution.
Modify Leave Request
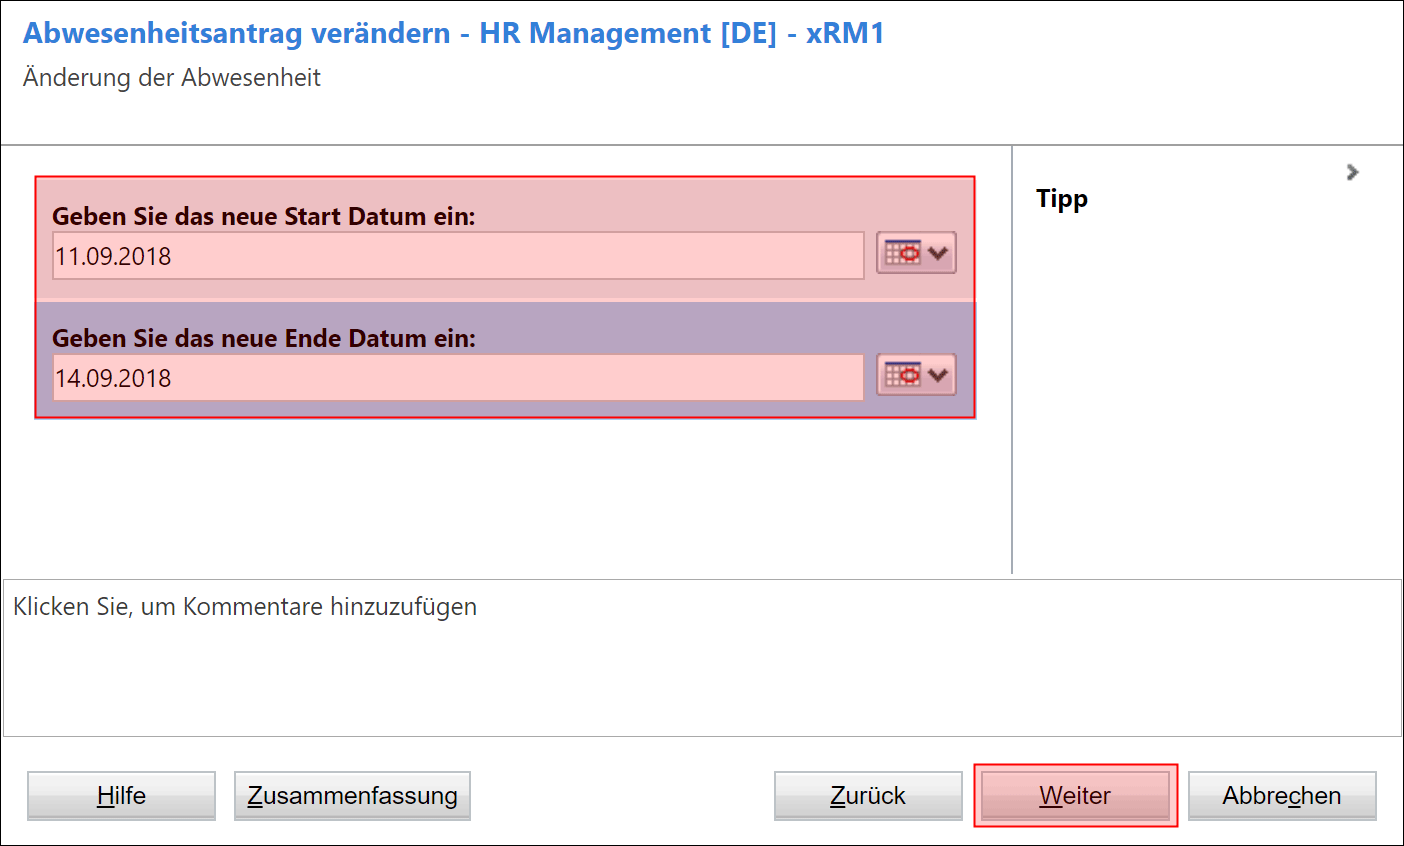
Select this option and confirm with Next to change the Start and / or End date.
Adjust the new times and confirm with Next
Split Leave Request
Choose this option and click Next to split the leave request.
Specify the date on which the absence is to be split (end of first half) and choose which absence types the first and second half should have. Confirm your settings by choosing Next
Note: Planned absences get automatically approved, ad-hoc absences don't!

Back to top | Back to table of contents
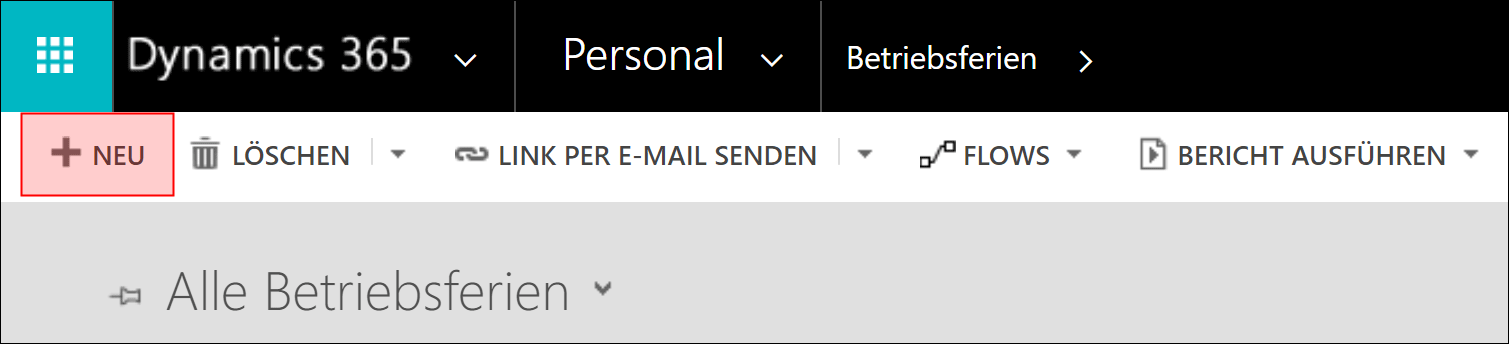
8. Business Closures
Dynamics HR Management offers an easy way to roll out company holidays. You can decide whether you want to roll it out for the whole company or only for certain departments or only for certain persons.
Put simply, this is a leave request that you create for the selected group of people and that is automatically approved.
Notes:
- The duration of the company holidays is deducted from the vacation entitlement of the respective employees
- If an employee's already approved leave request overlaps with the business closure, no new leave request will be created for that employee. Not even if the overlap is only half a day.
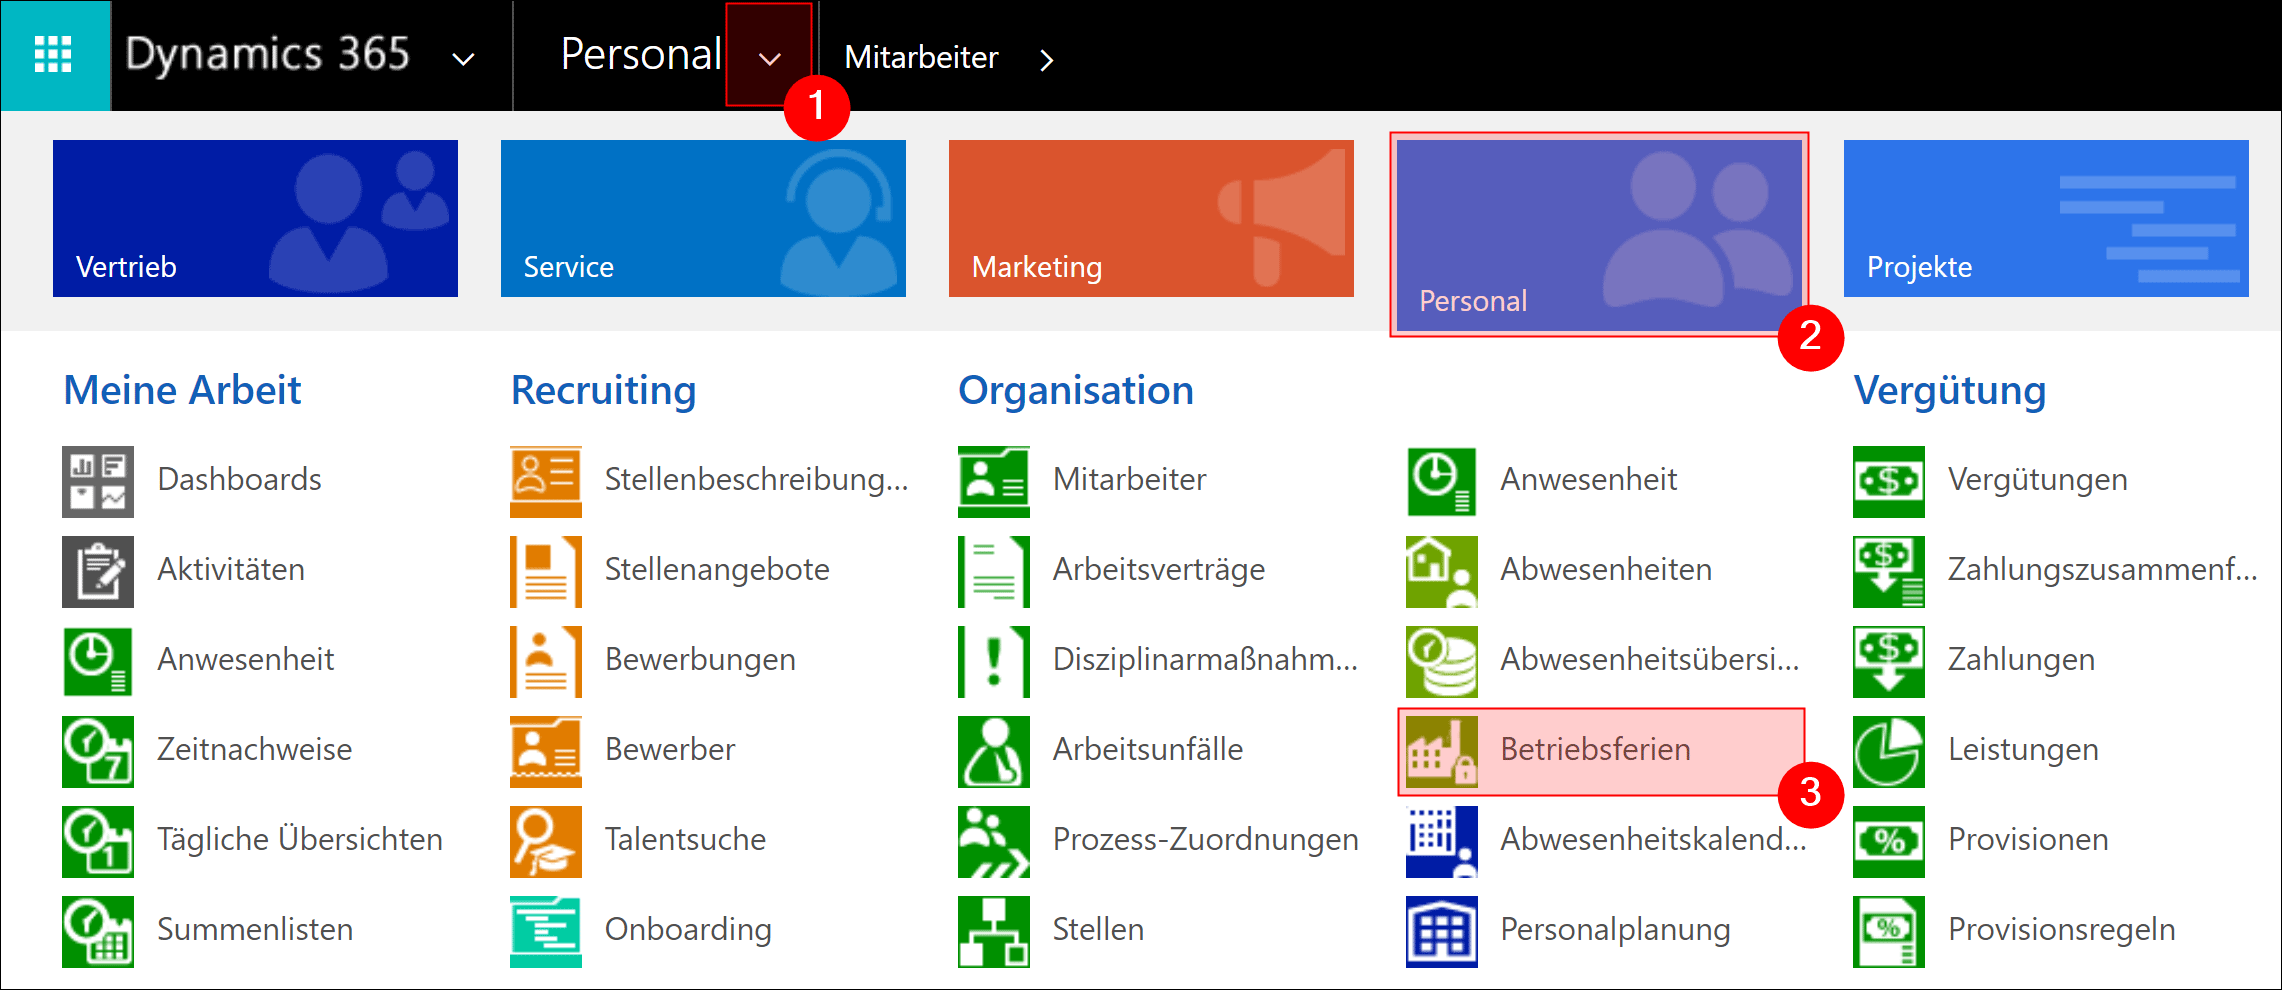
Go to Navigation Bar -> HR -> Business Closures and click on +NEW
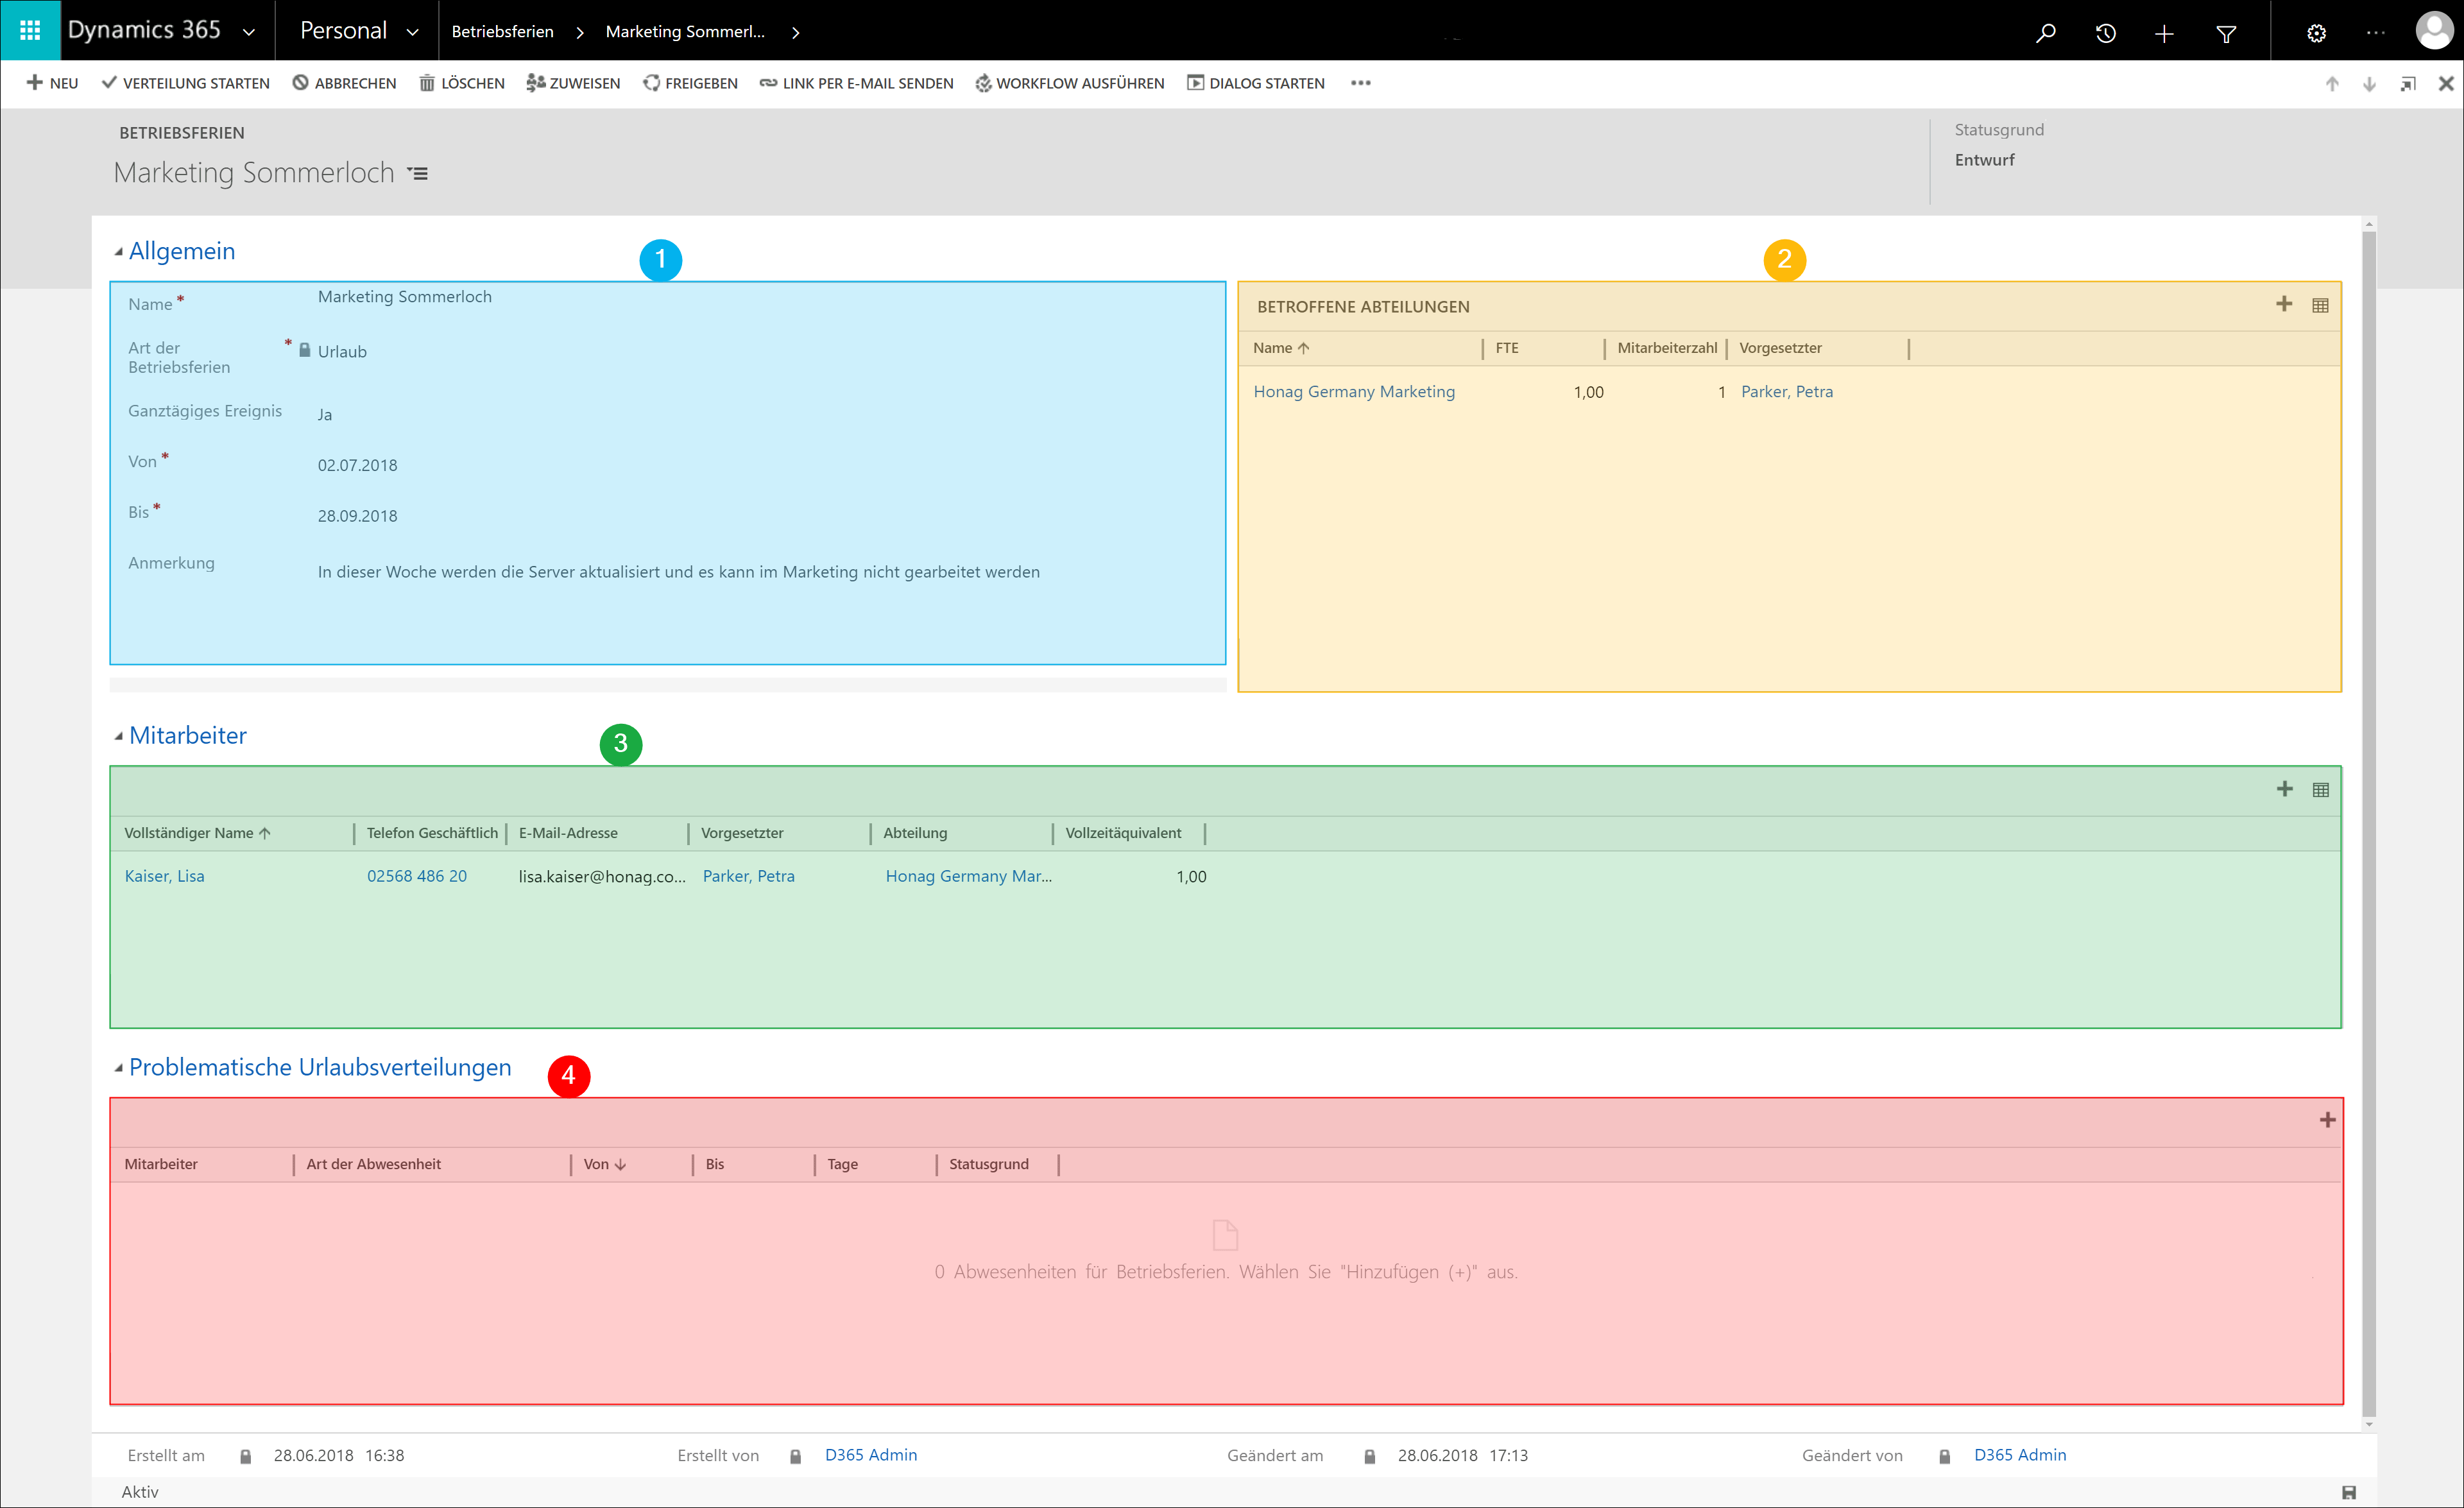
In Sector 1, enter an appropriate name and specify the period in which the business closure should take place. You can also use the option All-day event here to control whether it should be half a day. Save the record afterwards.
You can now select the affected departments in Section 2. Click on the + Icon in the upper right corner of the section.
All affected employees in Section 3 are now automatically displayed (you may need to update the view: Right click in the grid and select Refresh list)
Here you also have the option of removing individual employees from the list if you do not want the business closure to be rolled out for them.
Section 4 shows if one or more employees created errors during the roll out. This sector is always empty during creation.
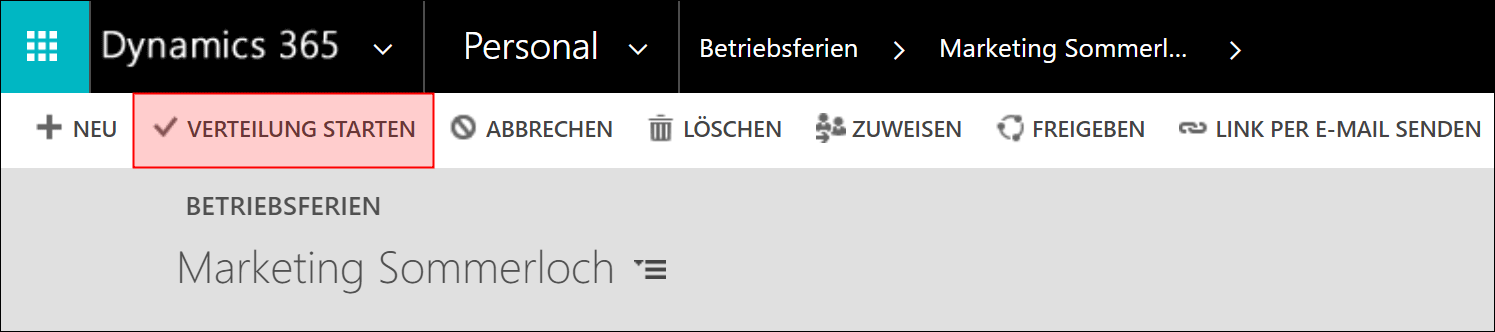
After you have set up and checked everything, you can start rolling out. To do this, click Start Roll-Out in the menu bar
Back to top | Back to table of contents
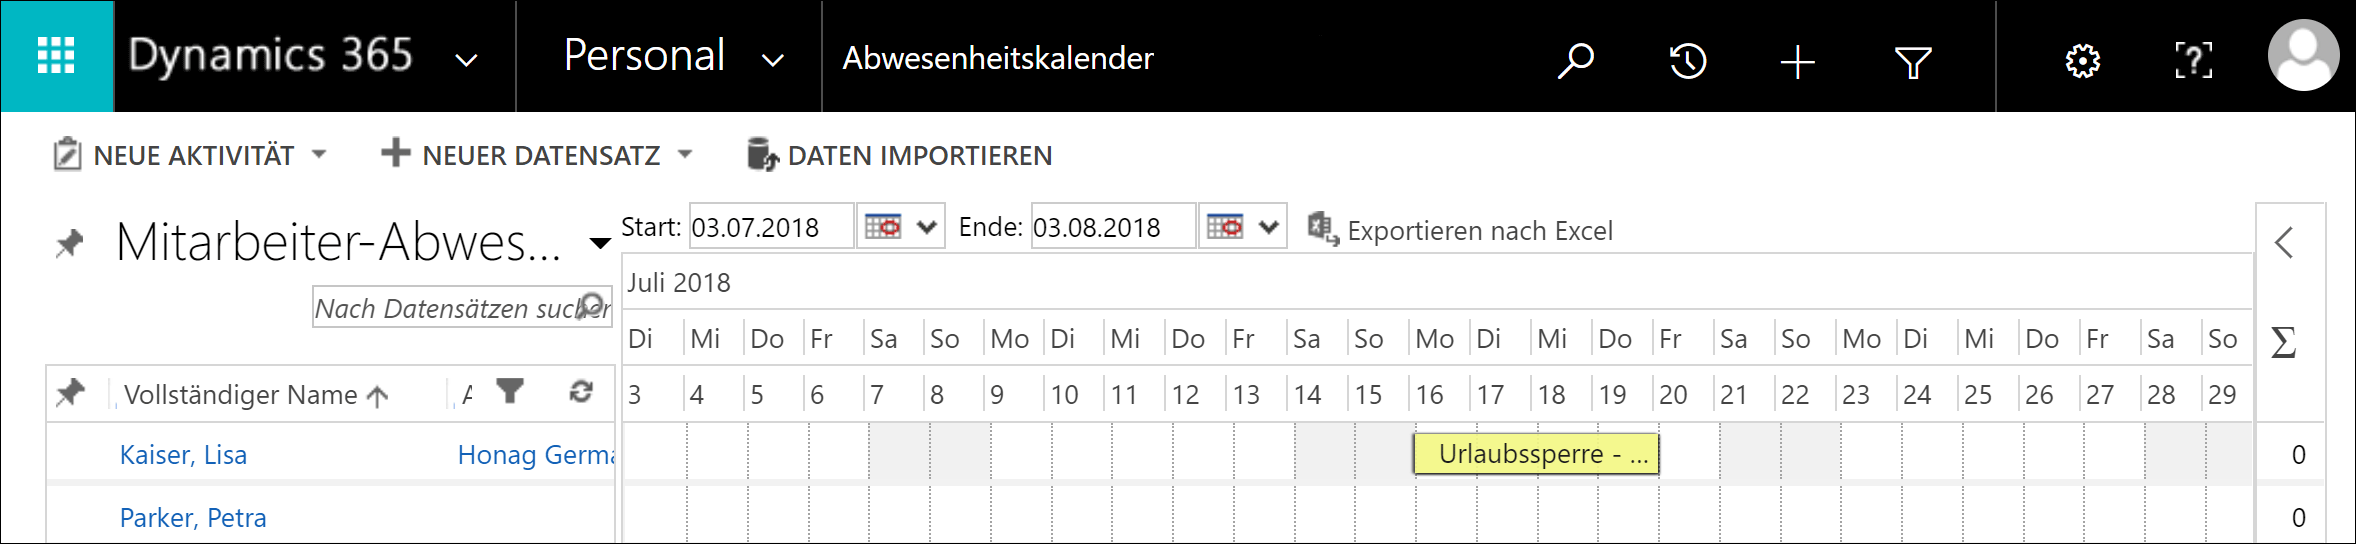
9. Leave block
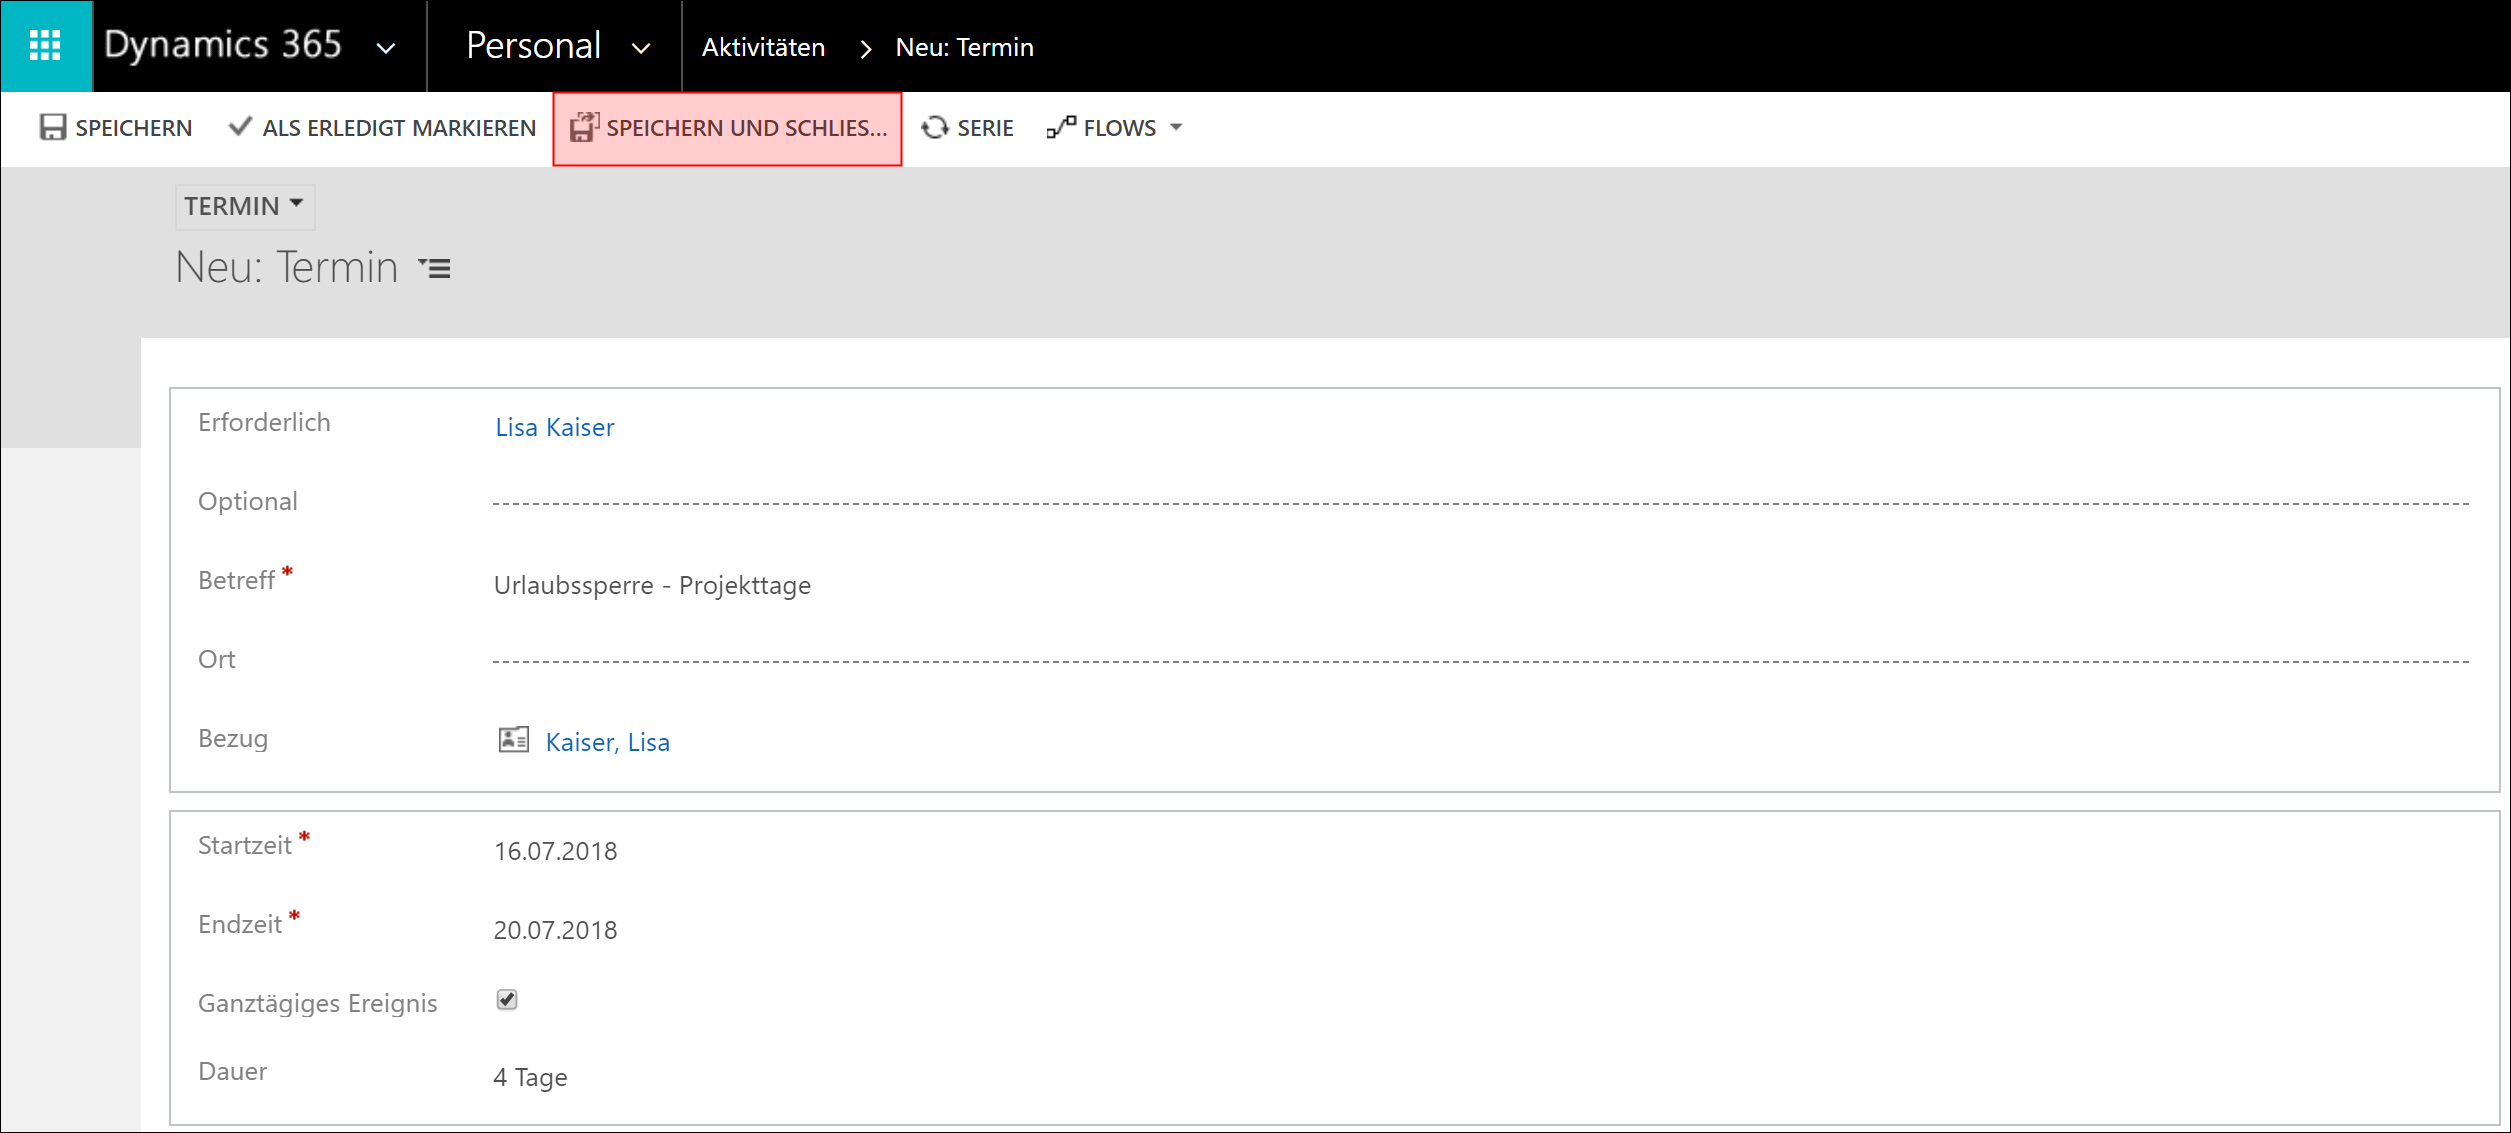
In Dynamics HR Management, you can also enter special workdays such as strategy planning weeks or a leave block in the absence calendar. To enter such a special workday in the calendar, an appointment is created for the employee.
To do this, click on the + Icon in the menu bar and choose Appointment

Enter a subject, start and end time here as you know it from Outlook, check the All-day event box and select the relevant employee if required. So that this appointment now also appears in the absence calendar, a further step is necessary. The appointment must also refer to the relevant employee.
Finally, you can Save & Close the appointment.
The leave block is now visible in the absence calendar.
Back to top | Back to table of contents
10. Automation
The absence processes in Dynamics HR Management are accompanied and supported by various activities. During the approval or documentation process, emails are sent and appointments and tasks are created in Microsoft Dynamics and Outlook.
You can see an overview of the activities in the respective absence process here:
| Absence Type | Creator | Process | Result |
|---|---|---|---|
| Vacation | Employee Supervisor HR Manager |
Approval process with or without substitute | E-Mail: to substitute for approval E-Mail to supervisor for approval Status: Approved/rejected (read only) E-Mail to employee for information about approval/rejection Global absence calendar: New entry Outlook-Appointment: “Out of office” for Employee Outlook-Appointment: “Free” for substitute Tasks for Employee: for absences > 2 days |
| Overtime | HR Manager | Approval process with or without substitute | E-Mail: to substitute for approval E-Mail to supervisor for approval Status: Approved/rejected (read only) E-Mail to employee for information about approval/rejection Outlook-Appointment: “Out of office” for Employee Outlook-Appointment: “Free” for substitute Tasks for Employee: for absences > 2 days |
| Special Leave Unpaid Leave | |||
| Sick / Work Accident | HR Manager | Waiting for return or waiting for sick certificate | Global absence calendar: New entry Status: Approved (read only) Outlook-Appointment: “Out of office” for Employee Sick certificate: for duration > 1 day |
| Sick Child | |||
| Unexcused Absence | |||
| Maternity / Parental Leave | HR Manager | Waiting for documents | Global absence calendar: New entry Outlook-Appointment: “Out of office” for Employee Status: Approved |
| Business Closure | HR Manager | Rollout of business closure | Status: Approved (read only) Outlook-Appointment: “Out of office” for Employee Tasks for Employee: for absences > 2 days |