
Employment Terms
1. Create new Employment Terms
2. Deactivate Employment Terms
3. Replace Employment Terms
4. Manage Wages
5. Manage Leave Entitlements
6. Create Work Patterns
1. Create new Employment Terms
There are many ways to create new employment terms. It depends on the situation which one you choose. If you use Best Practice Recruiting, you will create the new terms in the Application File. If you create one for an already existing employee, you will create the terms in the Digital Personnel File. Alternatively, you can choose the general way that serves as a model here.
Important preliminary information can be found here: Templates
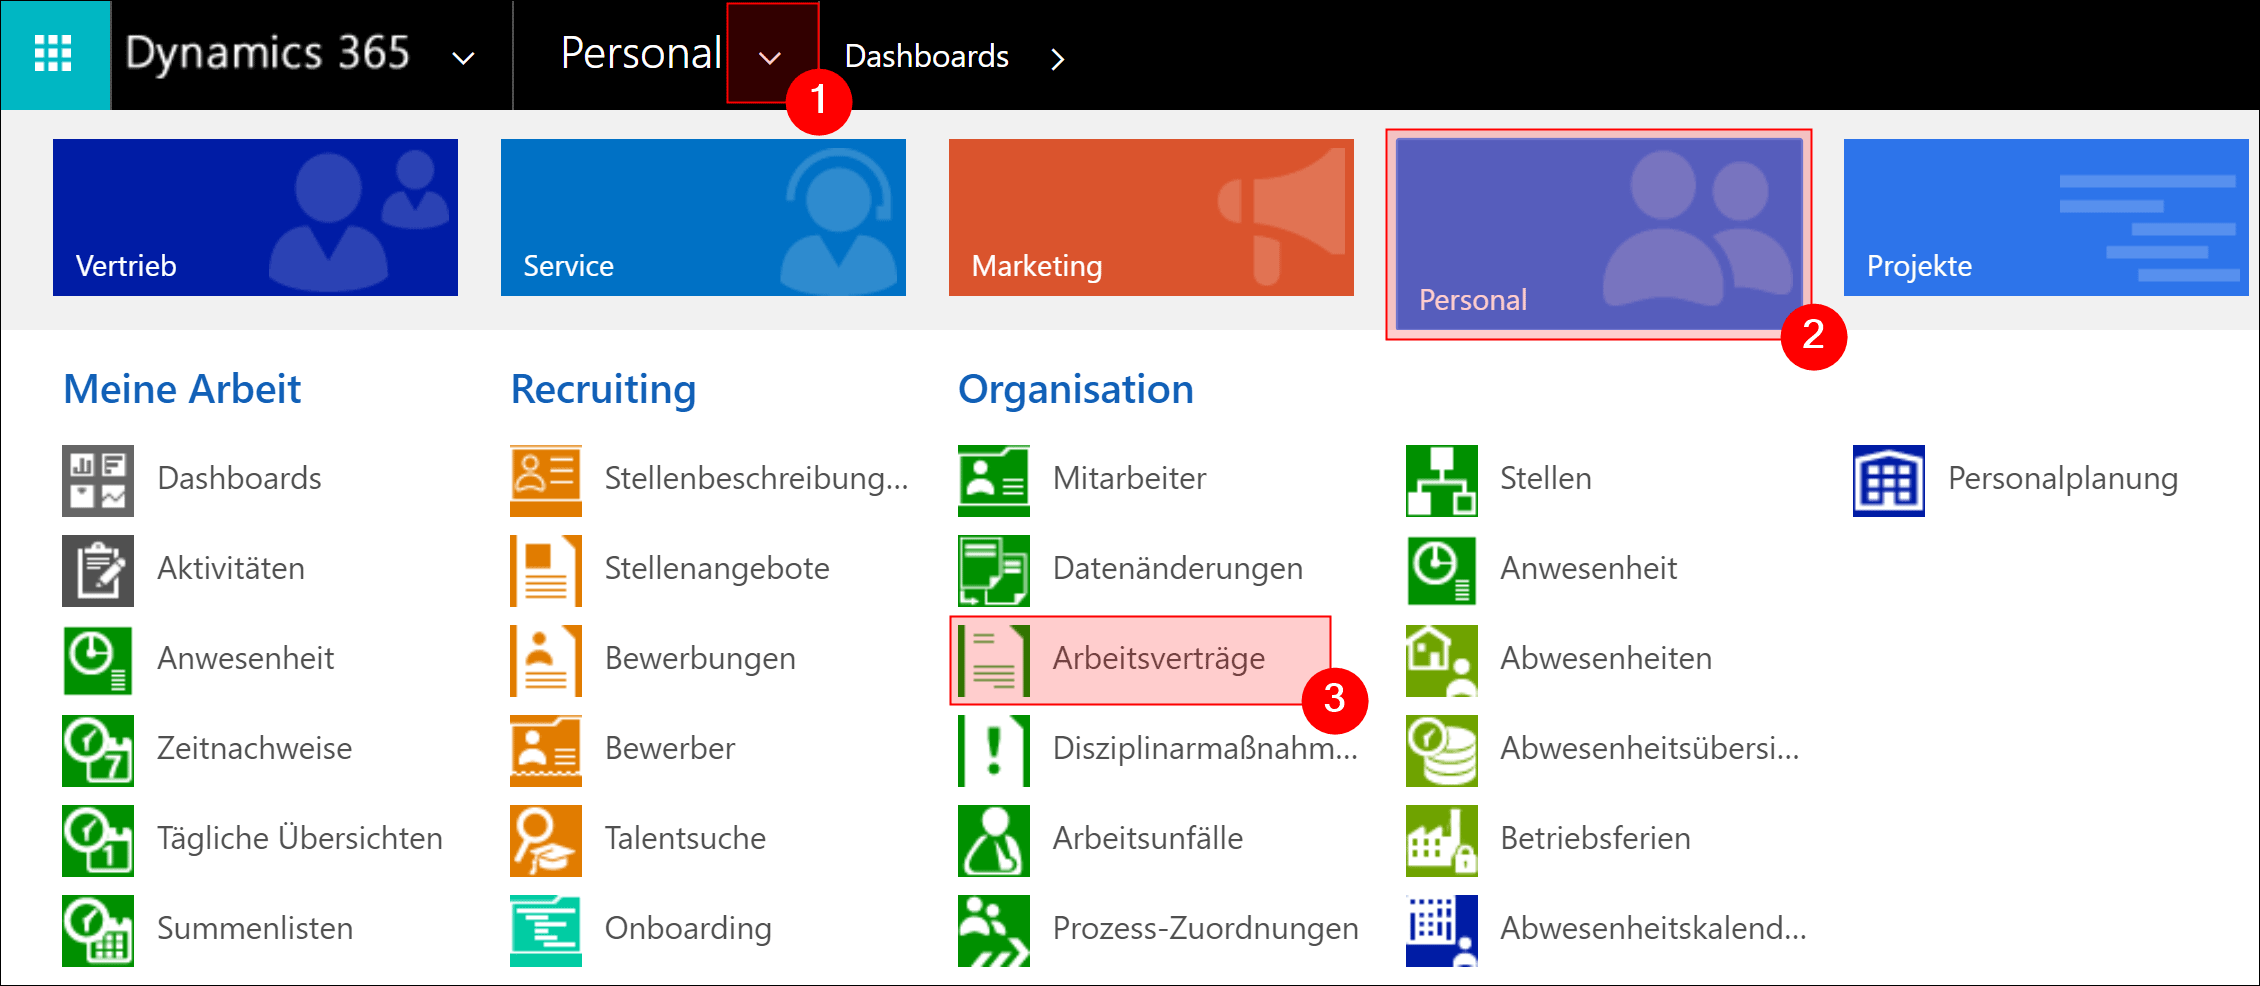
Go to Navigation Bar -> HR -> Employment Terms and click on +NEW in the menu bar

Note: Select a employment terms template and save the record. This automatically copies all data from the employment terms template to the employment terms. The transferred data can be further adjusted after the transfer as long as the terms are not yet valid.
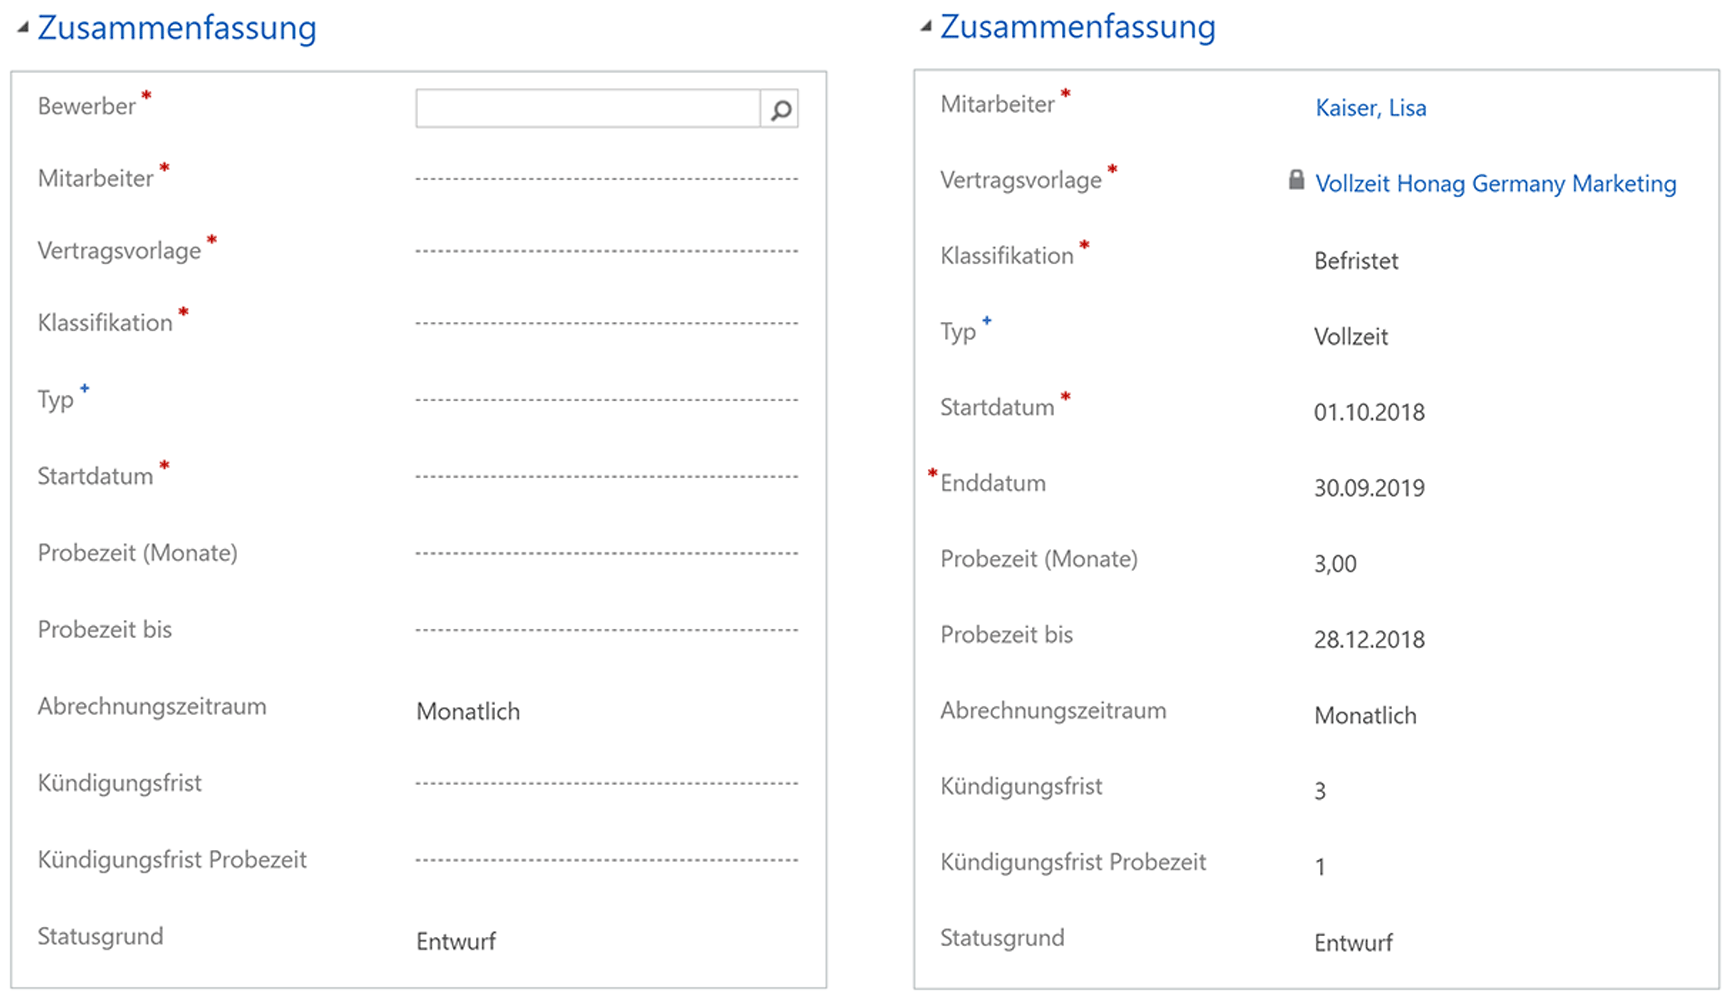
Now enter all the necessary data in the section Summary:
- Applicant / Employee: Both fields are marked as mandatory, but of course, employment terms are only valid for one person. As soon as you have selected one of the two fields, the other one is hidden
- Template: Select a Template. As soon as you save the employment terms, all the data stored in the template is automatically transferred. You can, of course, continue to adjust the automatically filled fields manually. For more information on leave entitlements, which are also transferred automatically from the template, see below: 5. Manage Leave Entitlements
- Classification: Select whether these are permanent or limited employment terms. If you select limited, your will obtain another field with an end date.
- Type: Select the type of employment, such as Full Time, Part Time, Internship, etc.
- Start Date: Date of validity of the terms
- End Date: End Date of limited terms. The field is only available for the classification limited.
- Probation Period: Enter the probation period in months
- Probation Until: Can be used as an alternative to specify the probation period in months
- Payroll Period: Enter the payroll period for all wages. Please note, however, that if you select Monthly, you cannot generate Weekly Payments.
- Terms of Notice: Enter the notice period in months.
- Terms of Notice Probation: Enter a possibly different period of notice during the probation period
- Status Reason: You have the possibility to choose between Draft, In Negotiation and Valid. In general, you create the employment terms as a draft. Once it is complete and correct, select In Negotiation and finally, if everyone agrees, to Valid. Note that as soon as the the terms' status is set to Valid, it is blocked for most changes. Only Leave Entitlements and wages can still be added. For more information on how to replace valid employment terms, see below: 3. Replace an Employment Term
- Working Hours: Specify how many hours have to be worked on which day. These values provide the basis for creating and calculating attendances and working hours in Time & Attendance
- Working Hours Details: Enter the time frame of the working hours. Among other things, these influence appointment planning by informing you when an appointment is made outside these working hours. However, apart from the note, it has no impact on the functionality
- Working Hours Total: Enter the total number of weekly working hours

A detailed description of Wages can be found below: 4. Manage Wages
A detailed description of Leave Entitlements can be found below: 5. Manage Leave Entitlements
Back to top | Back to table of contents
2. Deactivate Employment Terms
Employment terms can be deactivated for various reasons. If you want to deactivate an employment term, navigate to HR Hub - Employment Terms and open the employment term you want to deactivate by double-clicking on it.
Click "Deactivate" in the menu bar at the top.

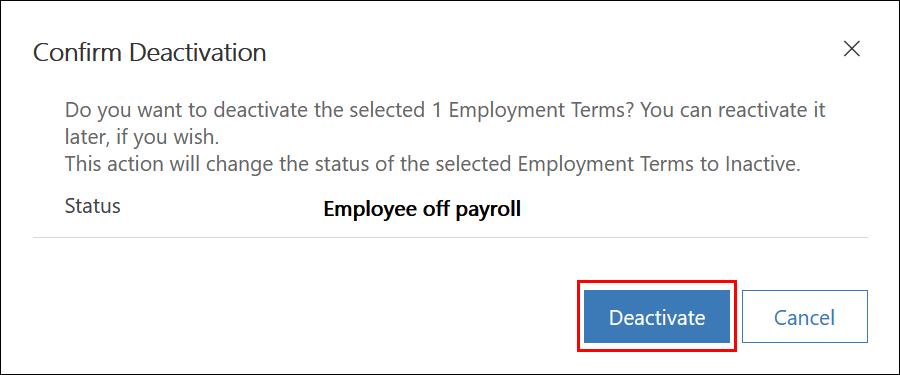
It opens a dialog. Select the appropriate option:
- Refused: The current employment term was refused.
- Replaced: The employment term has been replaced by another employment term.
- Not extended: The probation was not extended.
- Employee off payroll: The employee has left the company.
Confirm by clicking the "Deactivate" button.
Once an employment term is deactivated and not replaced with a new valid employment term, many HR for Dynamics features will no longer work because they rely on information from the employment term. In case the employee leaves, this is intentional, but you should always make sure that active employees also have a valid employment term.
If you deactivate an employment term, you should determine an end date afterwards. If the same employee is rehired at a later date and accordingly gets an active employment term again, the system would prevent this. This is because the old employment term, although it is inactive, would never reach the end date as long as none is set.
Click on the button "Set Employment Terms End Date" button and select the appropriate date.

Confirm by clicking on "Next".
Then reload the page. The end date for the employment term has now been set.
Back to top | Back to table of contents
3. Replace Employment Terms
If you want to replace active employment terms because the employee switches from full time to part time for example, Dynamics HR Management provides you with a dialog that makes it easier for you to create a new employment terms and takes care of the old terms completely.
Switch to the employee for whom you want to replace the contract (HR Hub - Employees) and navigate to the "Employment Terms & Wages" tab.
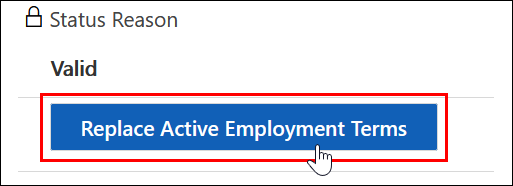
Double-click in the overview to open the employment contract you want to replace and then click the "Replace Active Employment Terms" button.
It opens a dialog. Now fill in the fields according to your specifications:
- Contract Template: The template for the new employment terms
- Classification: Determine whether the new employment terms are permanent or limited
- Start Date: Enter the employment terms' validity date. This date must be at least one day after the start date of the old terms
- End Date: If the new terms are limited, specify the end date
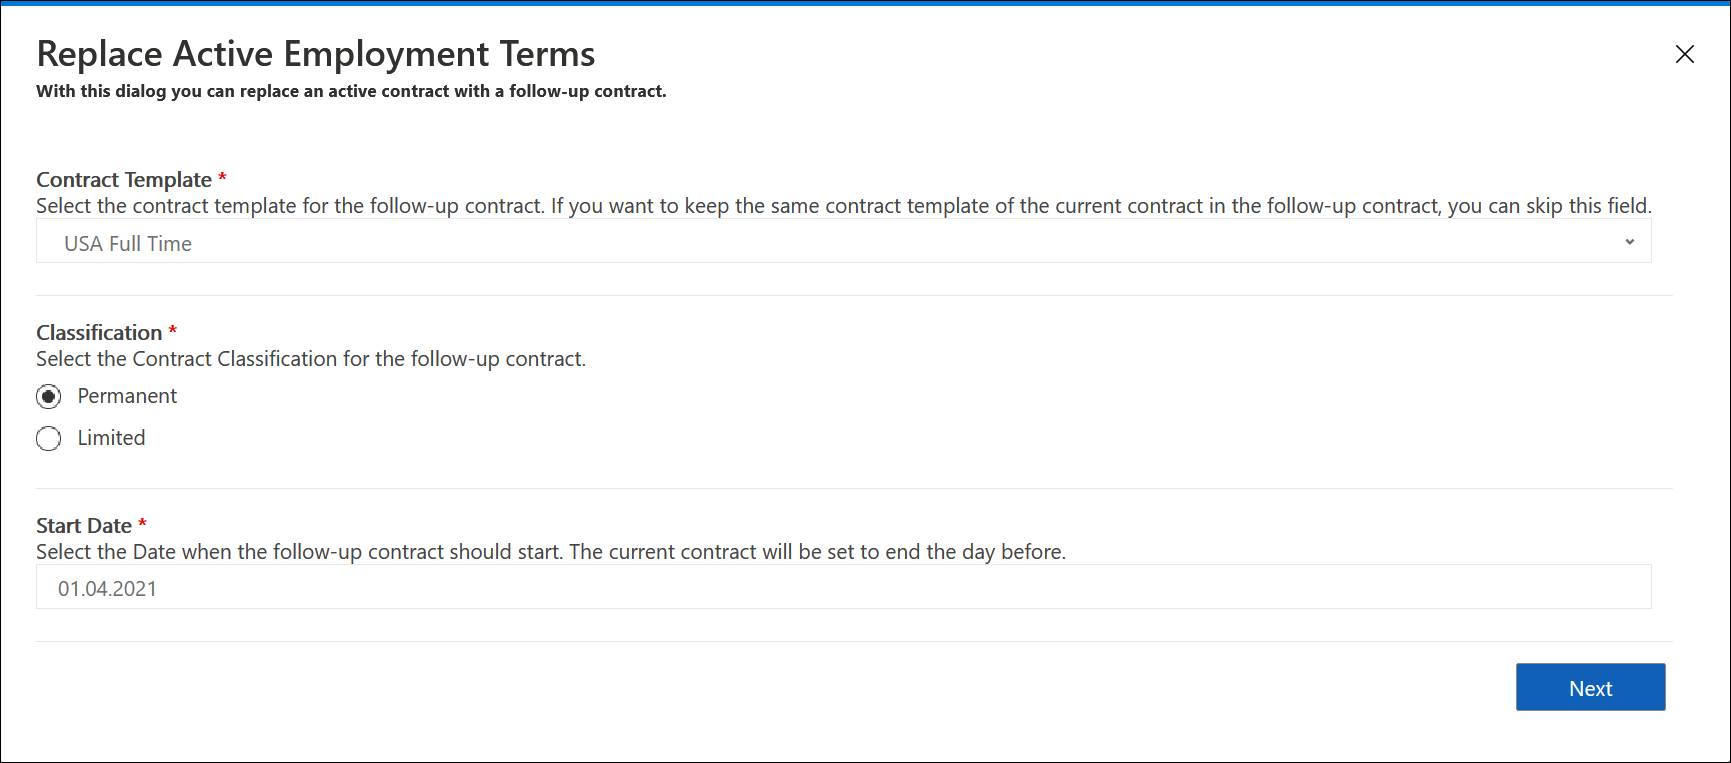
Click on Next.
So what happens now?
Directly when executing the dialog
- New employment terms are created with the status set to Draft.
- The end date of the old terms are set to one day before the start date of the new terms.
If the start date of the new employment terms is in the future
- The HR Deadline Dashboard displays the old terms' end date as a reminder that the new terms still need to be checked, adjusted if necessary, and finally set to Valid.
- Manually changing the status reason to Valid ensures that all employment terms' data has been checked and found to be correct.
- As soon as the end date of the old employment terms are reached, they are automatically deactivated with the status reason Replaced.
If the start date of the new employment terms is in the past
- In this case, the old terms is deactivated immediately with the status reason Replaced.
- You can immediately open the new employment terms, check the data, and then change the status reason to Valid.
- Manually changing the status reason to Valid ensures that all employment terms' data has been checked and found to be correct.
Another dialog appears.
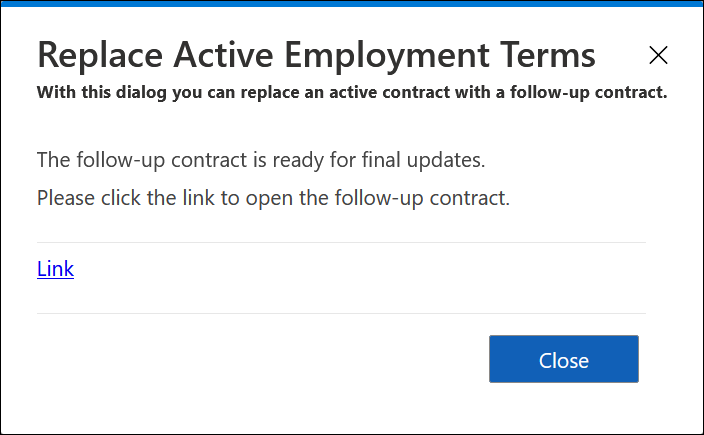
Click the Link to make further changes to the follow-up contract, such as setting the status reason to "Valid".
Back to top | Back to table of contents
4. Manage wages
Different types of wages may be contractually agreed. From regular payments such as basic salary and vacation pay, to one-time benefits in the form of payments or benefits in kind, to commissions, which vary depending on performance and agreement. In each case, the creation process follows the same pattern.
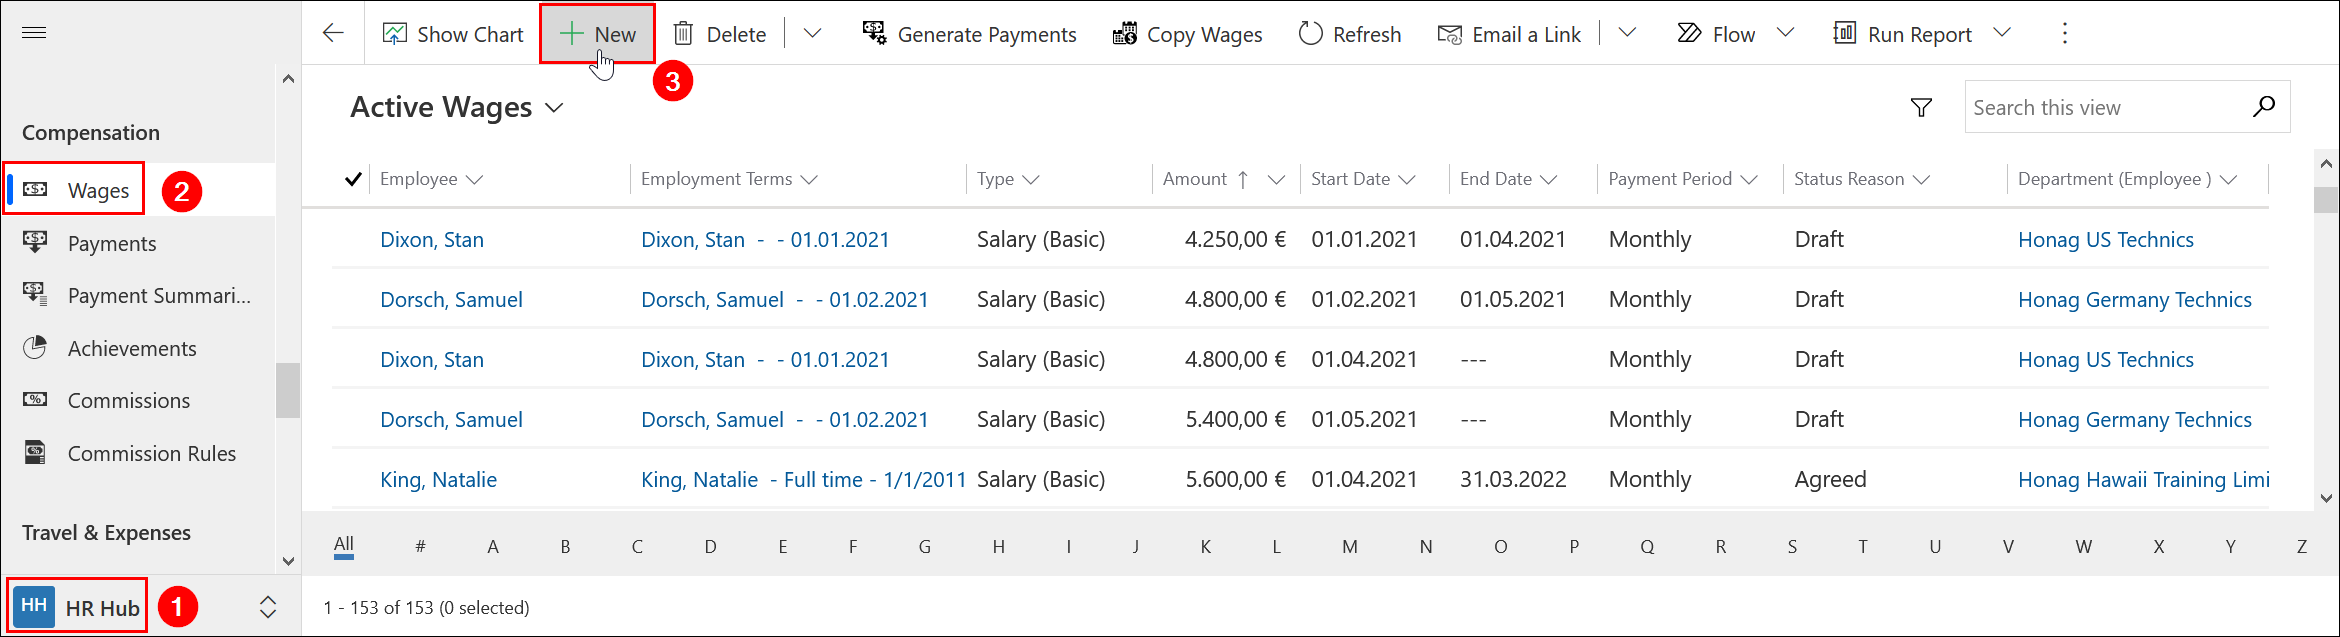
Create New Wage
To create a new wage, navigate to HR Hub - Wages and click on the "New" button.
Fill in the fields according to your requirements.
- Applicant: Select the applicant for whom this remuneration is to be assigned.
- Employee: Select the employee for whom this remuneration is to be assigned.
- Employment Terms: Insert the corresponding employment contract.
- Start Date: The wage is valid from this date and is only taken into account in calculations from this date.
- End Date: The wage is valid only until the specified date and is taken into account in calculations only until this date.
- Type: Specify what type of payment it is, such as the basic salary or a bonus payment. Note that further settings are necessary if you want to create the commission. Please read the further information here.
- strong>Currency: Specify the currency in which the wage is to be paid.
- Amount: Determine the amount of the wage.
- Payment Period: Specify the period in which payments will be made. Note that the options depend on the settings of the payroll interval of the employment contract and therefore it may not be possible to select all options.
- Pays per Year: This value is calculated automatically depending on the payment period.
- Yearly Amount: The yearly amount will be calculated automatically depending on the amount and the payment period once the record is saved.
- Remarks: Optionally, enter a remark, such as the reason for a bonus payment.
After you have entered the data completely, set the status reason to "Agreed" and save your entries.
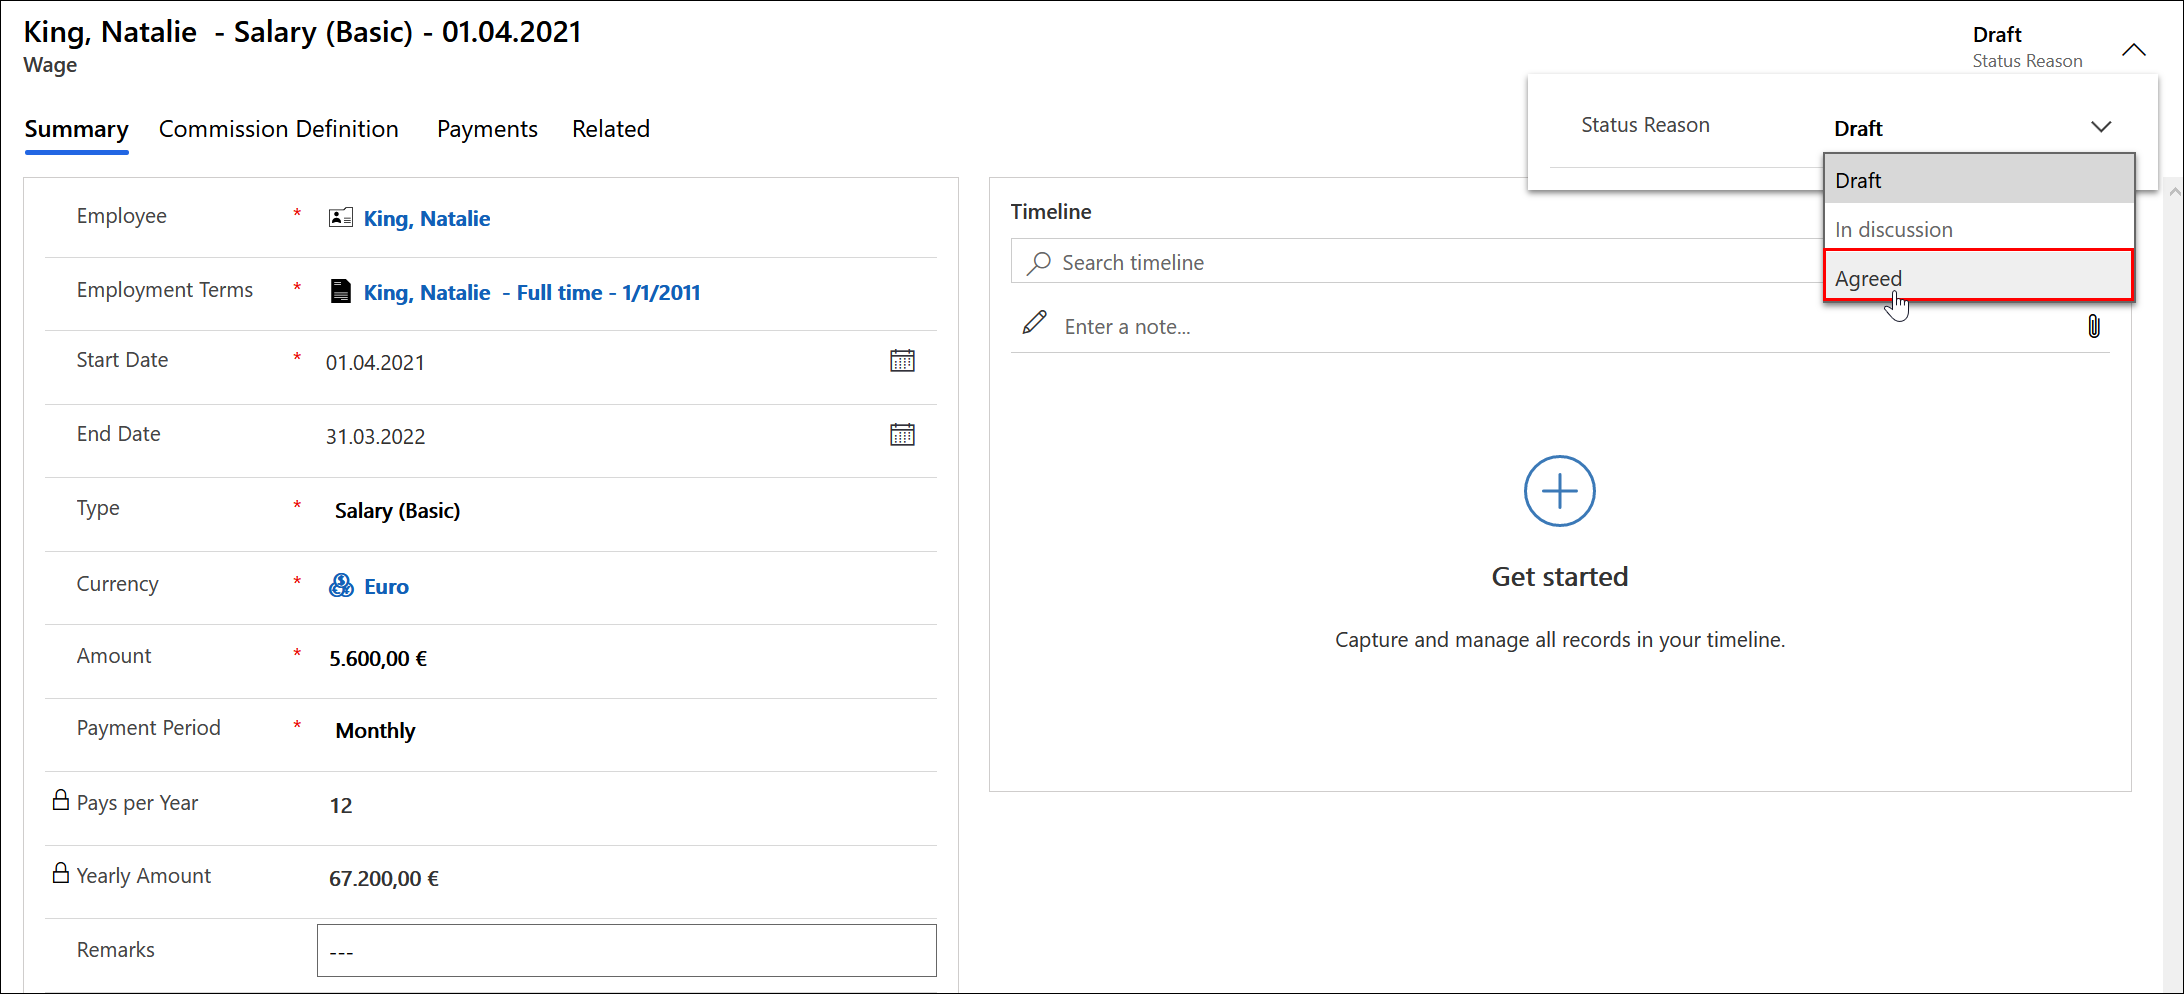
The entries are now read-only and can no longer be changed. If the status reason is not set to "Agreed", this remuneration is not taken into account when calculating payments.
Commission
Commissions need defined rules so that the calculation is correct. Therefore, the "Commission Definition" section becomes mandatory as soon as you select "Commission" as the type.
In the Commission Definition tab, define whether the commission is template-based or not. If it is template-based, select the commission template.
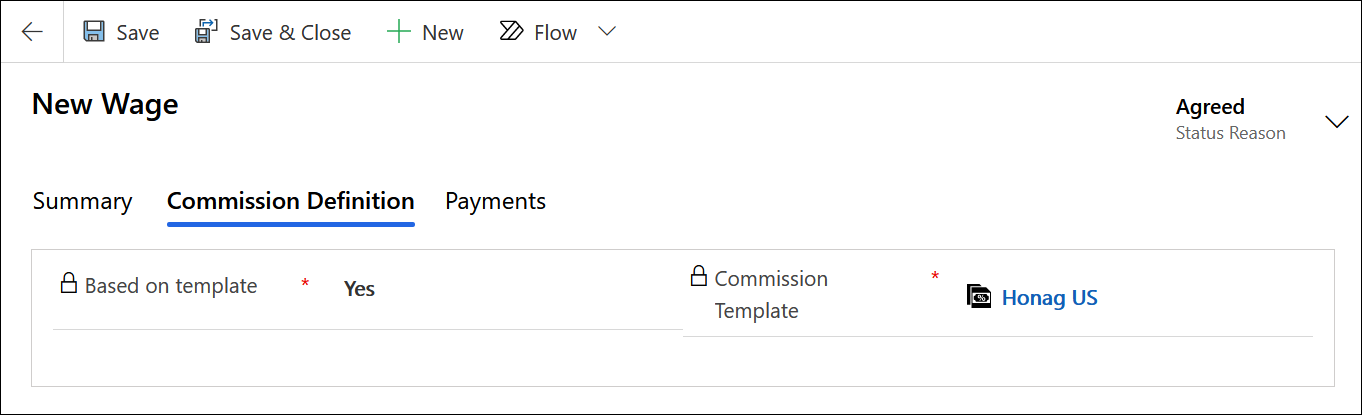
You can find a detailed explanation of the definition of commission rules here: Base Data - Commission Templates.
Set the status reason to "Agreed" and save your entries.
If you have selected a template, the commission rules will be applied automatically. If you do not use a template, the commission rules still have to be defined. Click on "New Commission Rule".
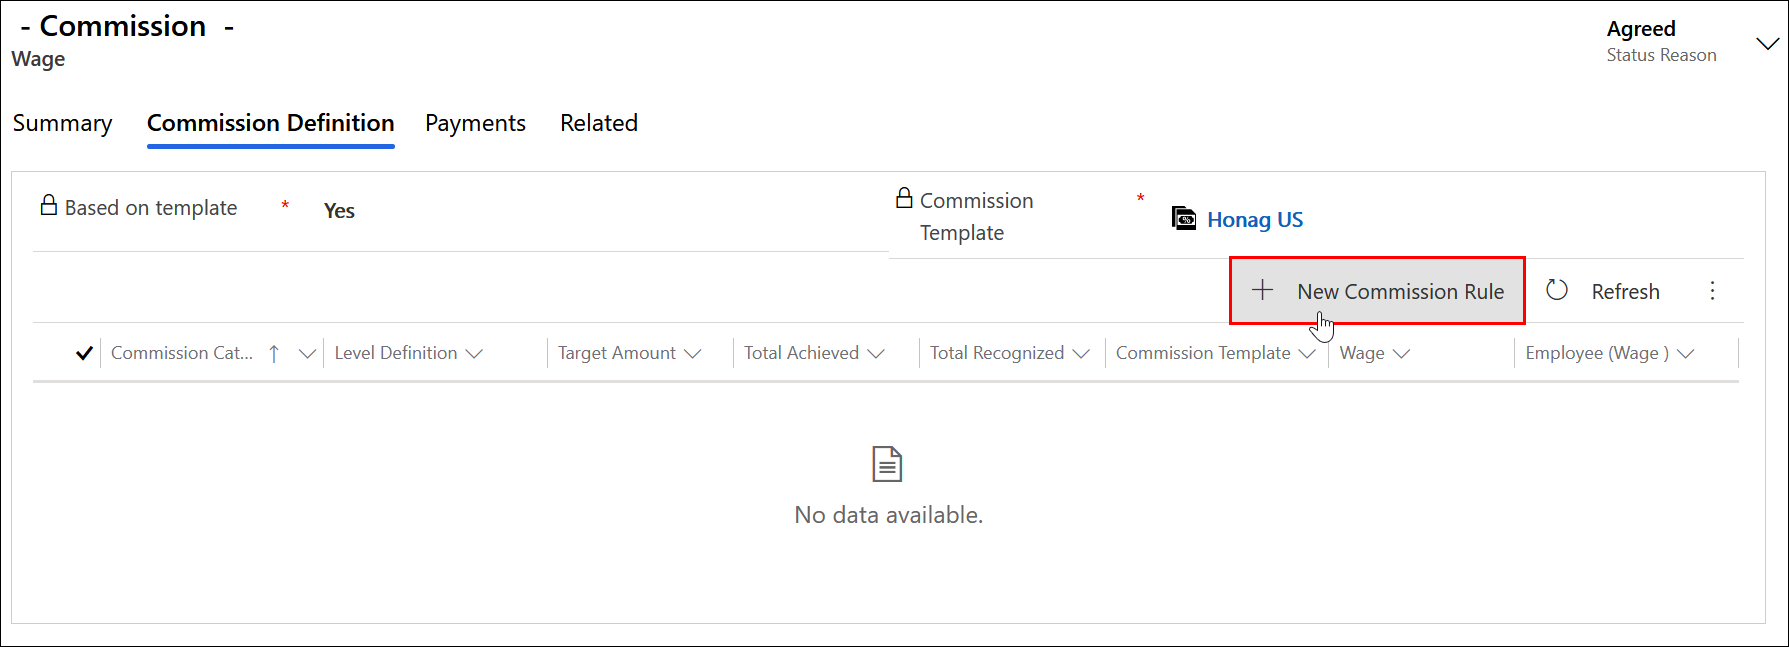
Now fill in all fields according to your specifications. A detailed explanation of how to define commission rules can be found here: Base Data - Commission Templates.
Extension of agreed Wages
Note that you can only extend the salary for agreed wages without an end date.
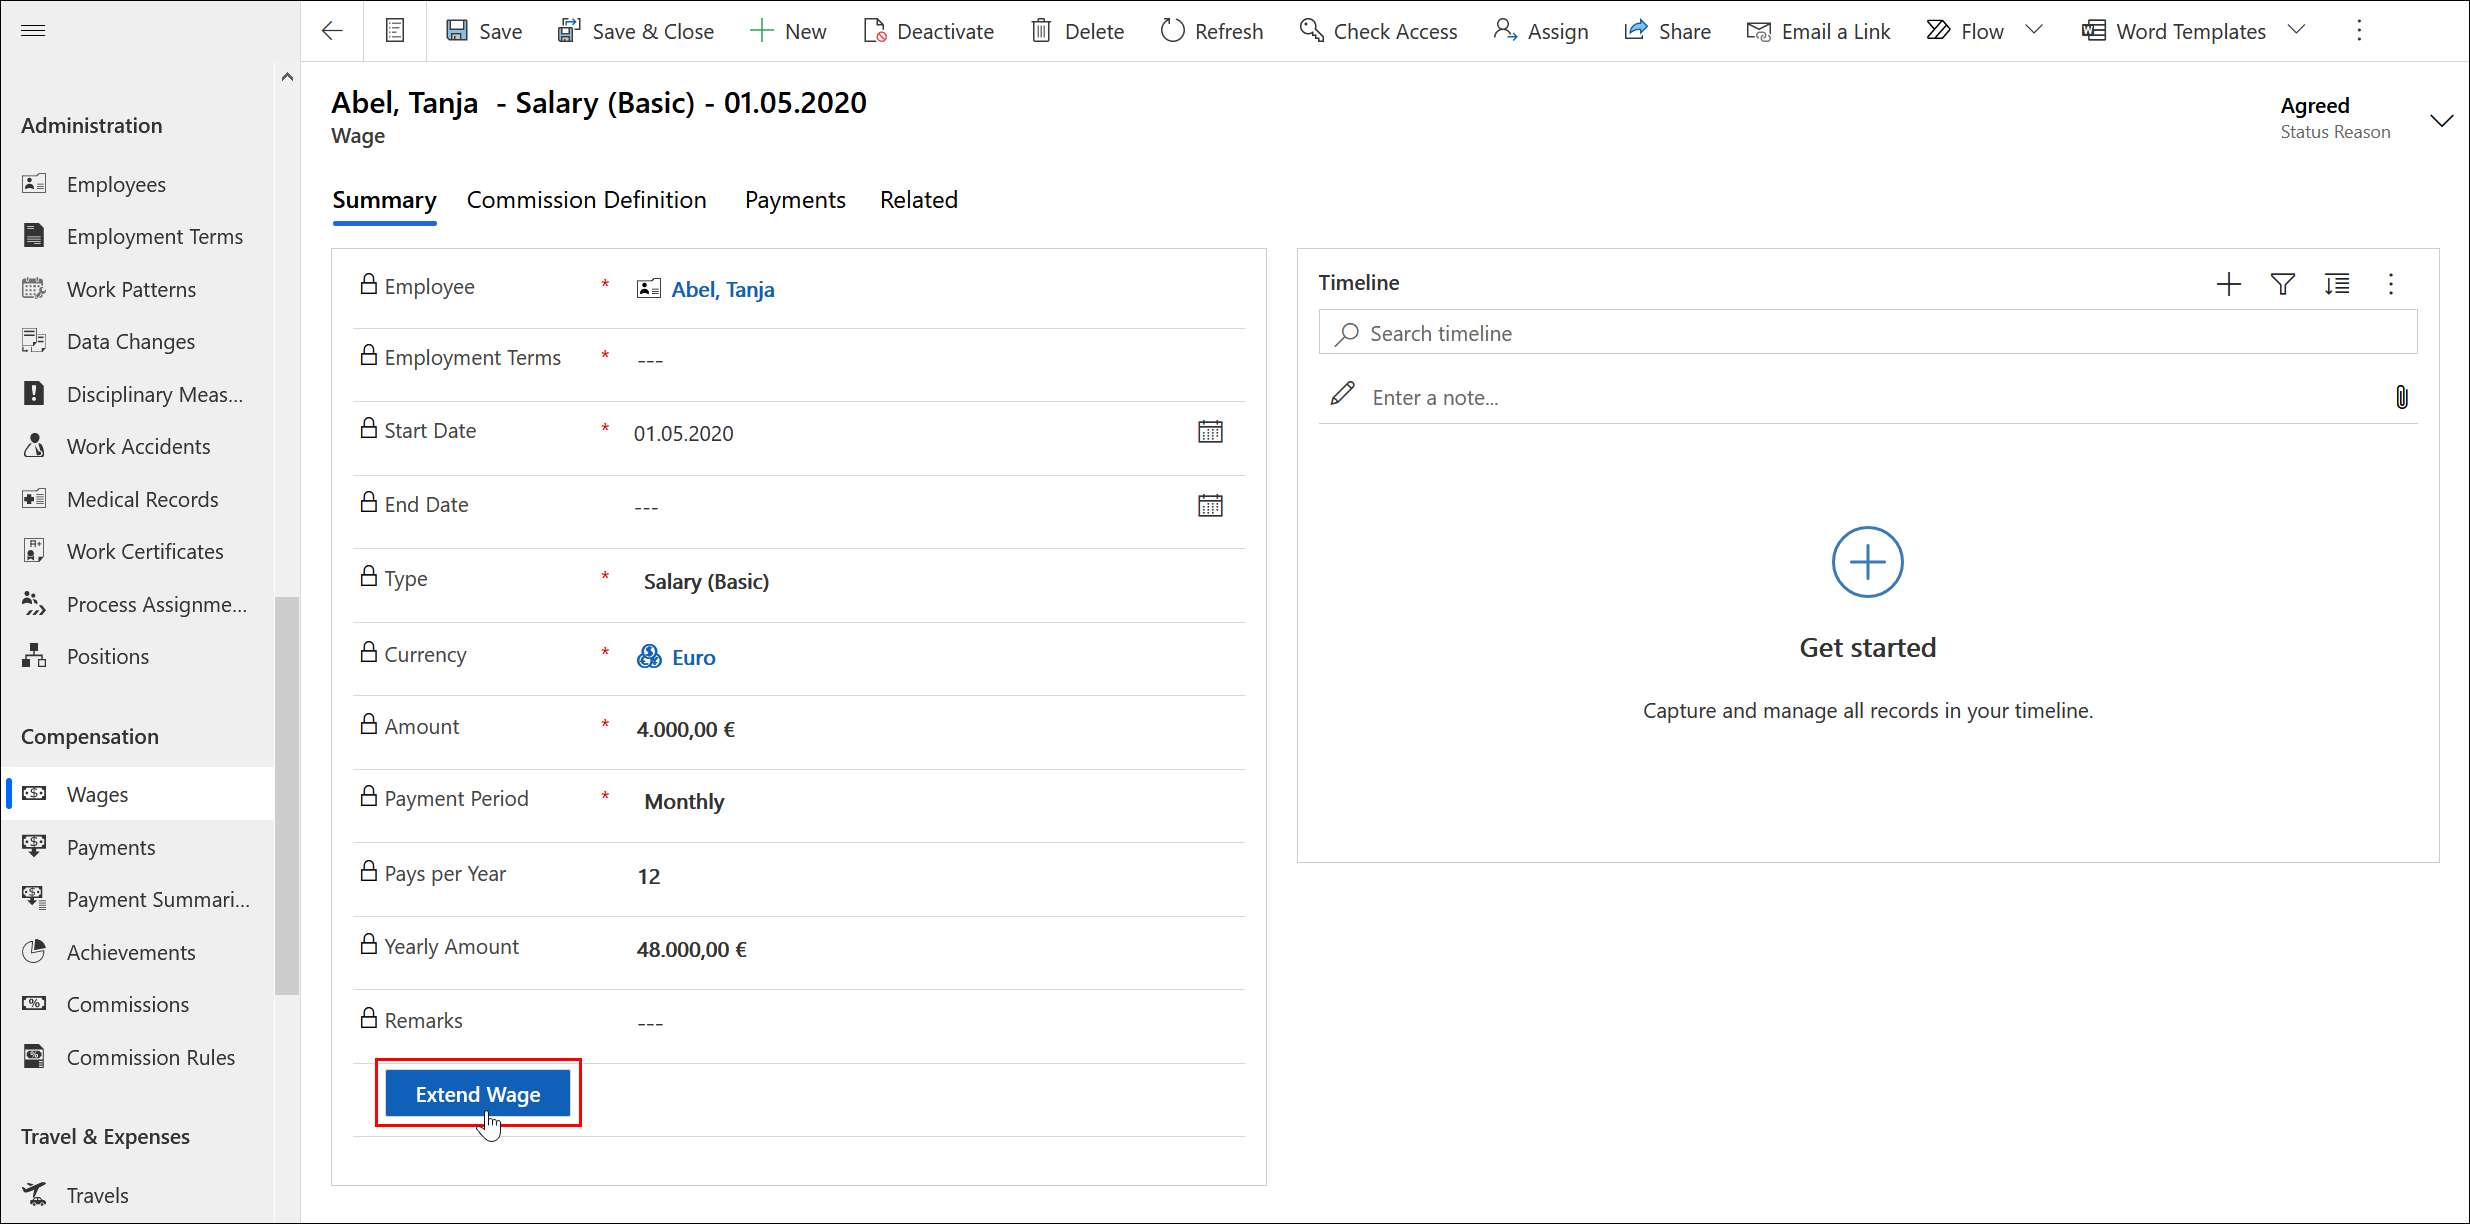
Agreed remunerations can no longer be changed. However, it may be necessary to add a wage without an end date, for example, to create a new agreed salary.
To do this, open the wage that you want to extend. Click the "Extend Wage" button.
A dialog opens. Set the End Date and select whether you want to create a new wage.
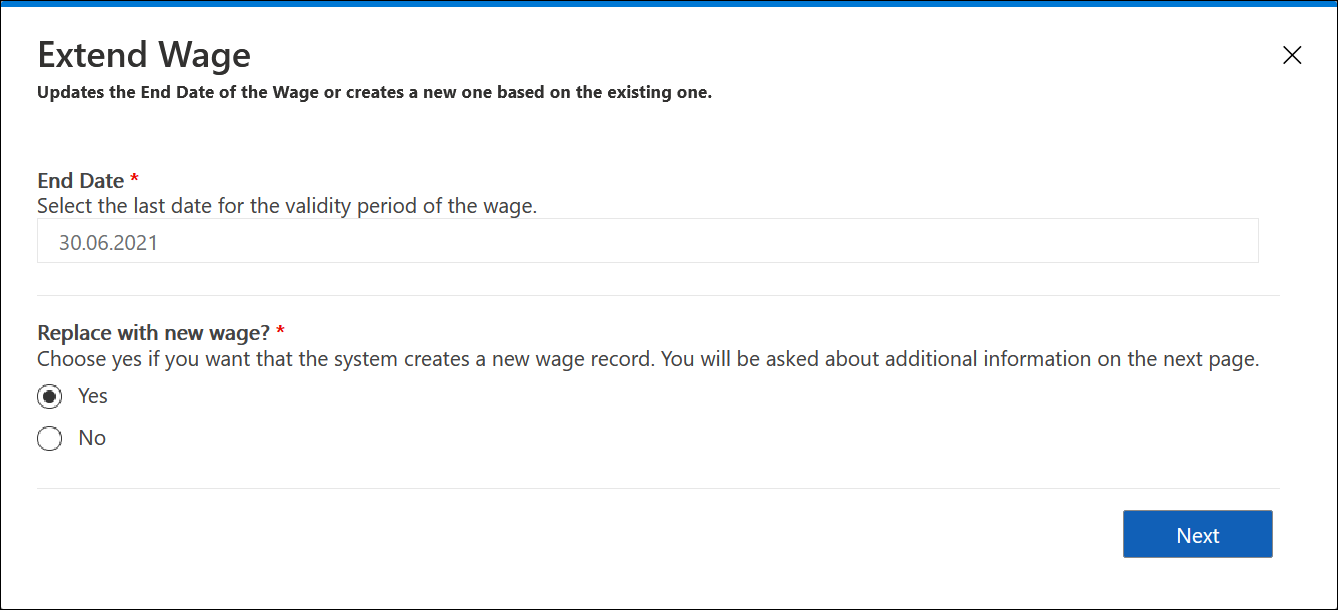
- Yes: Set the start and end date of the new wage. The start date defaults to the day after the end date of the previous wage.
- No: The wage will expire on the specified date, for example, if an employee is no longer to receive a commission or regular bonus.
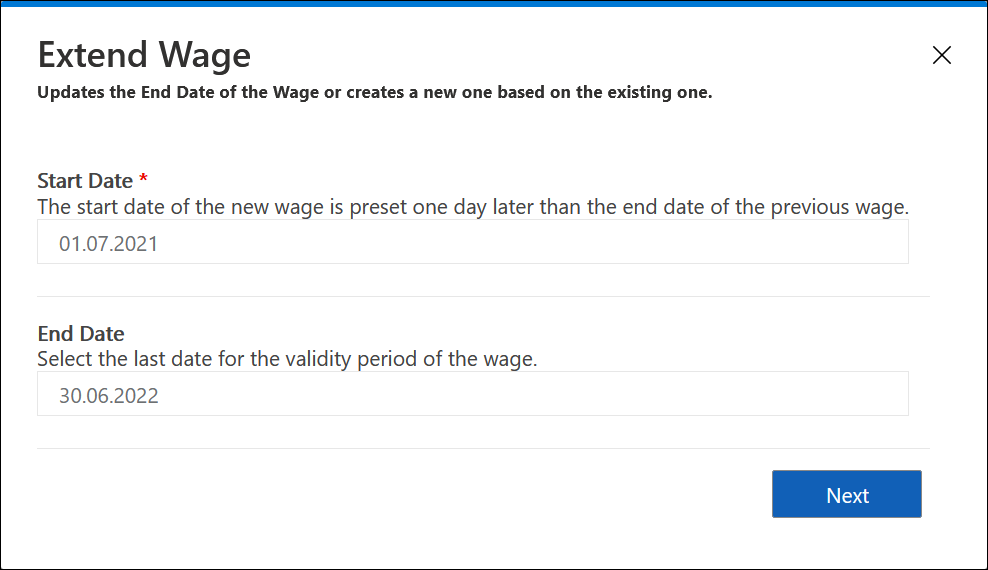
Confirm your entries by clicking Next.
The end date of the current contract is now entered in the background. If you previously selected "Yes, replace with new wage", a new wage is created with the data you defined. This wage is in the "Draft" status reason. Open the newly created wage, check and/or adjust it and then set the status reason to "Agreed".
Back to top | Back to table of contents
5. Manage Leave Entitlements
The employee's leave entitlements are automatically transferred from the employment terms template. If the employment terms does not start at the beginning of the year (specified in the employment terms template), the system automatically calculates how many leave entitlements the employee is entitled to on a prorated basis.
Employment terms with status reason Draft/Negotiation
As long as the employment term is in the "Draft" or "Negotiation" status reason, you can add additional leave entitlements here in the employment term by clicking on "New Leave Entitlement" under the Leave Entitlements section.

Then fill in all fields according to your specifications and click Save & Close.
For more information on the details of new leave entitlements, have a look at the following link: Base Data - Employment Term Template
Employment terms with status reason Valid
Once the employment term receives the status reason "Valid", you can add additional work entitlements directly from your employee's digital personnel file.
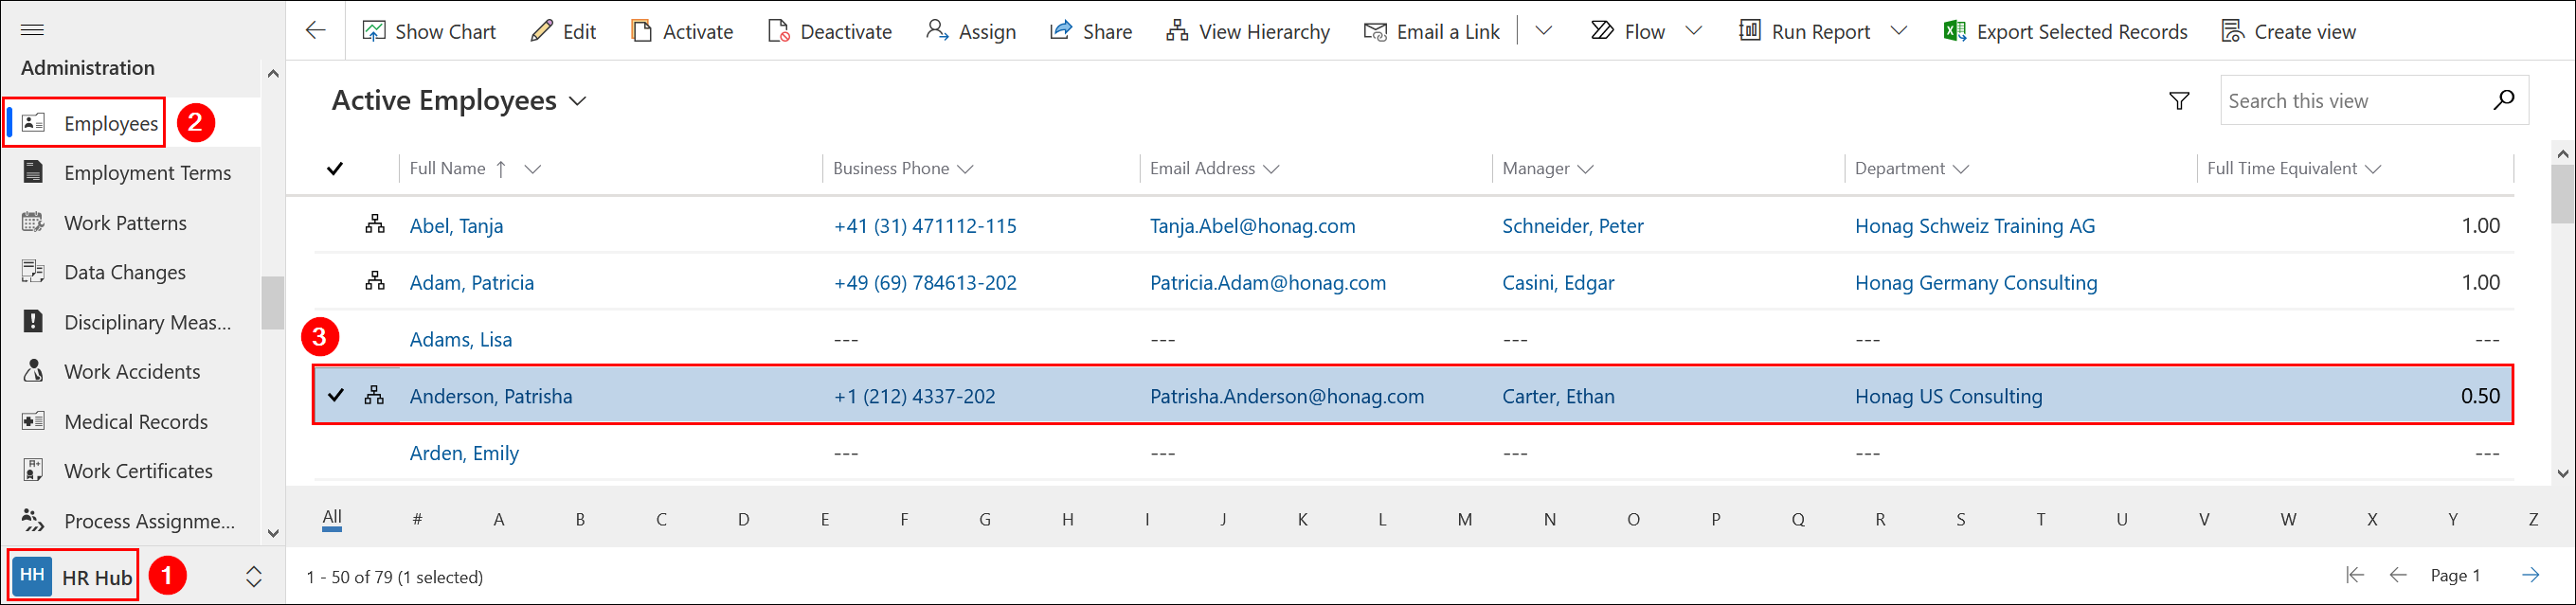
Navigate to HR Hub - Employees and open the entry of your desired employee by double-clicking.
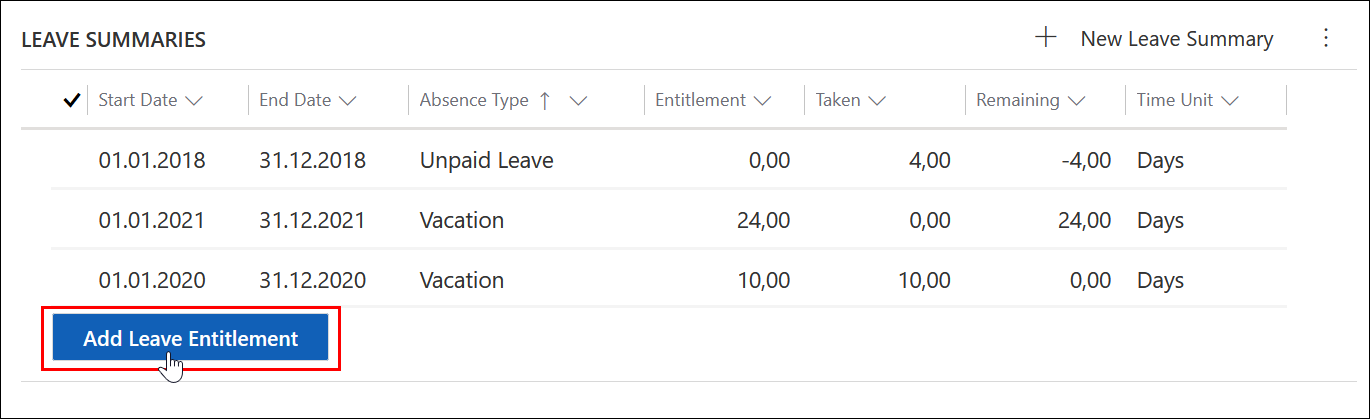
Switch to the "Leave & Absence" tab. Click the "Add Leave Entitlement" button under the "Leave Summaries" section.
Select the type of absence and the number of days (entitlement aamount) you want to add or subtract. Please assign only whole or half days for additional entitlements.
Define the start and end date for the validity period and select the date until when the absence entitlement should be transferred.
Select what should happen to remaining leave entitlements (process remaining). In addition, you can also specify a description for the leave entitlement.
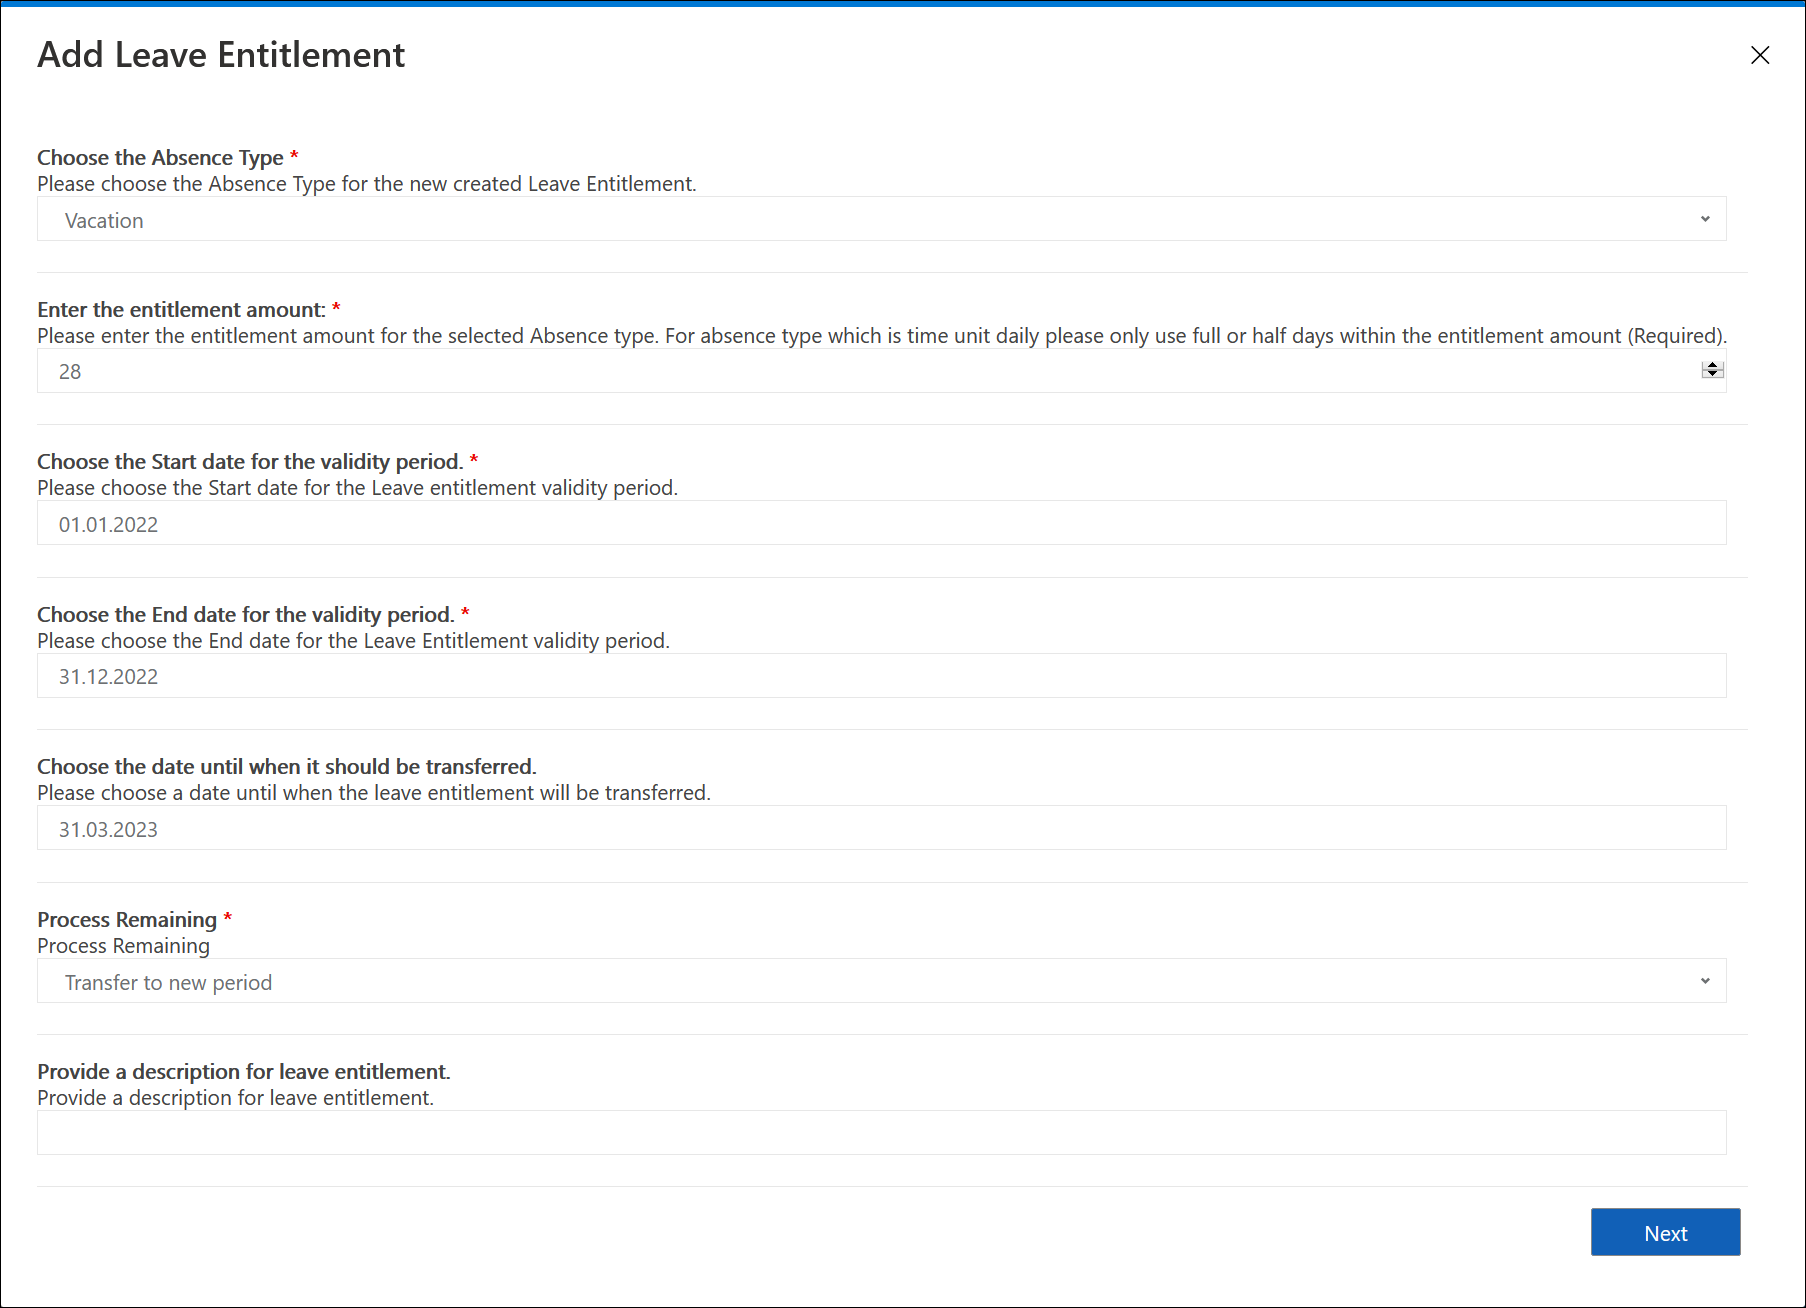
Once you have entered all the information, confirm your entries by clicking Next. The absence entitlement will now be added/subtracted.
When the action has been completed successfully, you can close the dialog. If necessary, please reload the page so that the leave entitlement you have just added is displayed in the overview.