
Wages
All features for preparing, managing and processing wages can be found in the navigation bar under Wages
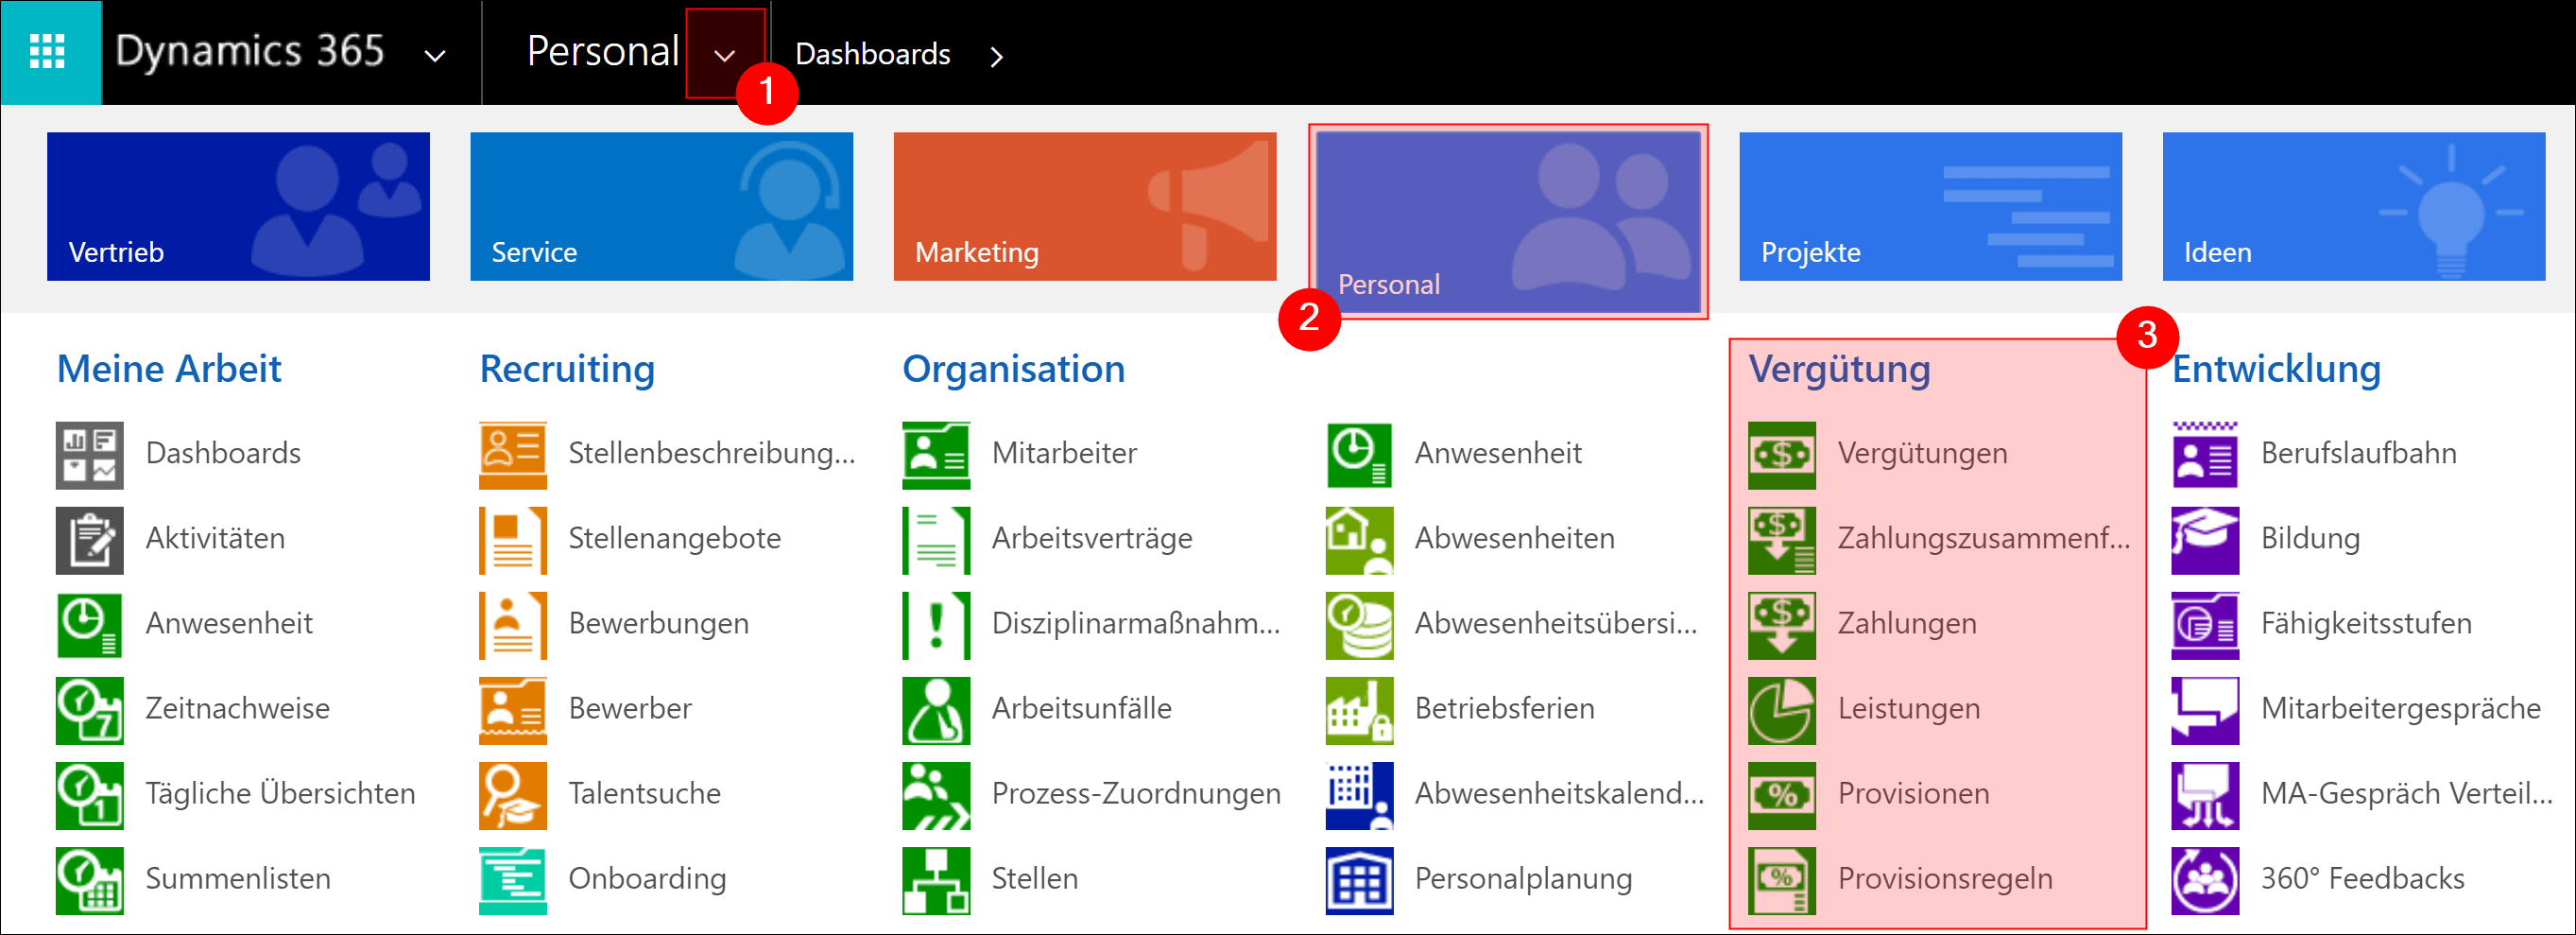
1. Wages
2. Payment Summaries
3. Payments
4. Achievements
5. Commissions
6. Commission Rules
1. Wages
This overview shows all wages for all employees, regardless of whether this is a draft, in process of negotiation, or an already approved wage. The relevant data is obtained from the employment terms.
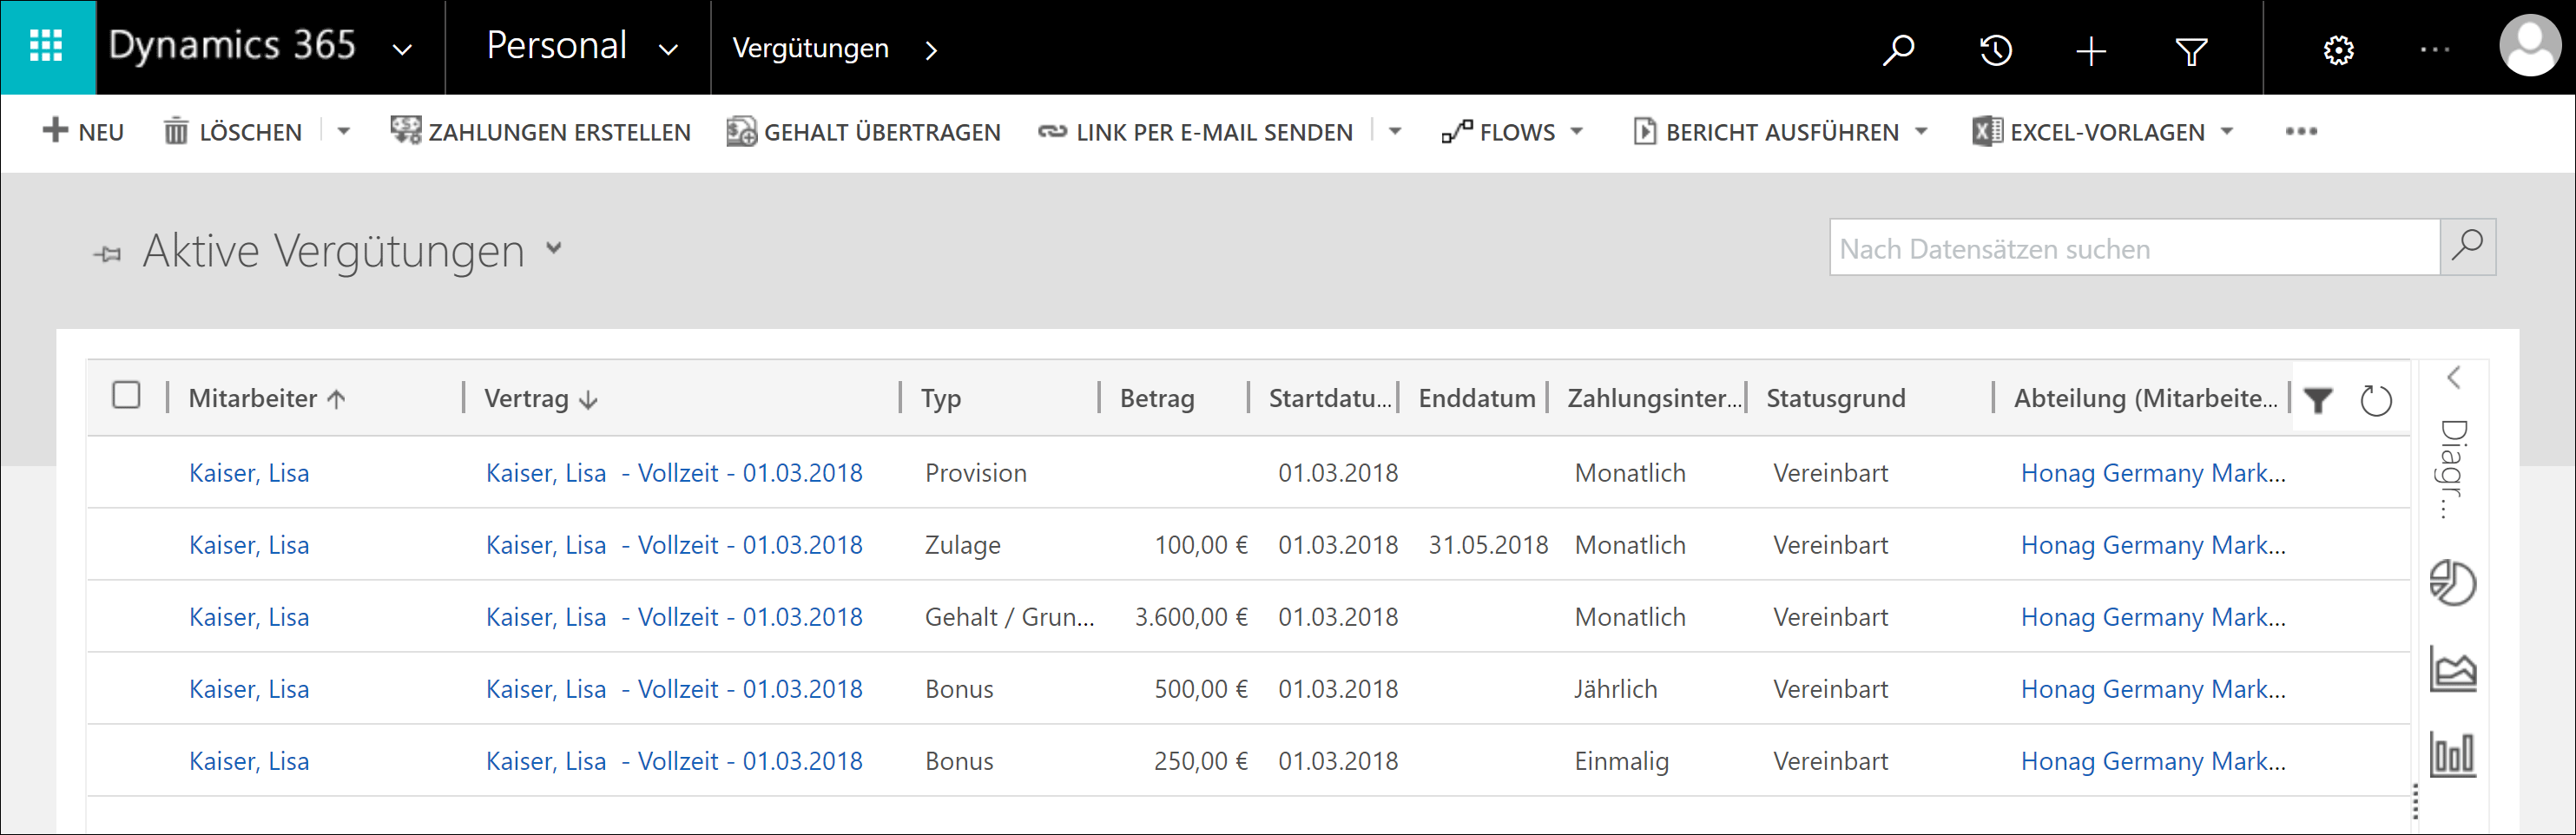
We recommend that you create new wages directly in the employee's employment terms, even if the terms are already valid. It is a great advantage that many fields are already filled in automatically and errors can therefore be avoided.
Detailed instructions can be found here: Employment Terms - Manage Wages
To create a new wage here, go to the menu bar and click on +NEW

Now fill in all fields. A detailed description of all fields and dependencies can be found here: Employment Terms - Manage Wages
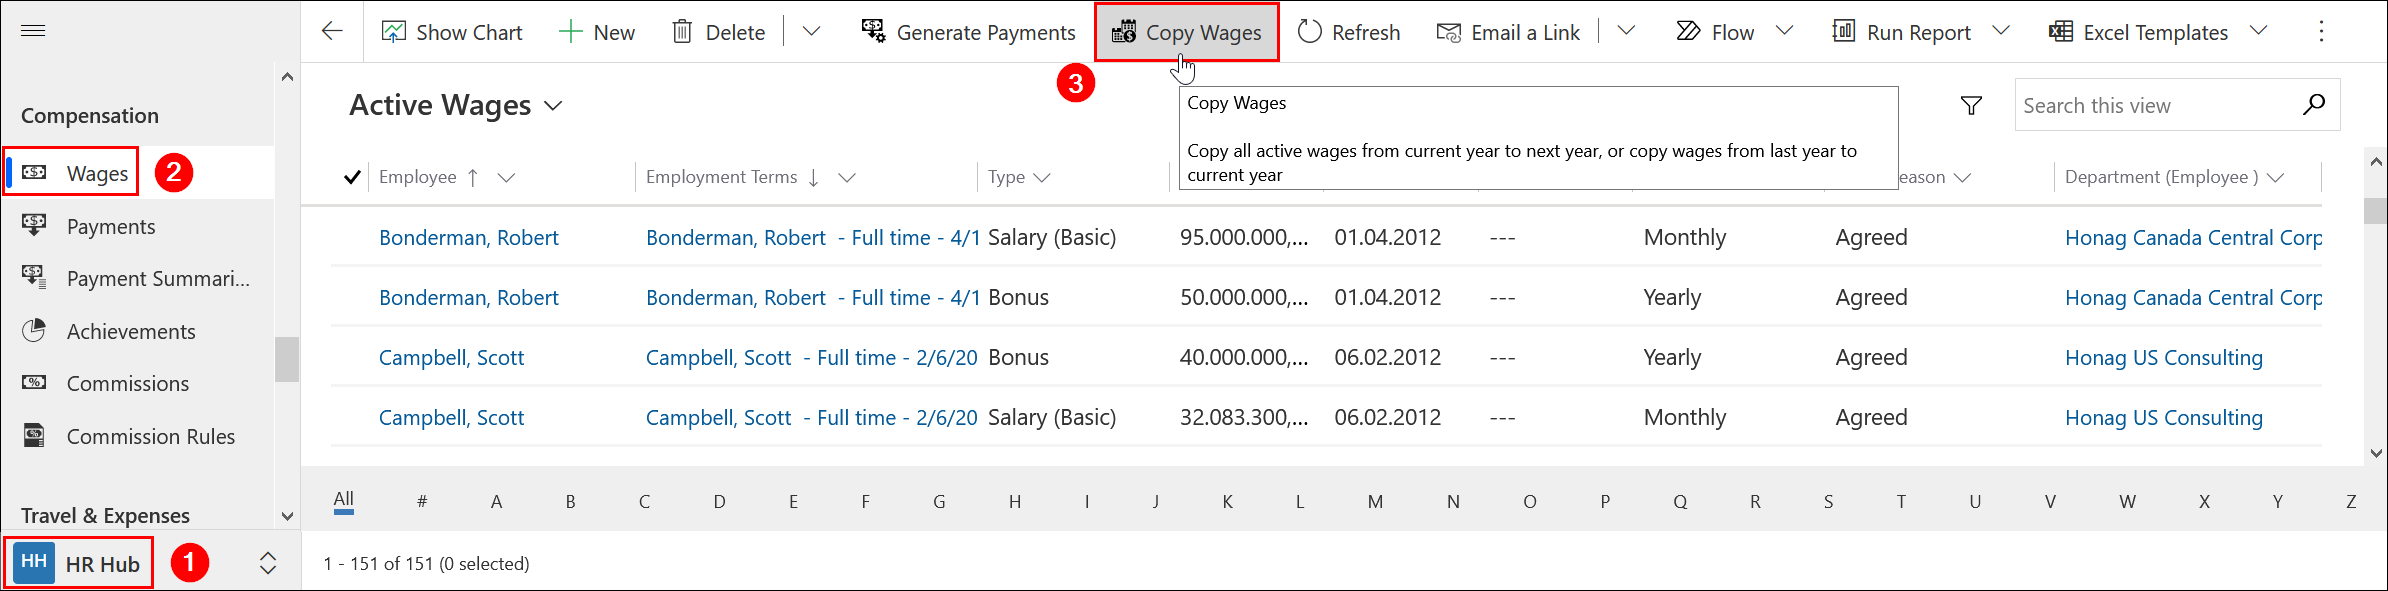
Copy wages to next year
You have the possibility to carry forward the agreed wages of your employees to the new year and increase them by a certain percentage. The function only transfers wages that have an end date.
To do this, navigate to HR Hub - Wages - Copy Wages.
It opens a new dialog. Fill in the fields according to your specifications:
- Period (Source): This field indicates whether you want to copy wages from Current Year to next year, or whether you want to copy wages from Last Year to current year
- Automatic Increase: You can specify the percentage which will be used to increase the new wages. If you select nothing or 0, then the same amount is taken over to the target period
- Include "One-Time" Wages: Determine if "One-time" wages are considered for copying
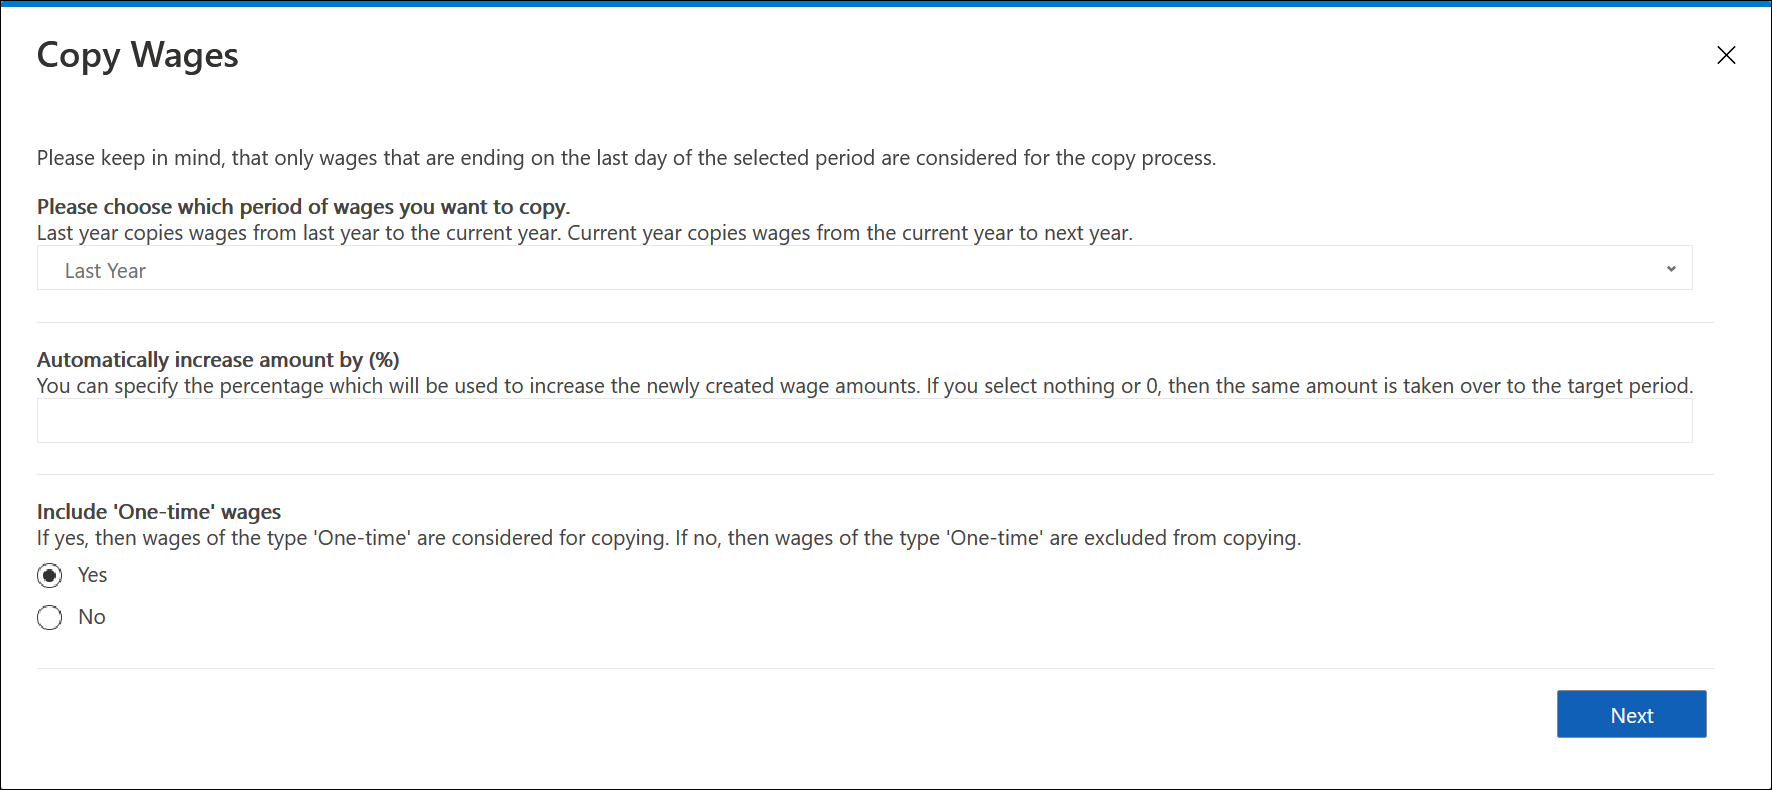
Click Next to confirm and then exit the dialog by clicking on Finish
Back to top | Back to table of contents
2. Payment Summaries
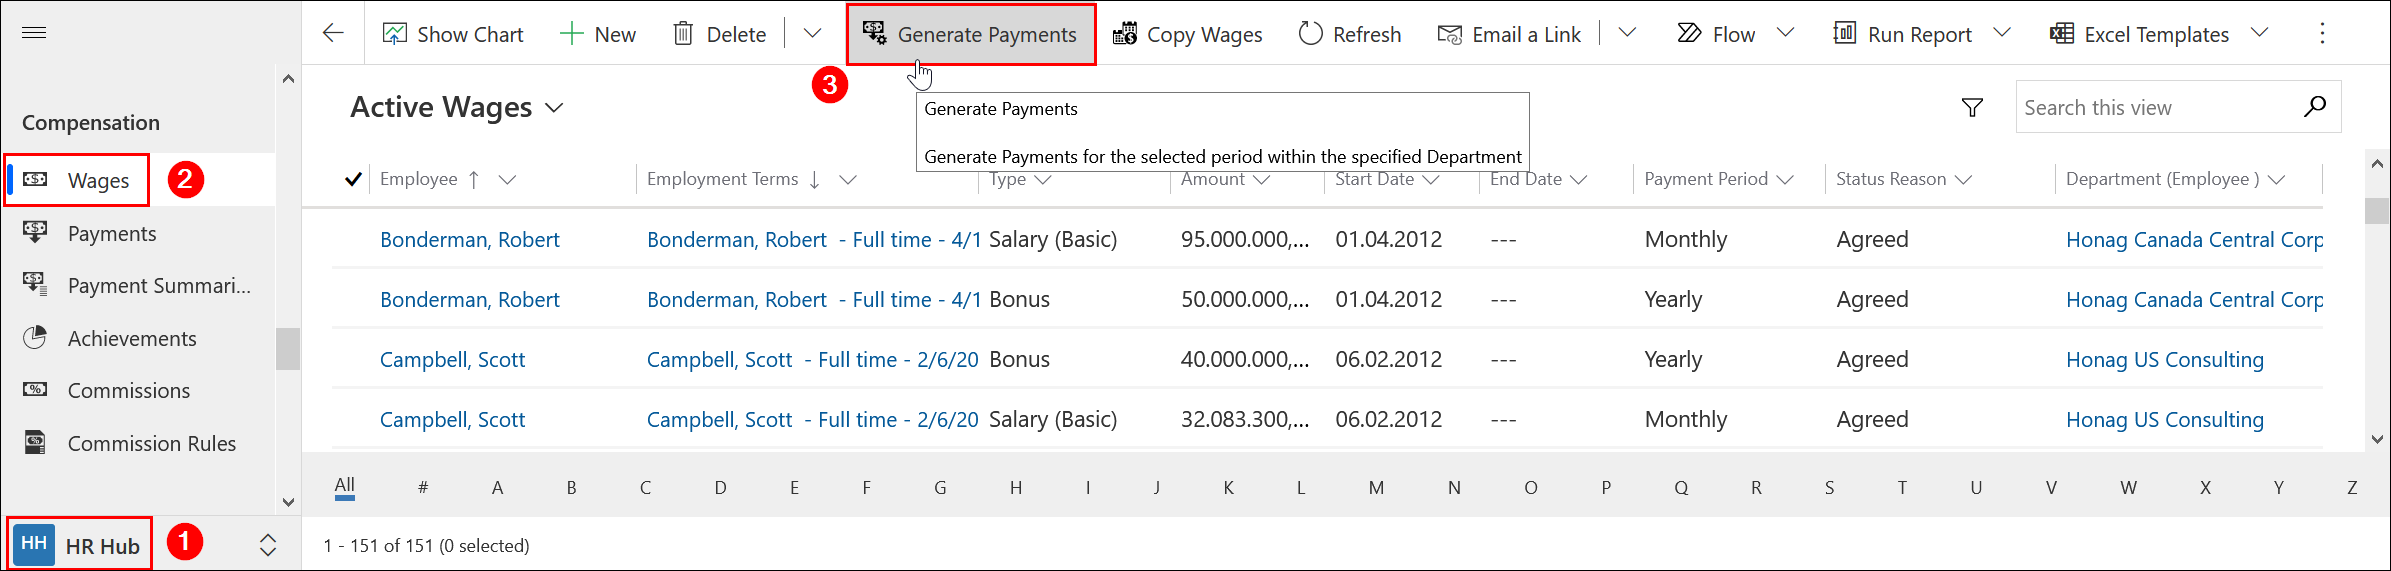
You can generate all Payments here in order to prepare them for payroll accounting. You simply execute a dialog which then prepares everything automatically.
Navigate to HR Hub - Wages - Generate Payments.
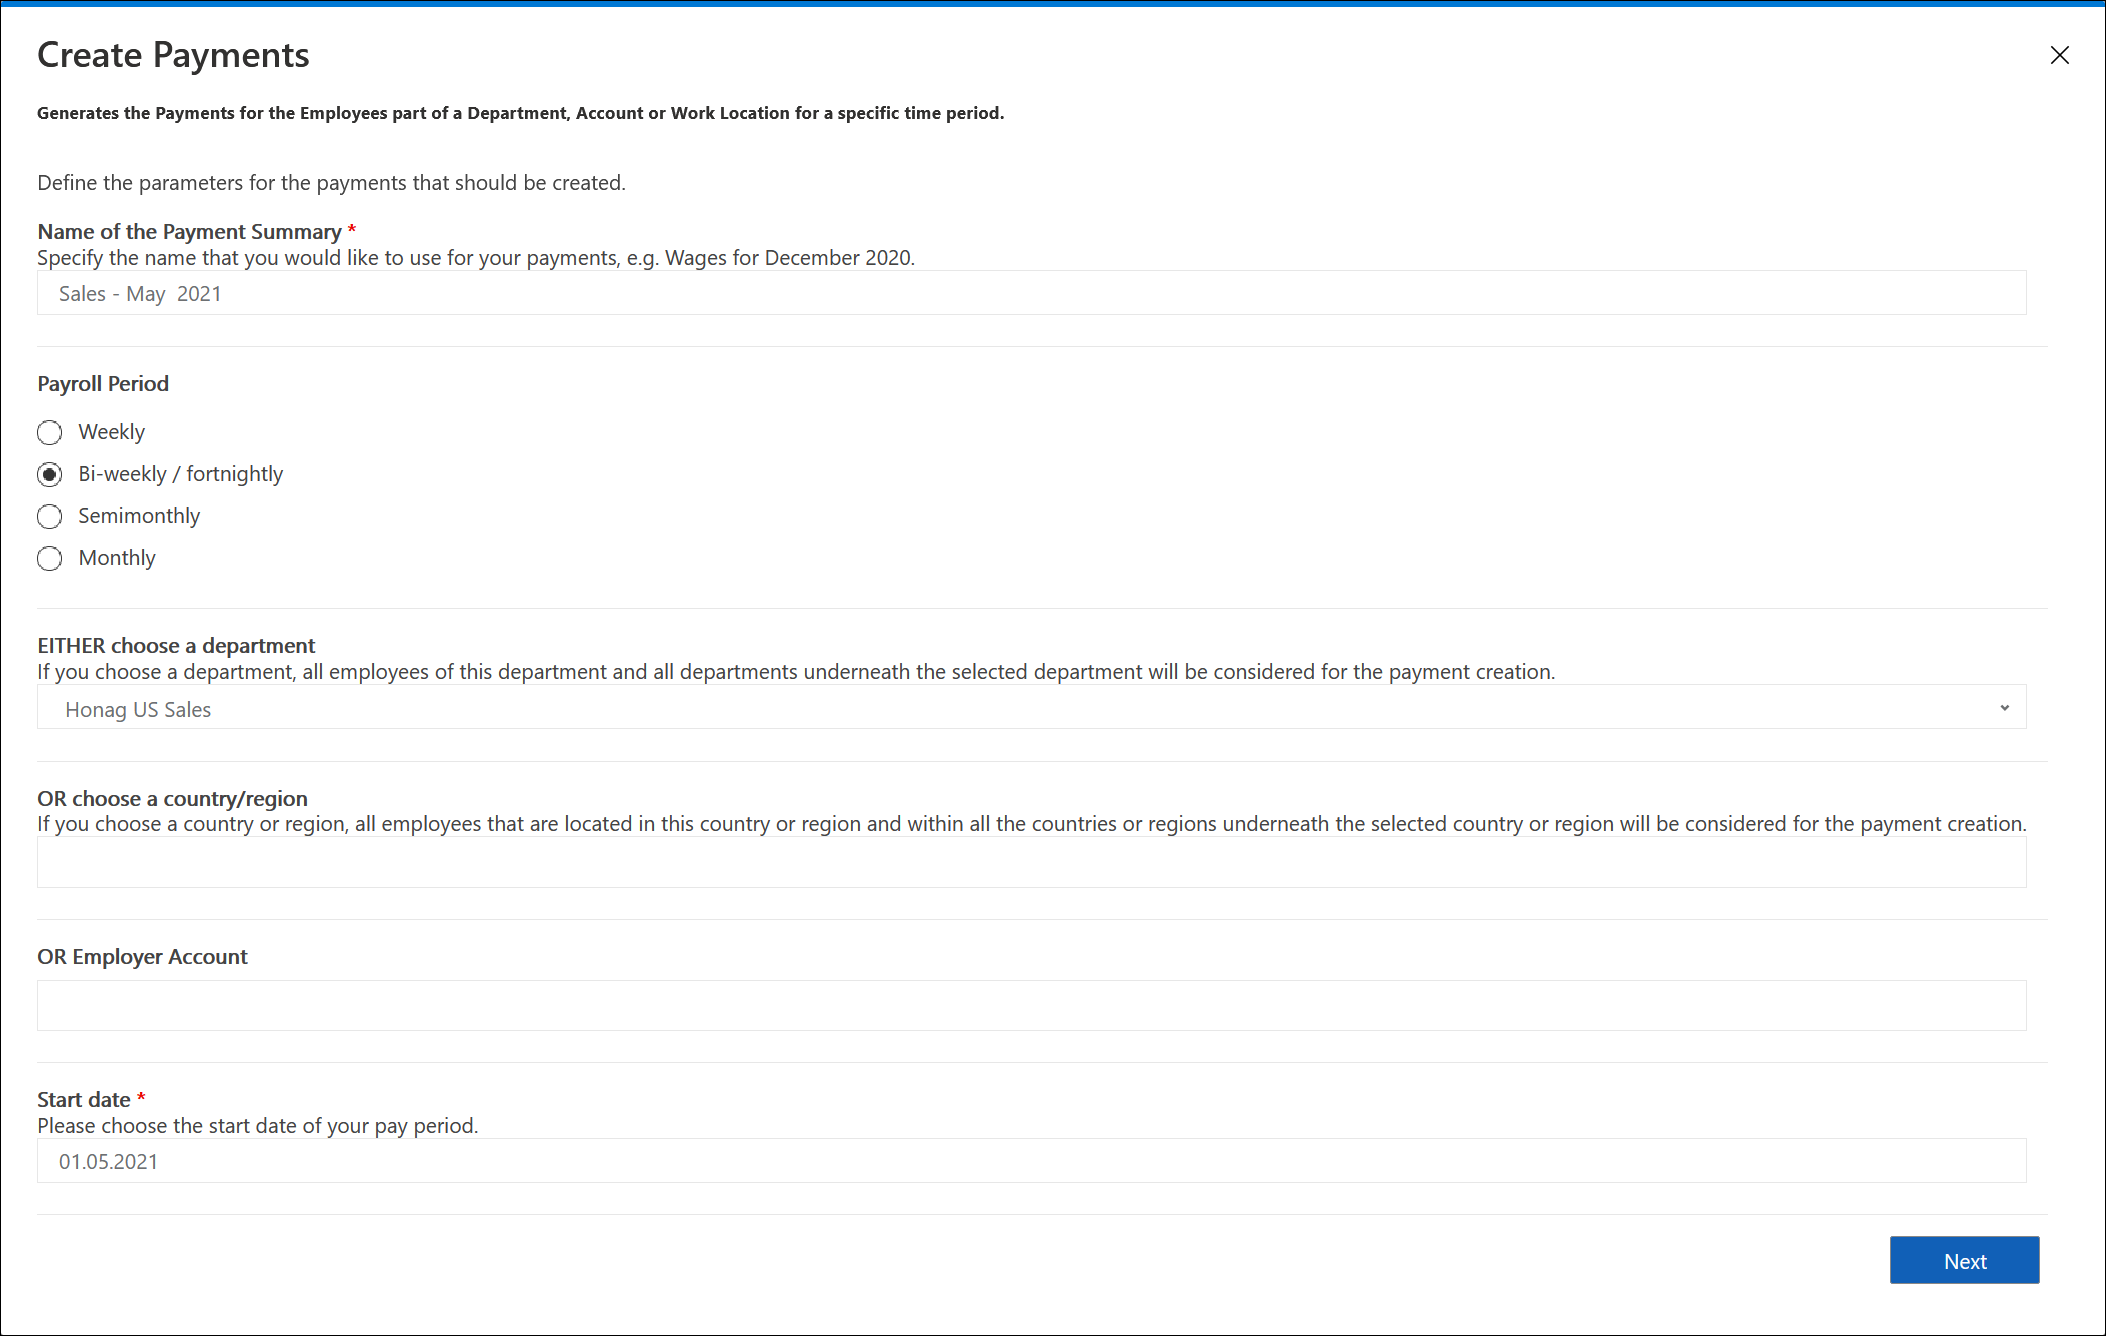
It opens a new dialog. Fill in all fields according to your specifications:
- Name for Payment Summary: Enter a descriptive name, such as Wages May 2021 or Department - May 2021 or Payroll - Temporary worker May 2021
- Payroll Period: Select the payment generation period
- Option 1: Department: Select the department for which you want to generate payments. All employees of this department and its subordinate departments are taken into account
- Option 2: Country/Region: Select the region for which you want the payments to be generated. All employees in this region and the subordinate regions are taken into account
- Option 3: Employer Account: Select the employer for which you want to generate payments
- Start date: Select the start date of the payment period
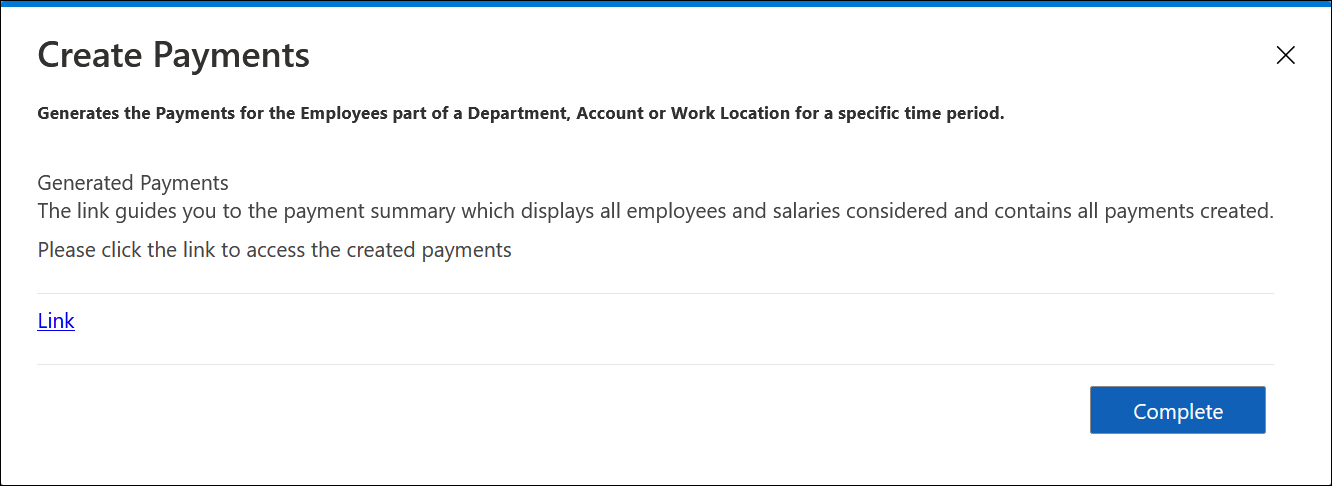
Confirm your entries with Next. Another dialog will open. You can either close this dialog by clicking on "Complete" or click on the link to return to the payment summary you just created. You can view and edit your payment summaries at any time under the "Payment summaries" entity.
Depending on the previously selected payroll period, the system automatically recognizes which period must be calculated. If, for example, you want to create a monthly payroll run for June, you could also enter June 14 as start date. You will still receive the payroll for the entire month of June.
Section: General
The system displays the general information that you specified during generation as well as the total amount. The payment summary can also be approved here. You only need to enter an authorized person in the field.
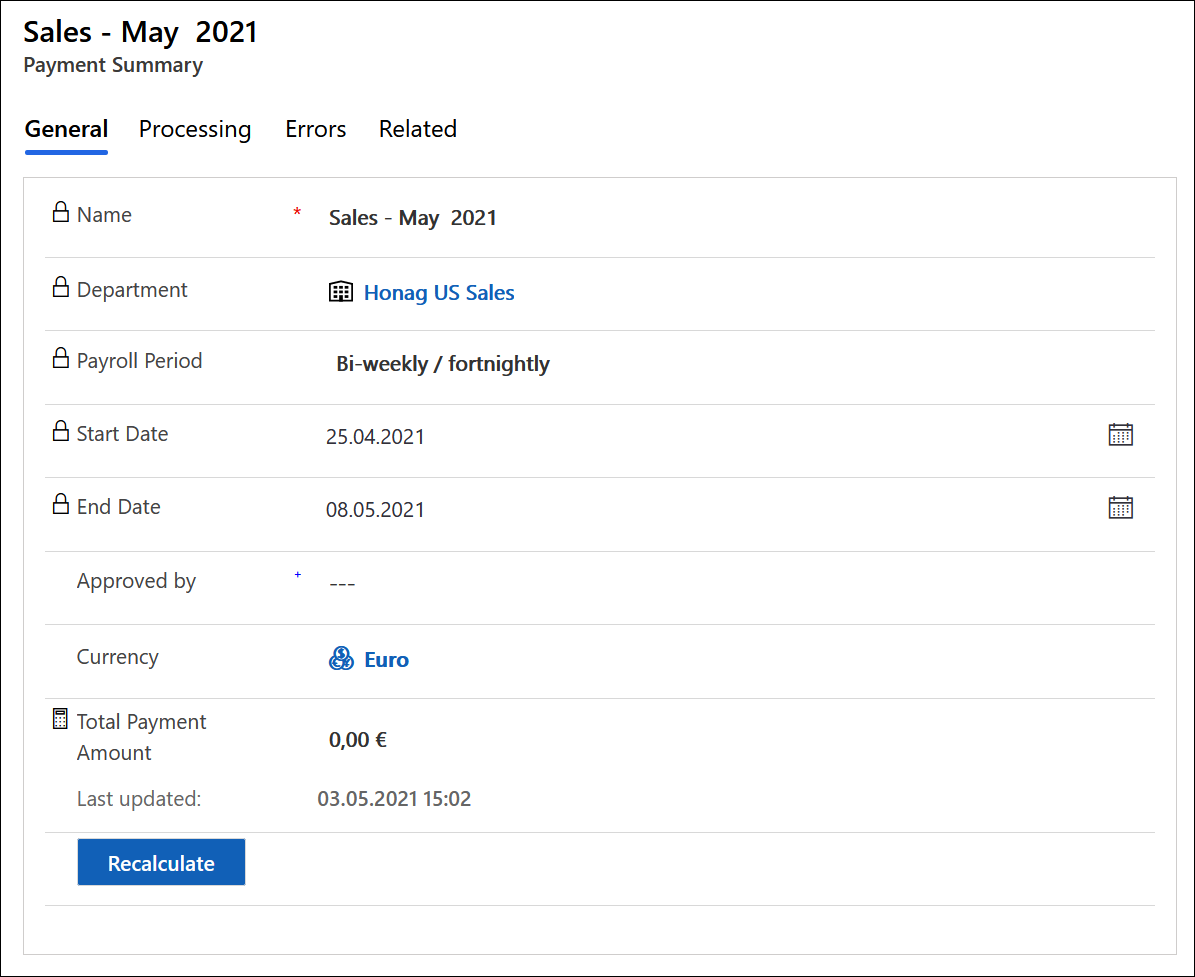
The graphical overview shows how the total amount is composed of the different payment types.
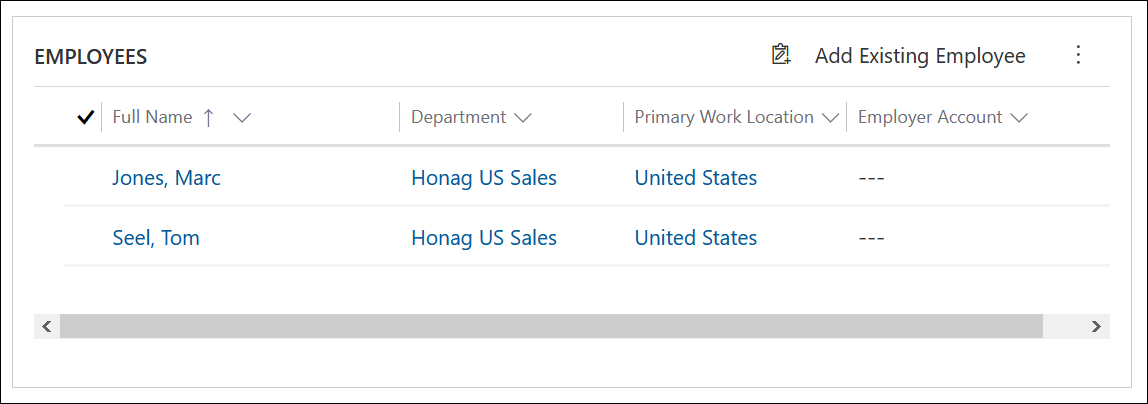
The sector Employee shows who has been included in this payment summary and is based on the selection you made during generation. Here you also have the option of adding or removing individual employees manually.
If you have made changes, you can recalculate the payment summary. To do this, click on the "Recalculate" button under the general information.
A new dialog for recalculating the payments opens. Select "Yes" and confirm with Next.

When the recalculation of payments is complete, close the dialog and refresh the page.
Section: Processing
The system displays a list of all agreed wages that are assigned to the employees of this payment summary.
The payments, that you can also see in a detailed list, are automatically calculated from these wages.
Section: Error
This section may show payments with errors during generation.
Export payments
After having checked and approved all the data, you can export a detailed overview of the payments for payroll accounting. Here you can find a detailed description of how to create a template and then export it: Payment Summaries - Create and Use Templates
Back to top | Back to table of contents
3. Payments
Here you will find a detailed list of due payments. These are calculated while the payment summaries are generated and can also be found there.
If you open an entry with a double-click, you get a more detailed view.
If the open entry is a commission, you will exactly see how the amount was calculated in detail.
Back to top | Back to table of contents
4. Achievements
In this function, you will first get an overview of all achievements that are eligible for commission calculations.
To enter further achievements, go to the menu bar and click on +NEW.

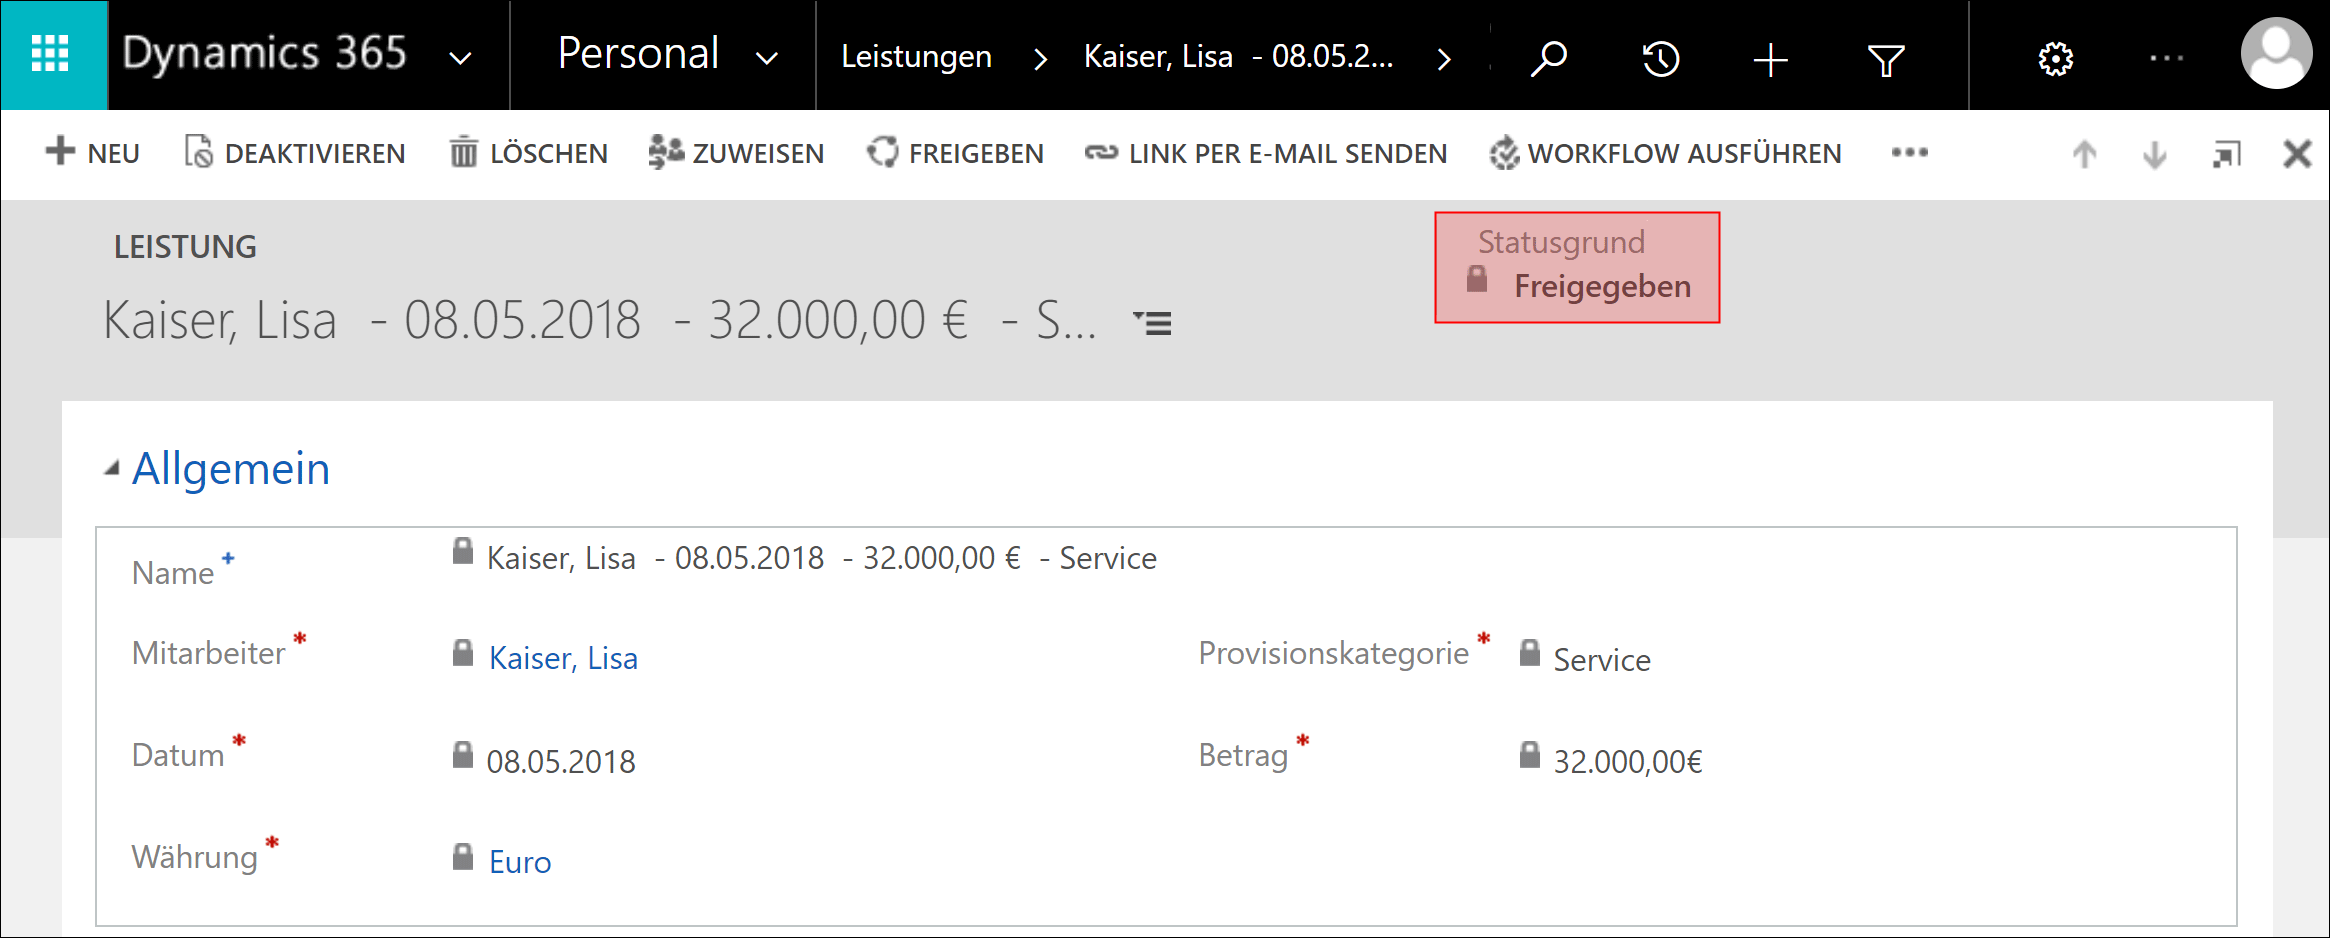
Enter the required data here, such as the name of the employee, the commission category, as well as the achievement amount. The name is automatically generated from this information as soon as you save the record.

As soon as all the information is entered correctly, you can set the status to Approved. As a result, all fields are locked and can no longer be changed. From this point on, this achievement is also taken into account when payments are generated.
After generating a payment and taking this achievement into account, you will also obtain a detailed list of the payments in the area Commissions. You can also see how much was earned in the corresponding commission level.

Back to top | Back to table of contents
5. Commissions
This function provides you with an overview of all commissions and is therefore an excellent basis for a detailed evaluation. At a glance, you get the most important details about earned commissions, their underlying achievement and the way they were calculated.

As soon as you open one of the data records with a double-click, you obtain further information that breaks down the commission to the last detail. Here you can see the date of the underlying achievement, the amount, which commission level was used for the calculation, and of course the resulting amount.
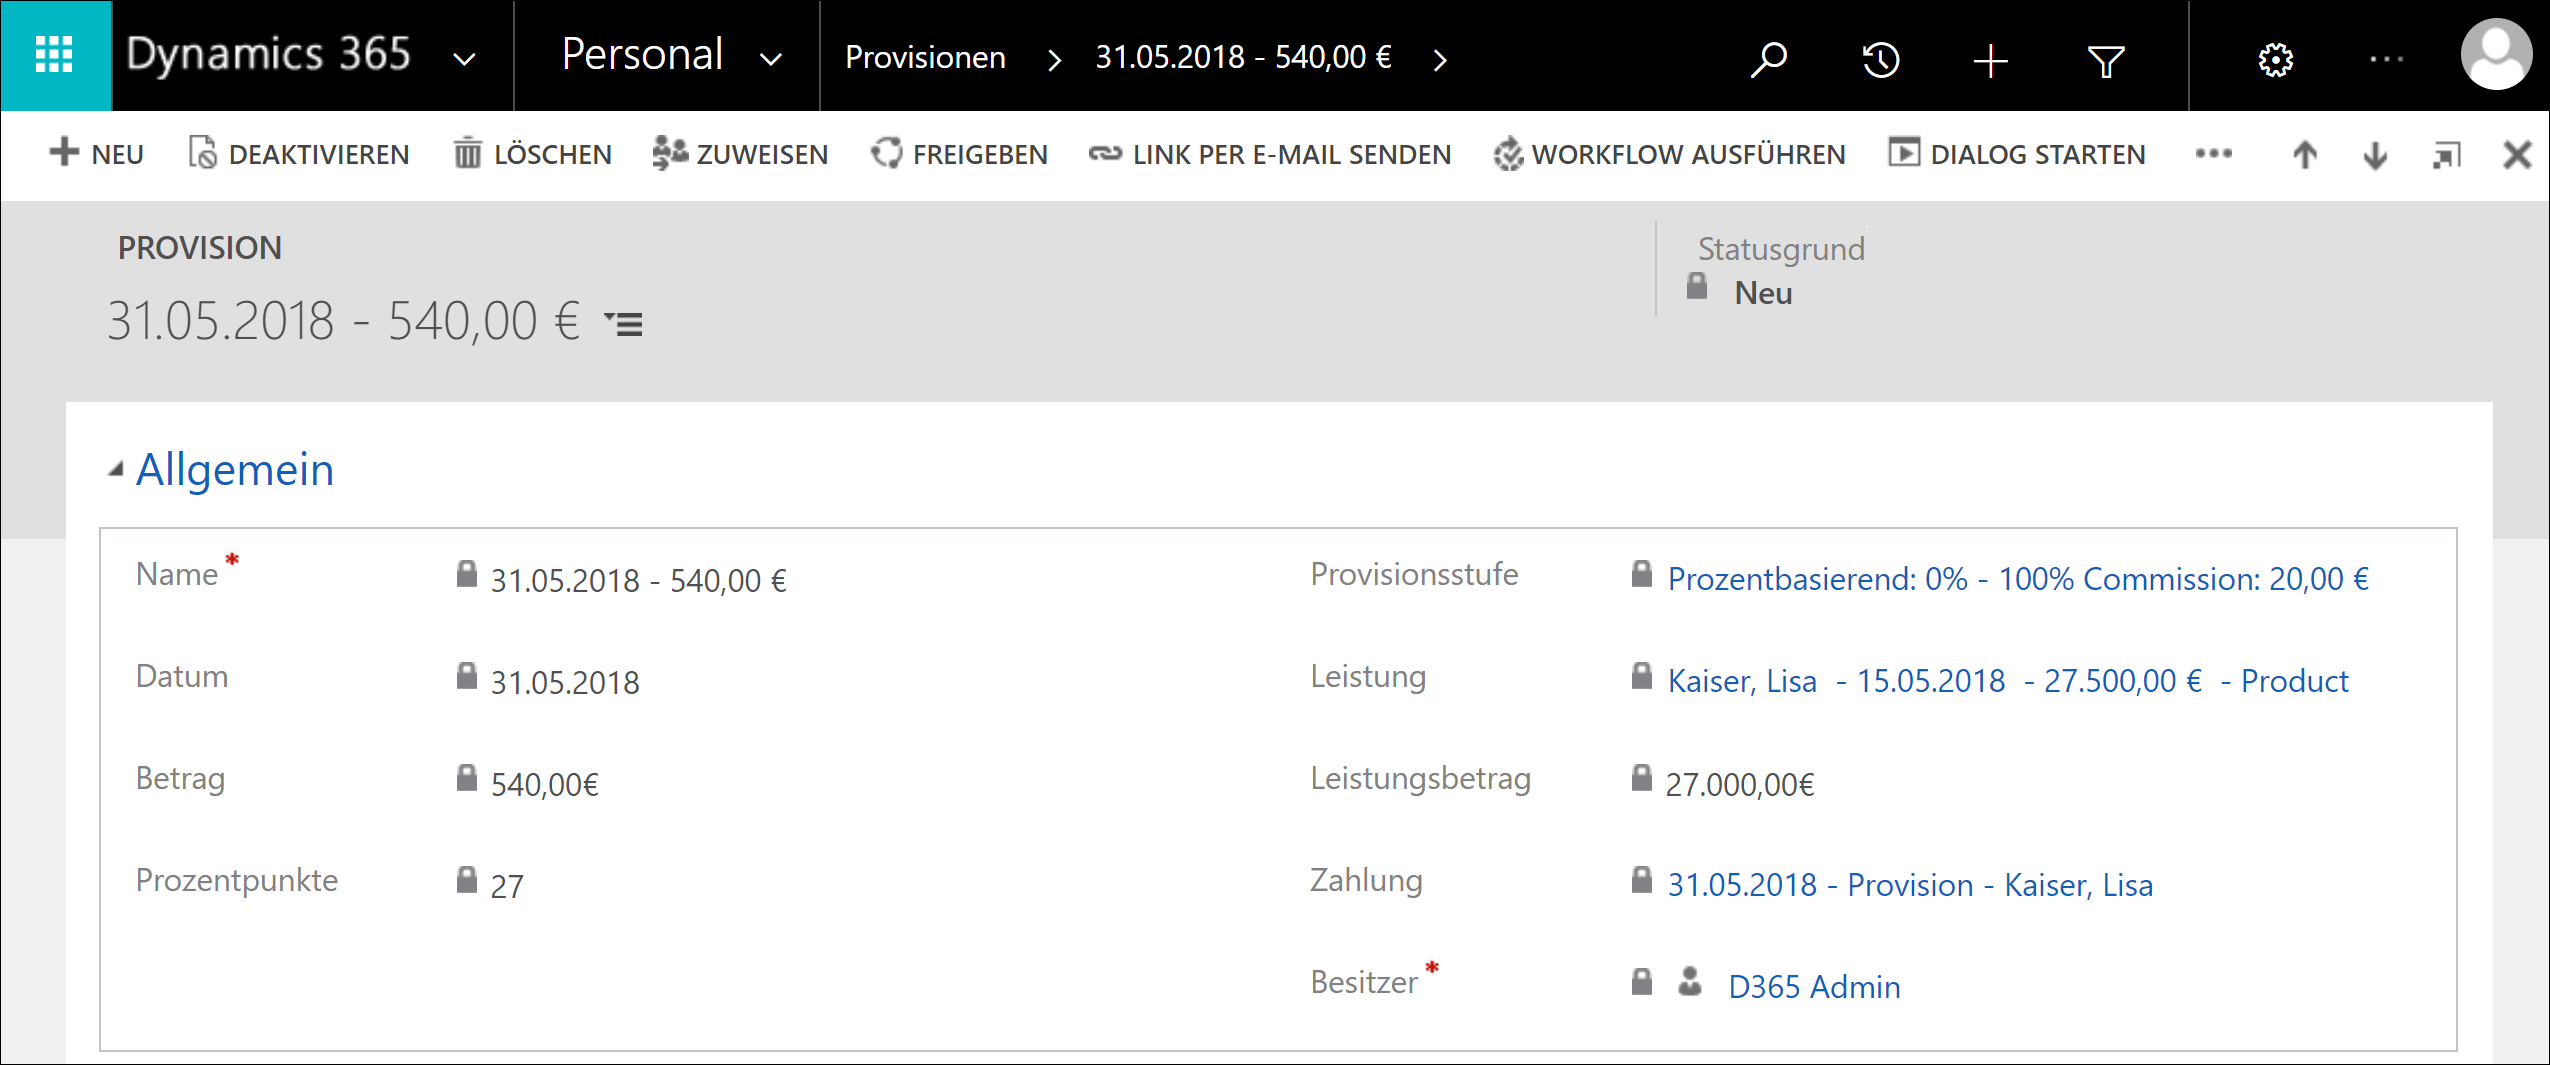
This detailed view is for evaluation purposes only and cannot be changed. All values displayed here are directly taken or calculated from the achievements and commissions.
Back to top | Back to table of contents
6. Commission Rules
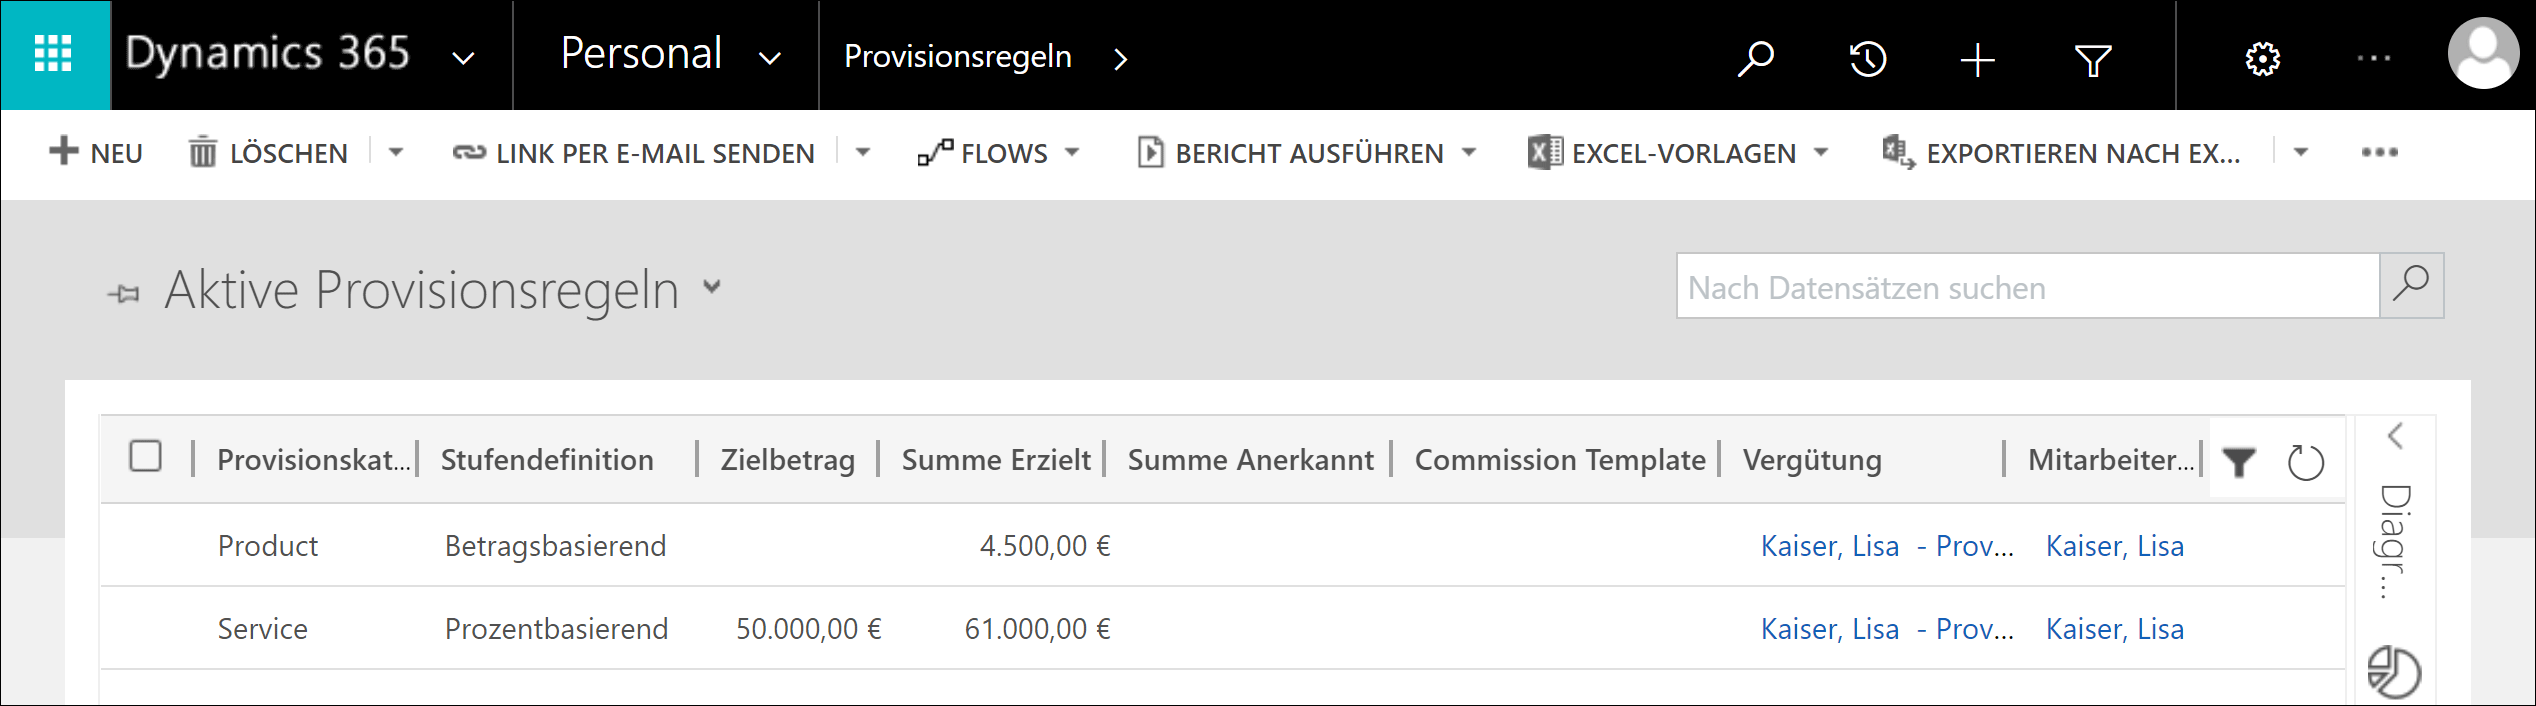
This function provides you with an overview of all commission rules used and is therefore an excellent basis for a more detailed evaluation. At a glance, you get the most important details, such as the agreed target amounts, the current progress and of course the employees to whom this rule is assigned.
If you open one of the entries with a double-click, you will also obtain a detailed breakdown of the commission calculation based on the achievements made and recognized.
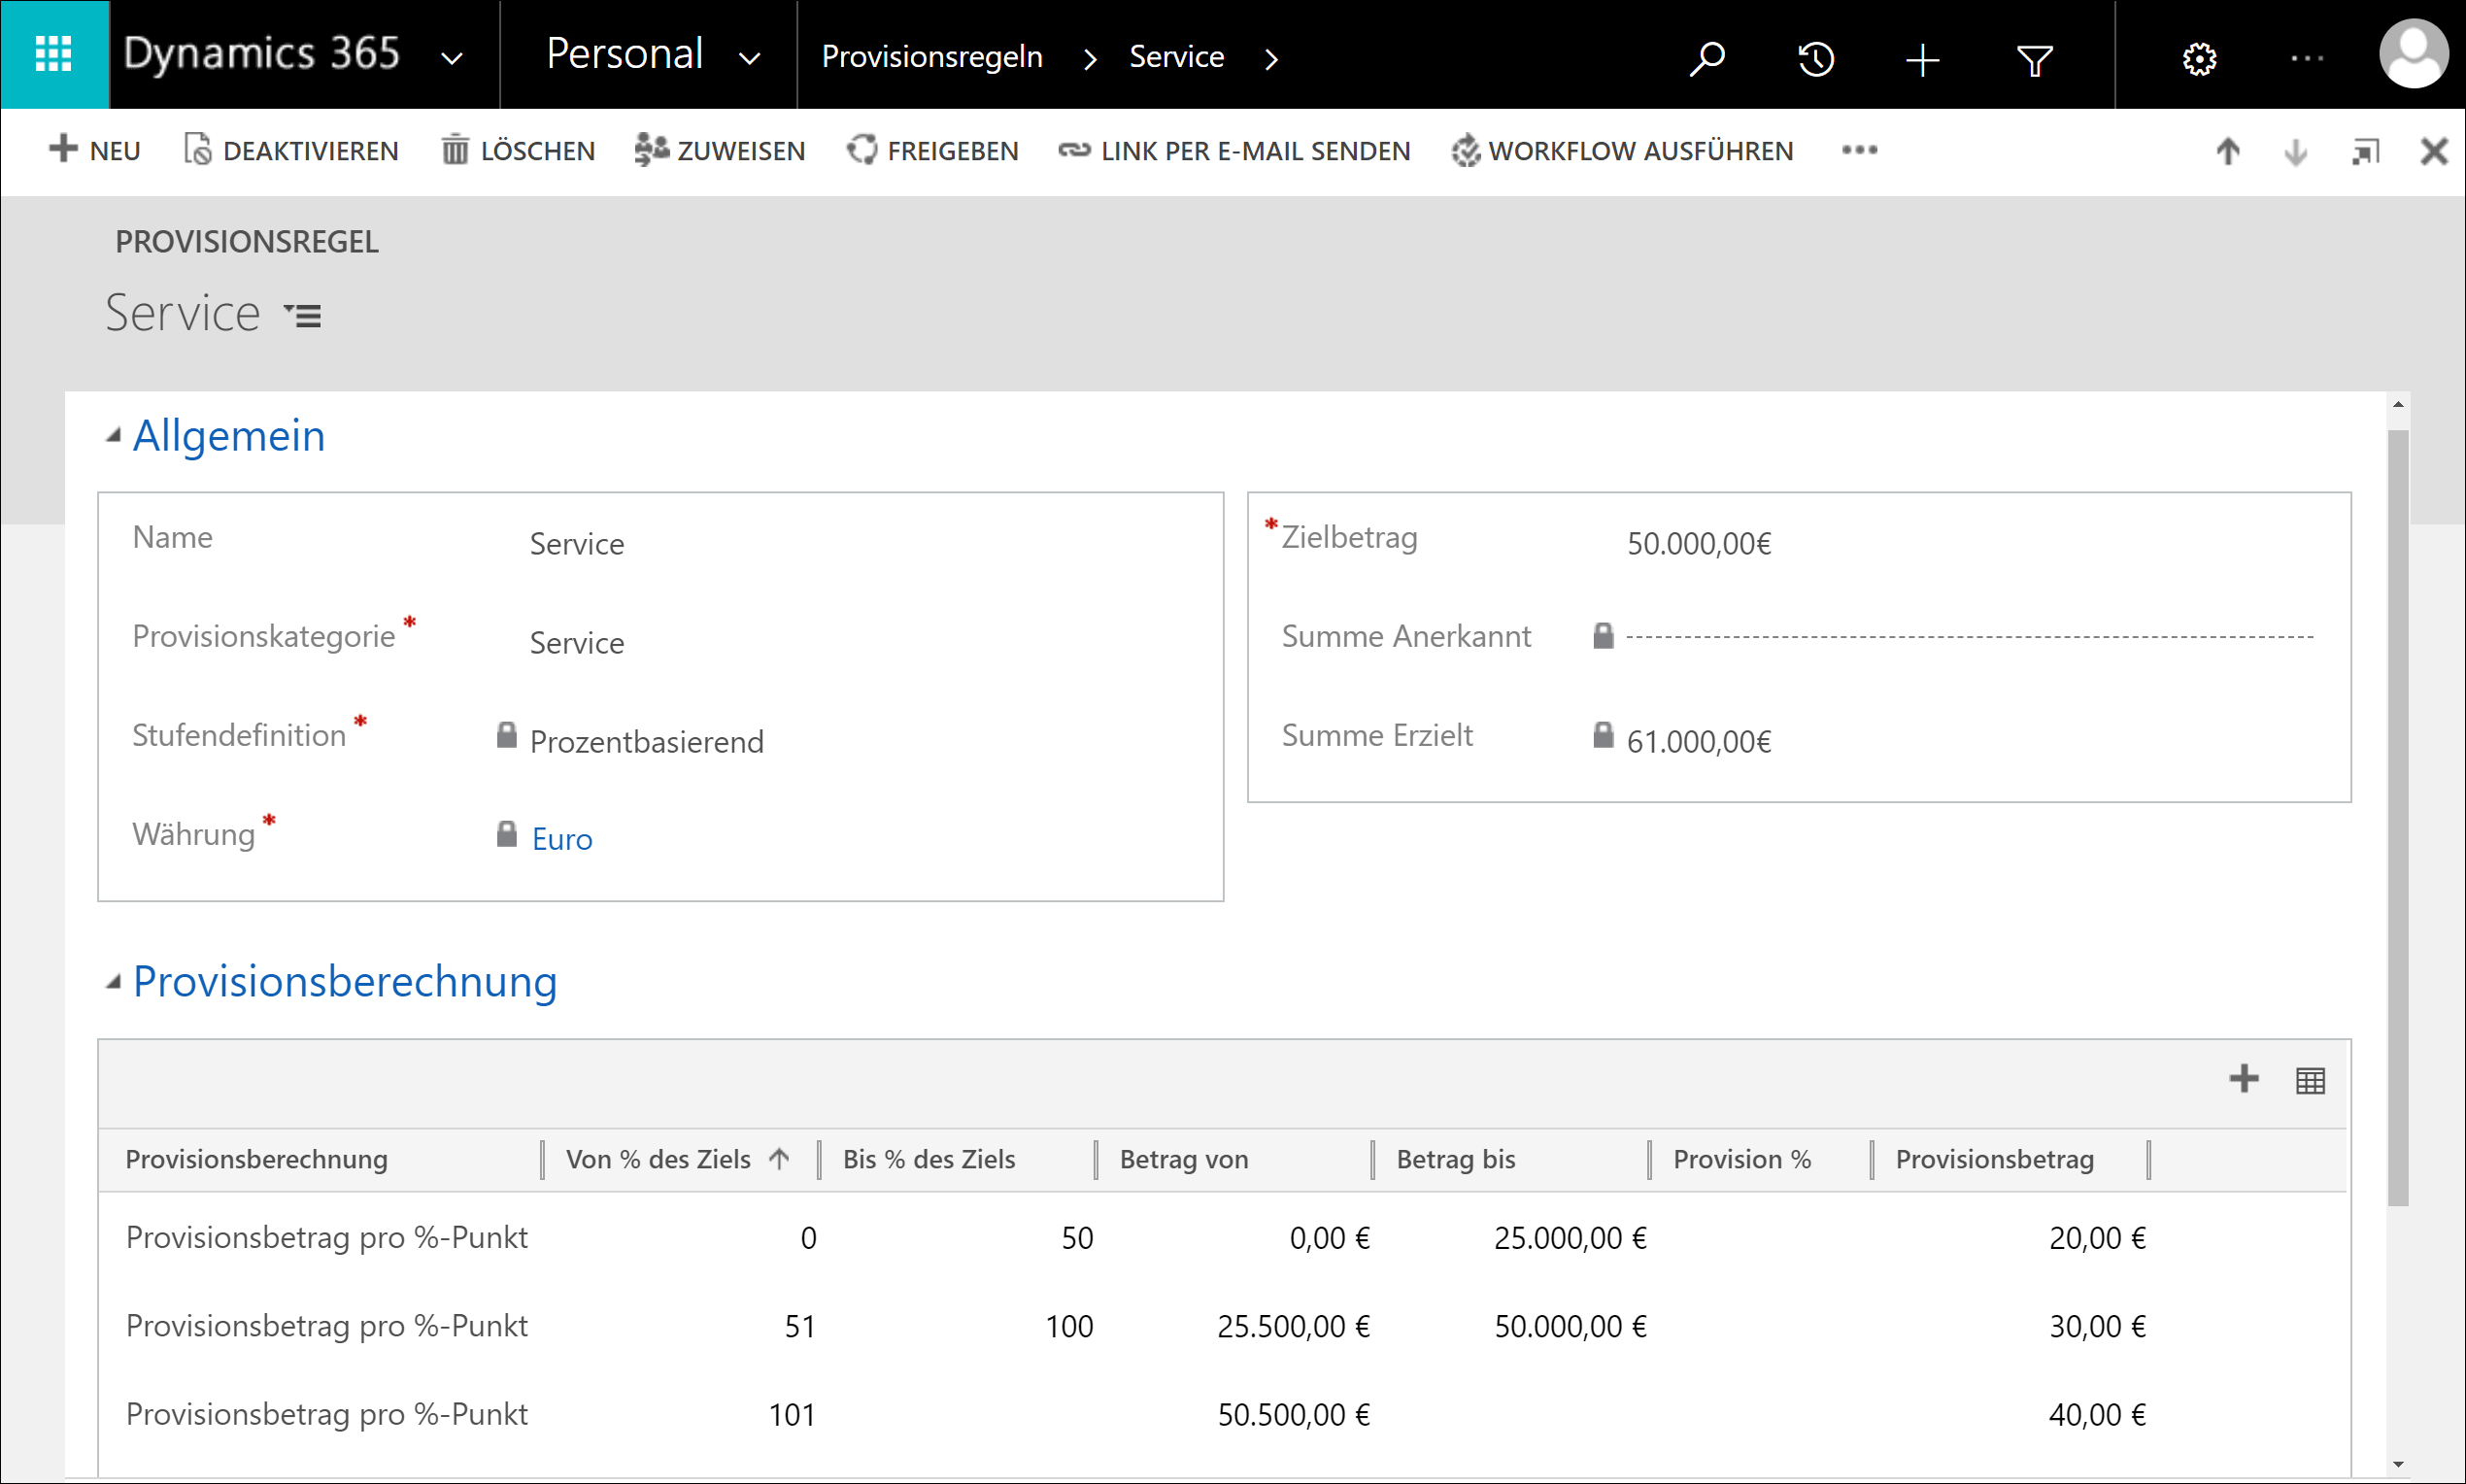
The amount achieved so far is automatically transferred from the Approved Achievements. The Recognized Amount is automatically entered here as soon as a payment has been made.
The entire record is automatically updated as soon as another achievement is approved.