Create a template for Payment Summaries in Excel

Objective

In the tutorials section of this module, you already learned how to create a Payment Overview which you can send to your Payroll Providers. That tutorial covers a simple way of accumulating all the data your Payroll Provider needs with just a few clicks.

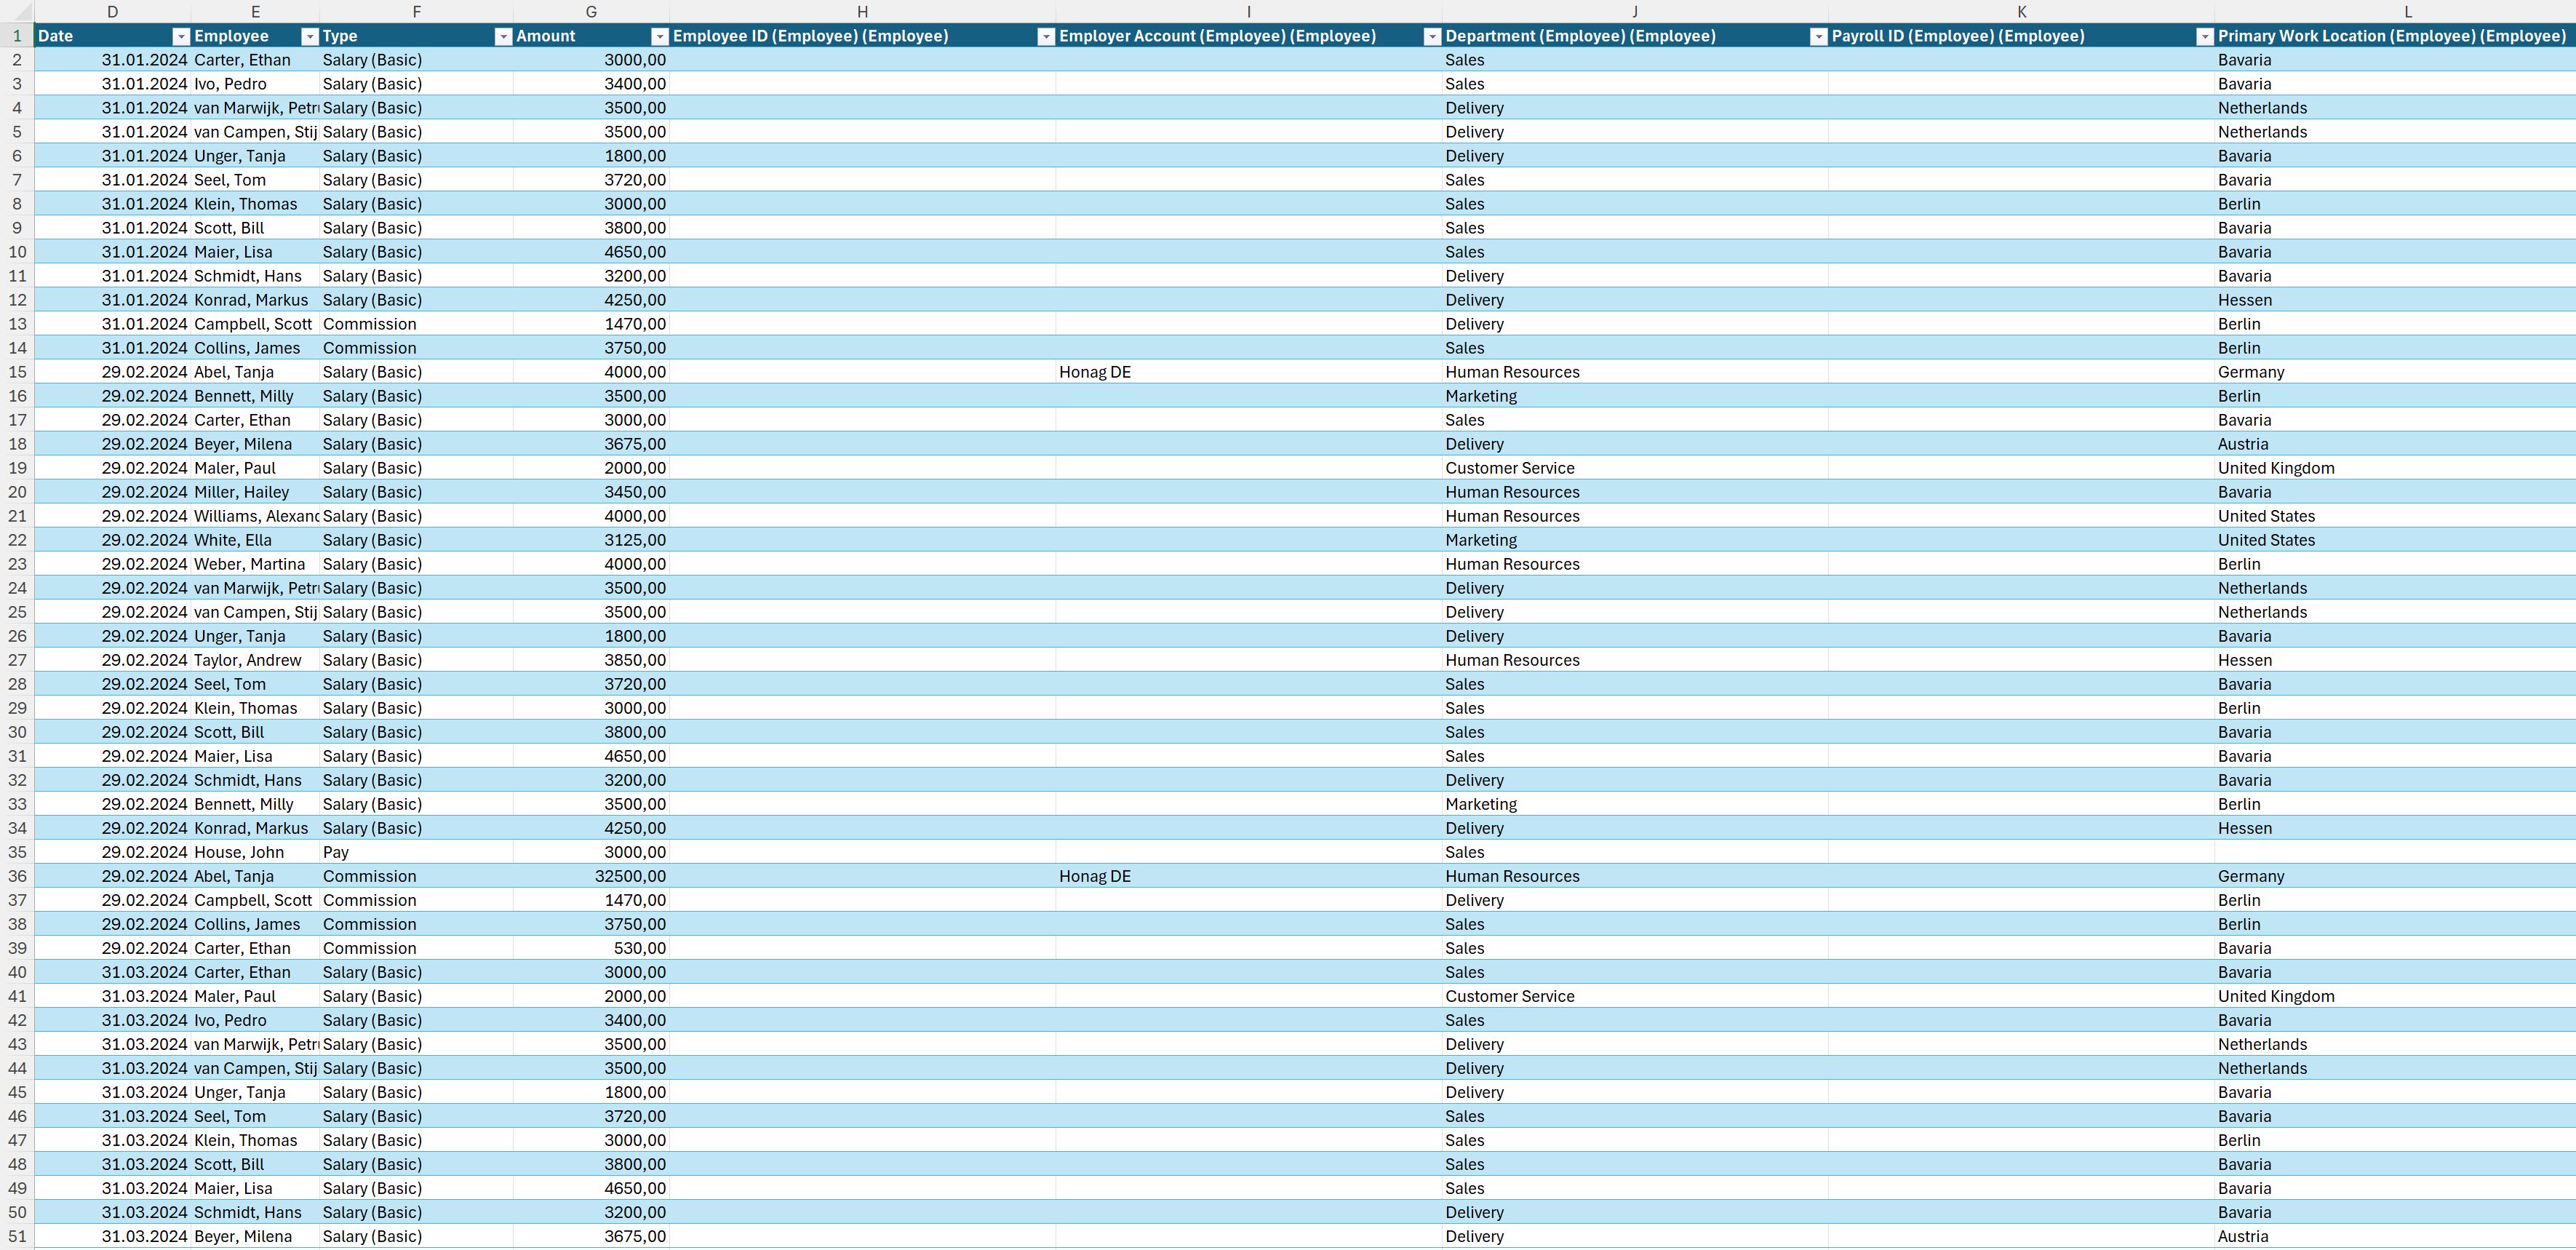
However, if you would like to provide more detailed information and analyses, or analyze the payment information more in depth yourself, it makes sense to do so using an Excel file, which you can easily create using your HR for Dynamics data.

There are three steps to creating more detailed Payment Summaries in Excel:
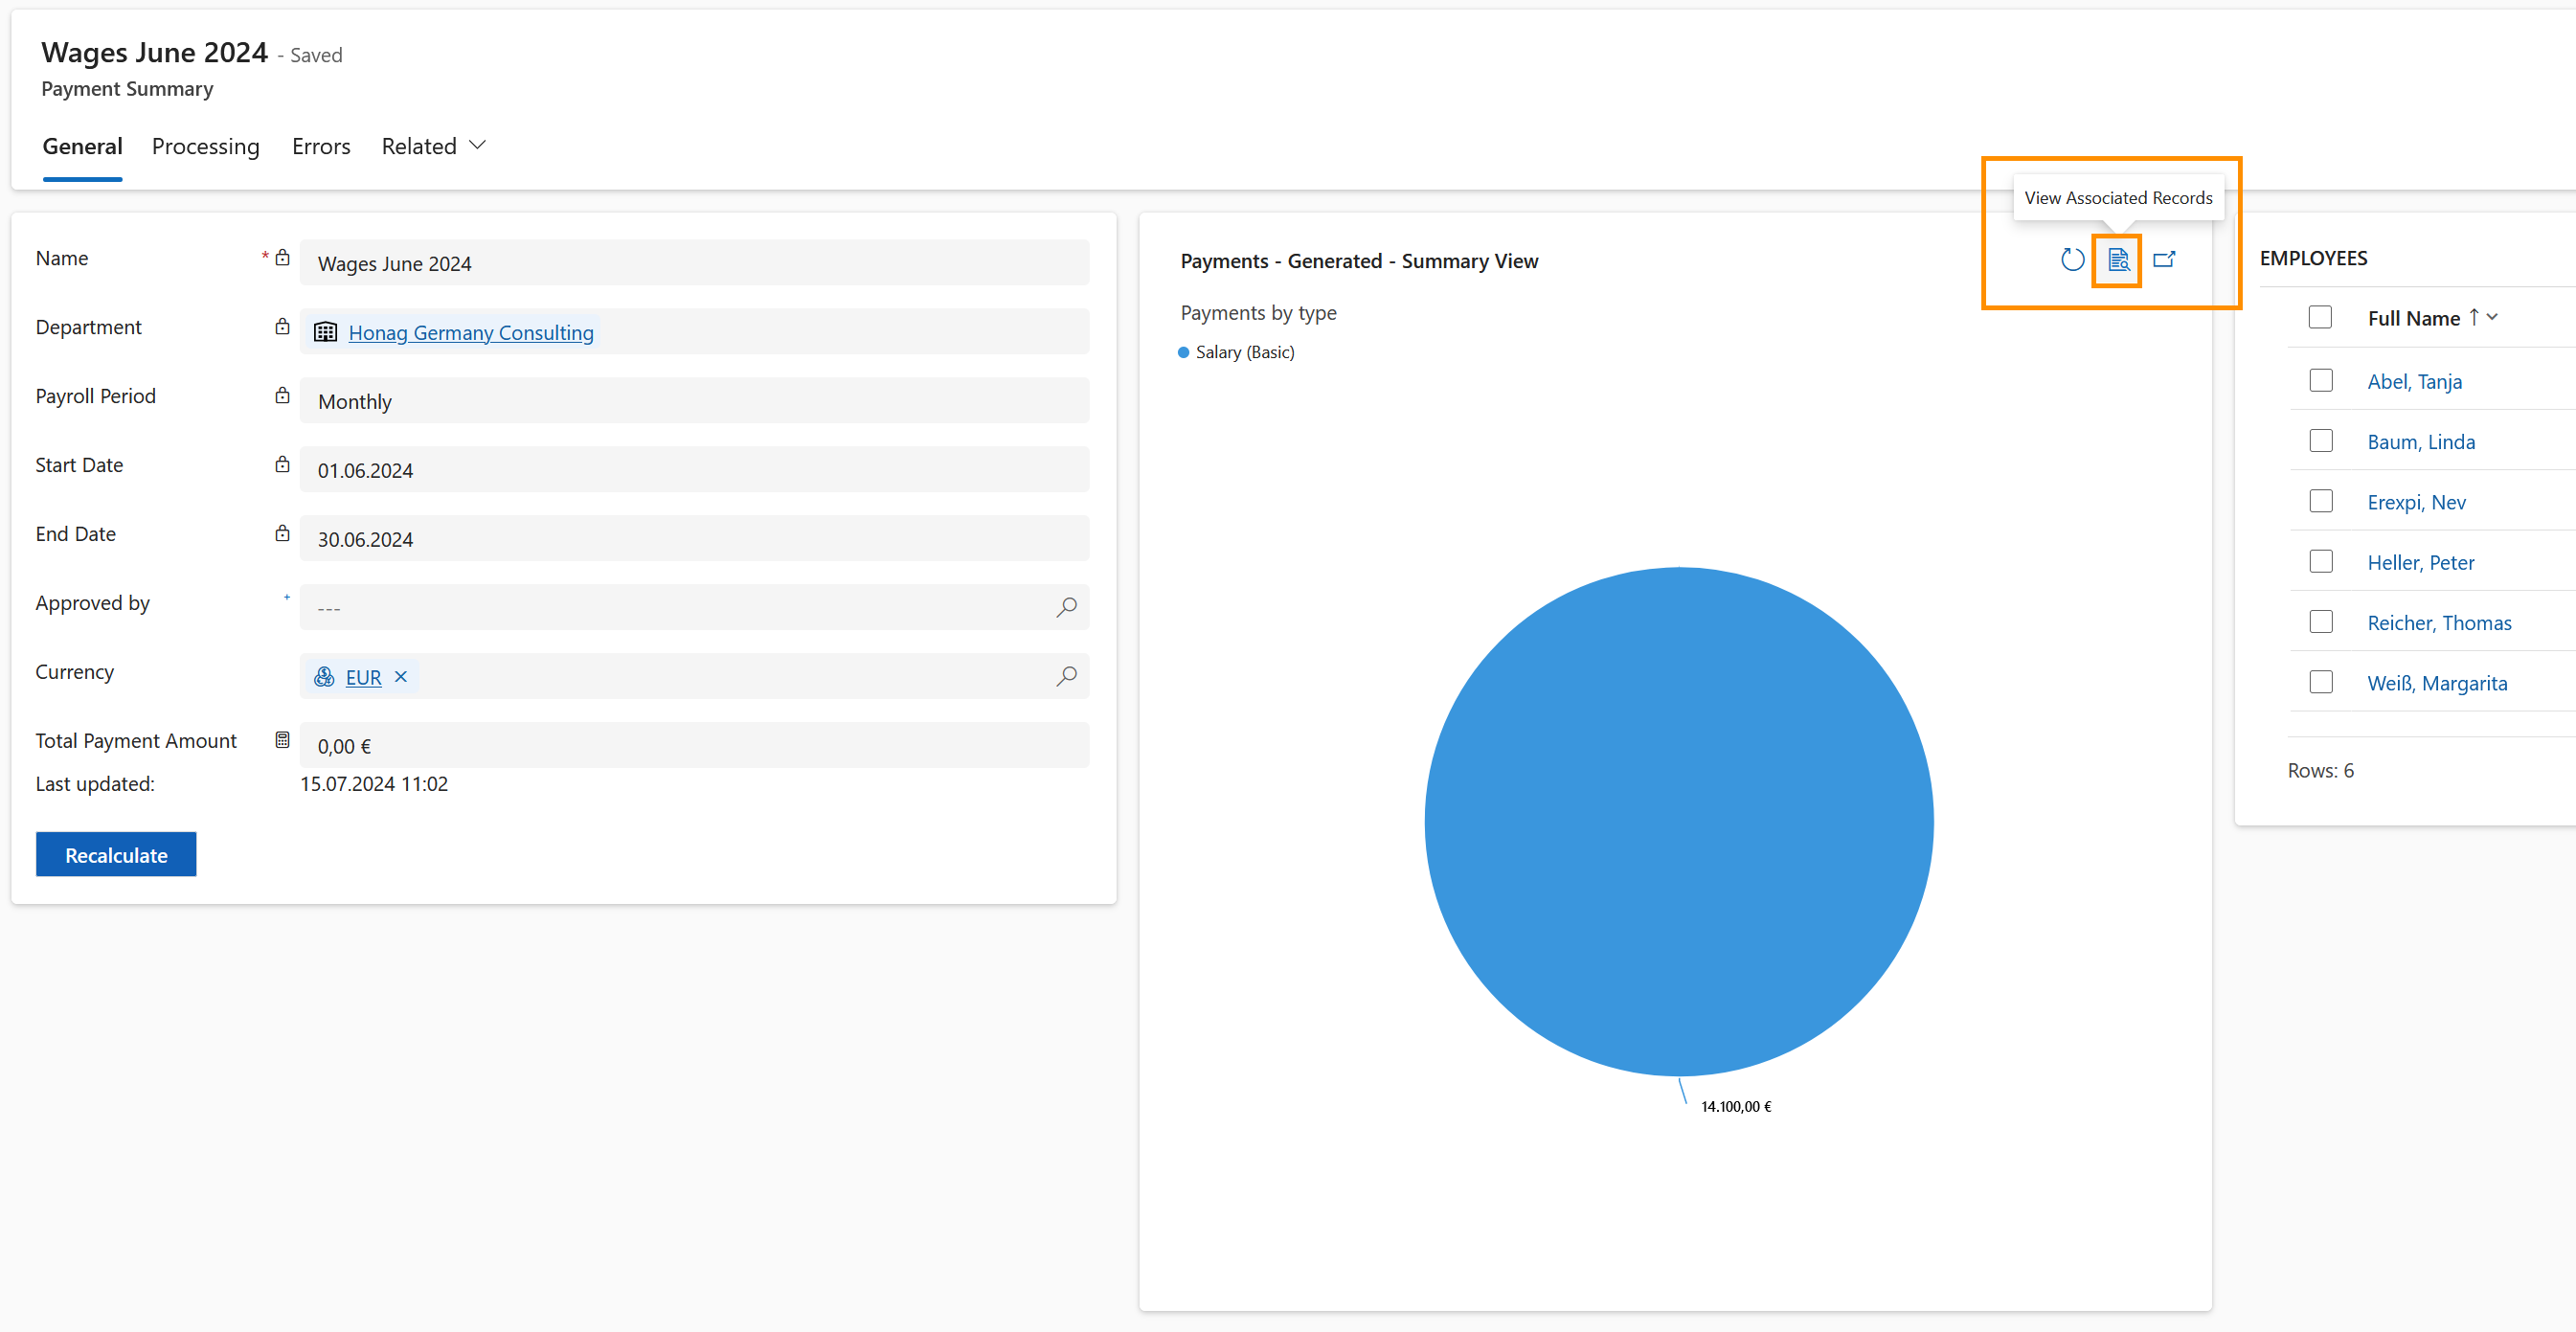
First, you need to create a template for Payment Summaries in HR for Dynamics and download it. This tutorial page covers that first part.
Second, you need to create a Pivot table in your downloaded Excel template to specify the parameters for your analyses.
Third, the created Excel file with the Pivot table needs to be uploaded back into HR for Dynamics.

From there, you can use the template to analyze every Payment Summary easily, or send the more detailed Payment information to your payroll provider.

Prerequisites

  • You are HR Manager
  • Your employees have valid Employment Terms with associated wages inside HR for Dynamics

Click Through

  • Start in HR HUB
  • Under Compensation, navigate to Payment Summaries
  • In the top ribbon, click on Generate Payments
  • Add a name to the Payment
  • Select the Payroll Period you want to cover
  • Select one option between Department, Region or Employer Account
    • If you choose a department, all employees of this department and all departments underneath the selected department will be considered for the payment creation.
    • If you choose a country or region, all employees that are located in this country or region and within all the countries or regions underneath the selected country or region will be considered for the payment creation.
    • If you choose an Employer Account, all employees connected to this Employer Account will be considered for the payment creation.
  • Add the Start Date of the desired pay period
  • Click on Next
  • Wait for the Payments to be generated - depending on the number of records, this may take a minute
  • In the pop up window, click on Link to open the created Payment Summary
  • In the Payments - Generated table, click on the icon View Associated Records (Screenshot)
  • Click on the Excel Template dropdown and select Download Template
  • As Entity, add Payment
  • As View, add Active Payments
  • At the bottom, click on Edit Columns
  • Remove the checkmark for Status Reason
  • In the drop-down menu on the top, change the record type to Employee (Employee)
    • Add Department
    • Add Employee ID
    • Add Employer Account
    • Add Payroll ID
    • Add Primary Work Location
  • In the drop-down menu on the top, change the record type to Payment Summary (Payment Summary)
    • Add the Area
    • Add the Employer Account
    • Add the End Date
    • Add the Name
    • Add the Start Date
  • Click on Download
  • Save the file

Hint

  • This Excel sheet will later be used to configure the Pivot Tables.

Recommendations

  • Since more than one template can be created, be sure to name your record properly.

Result

Once all the Record Types are added, and the template is downloaded, you should have an Excel file similar to the one you see below.
The next step is to create a Pivot table in this Excel file that will help you to summarize, analyze, and visualize your employees' payment summaries.
Image
HR