Sections of Digital Personnel File (HR Manager): HR Details
Objective
The objective of this page is to show in detail all the parts of one section of the Employee´s Digital Personnel File, in this case, the HR Details tab.
Detailed view
The HR Details section is divided into nine sectors, and all fields deal with information that is particularly important for the HR Manager, such as insurance details and account data.
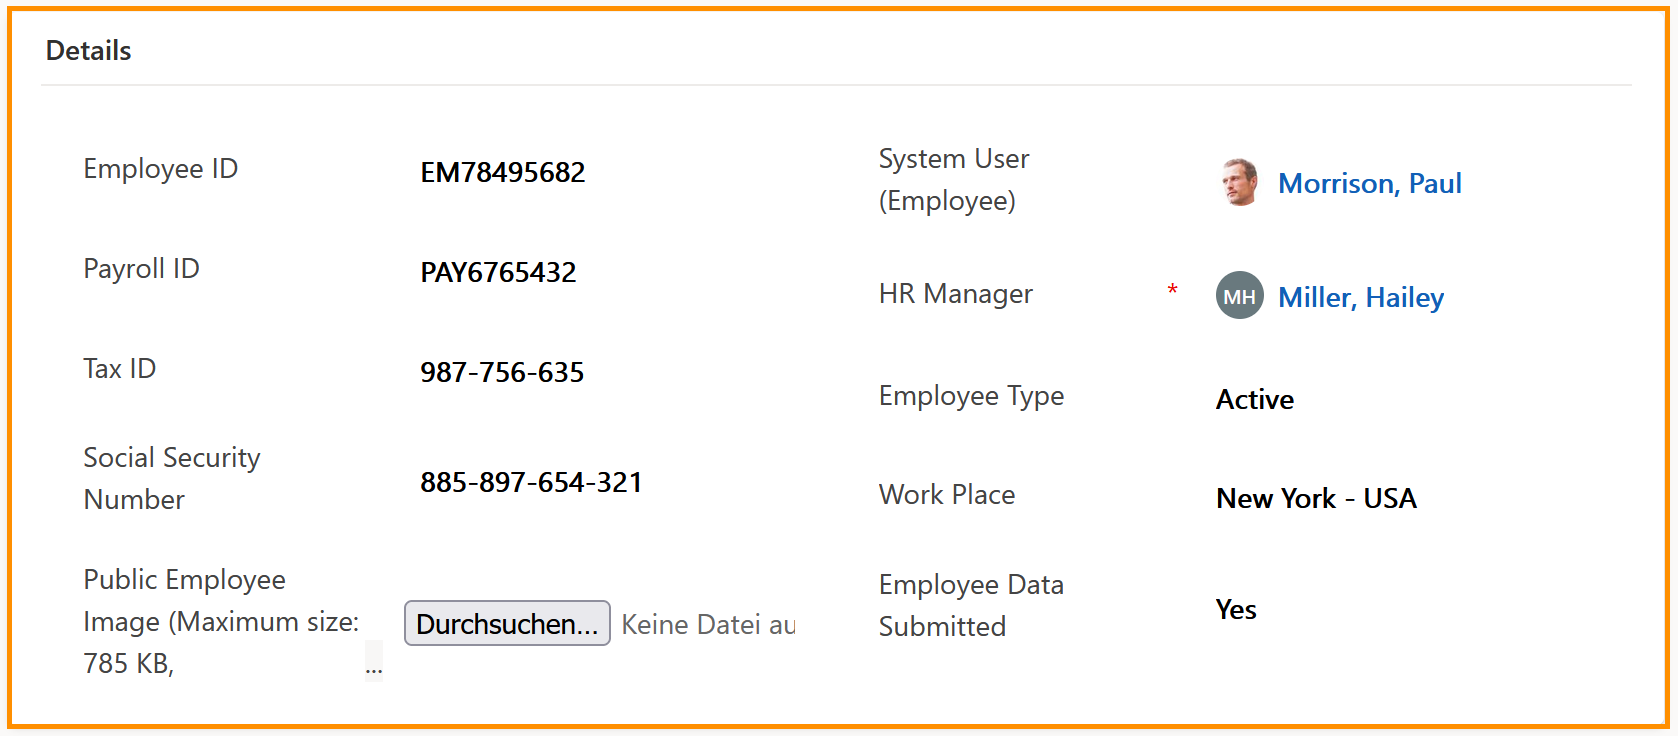
| Details (screenshot) | In this section, you can enter all Ids that are used in your company, and affect the employee. The System User is an essential component, since access rights are regulated by the system user in the form of the assigned license. If an employee is not assigned a system user, they have only extremely limited access to Hubdrive. The HR Manager is a mandatory field. The Employee ID is a field for your own information and can optionally be filled to identify the employee easier. This may be helpful especially for very big companies. |
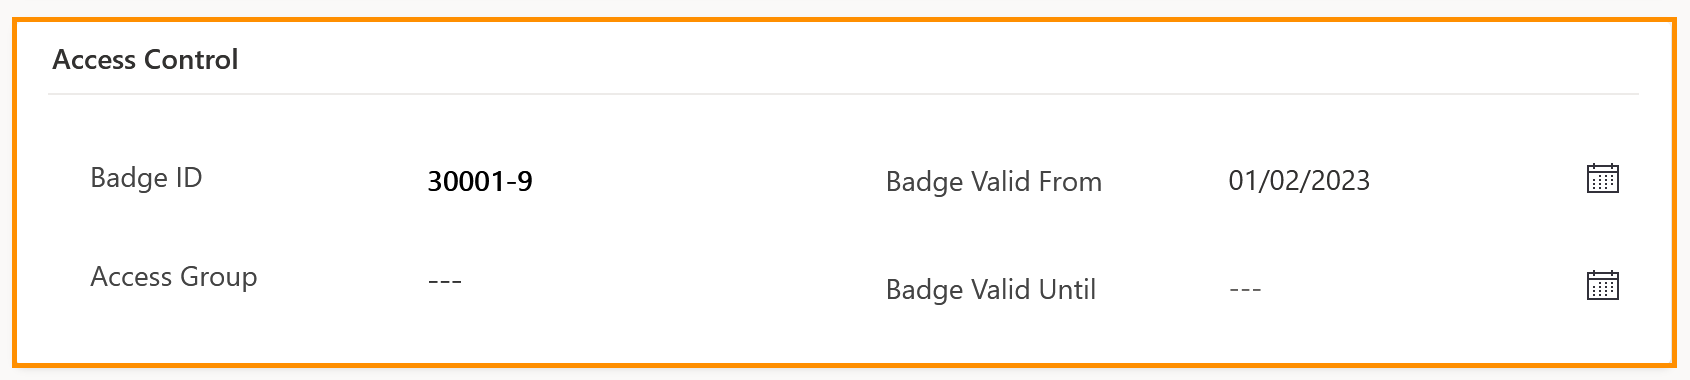
| Access Control (screenshot) | This section gives information about the badge used by the employee, so he can enter specific areas in the company, as well to book their times by using a Time Clock Terminal. |
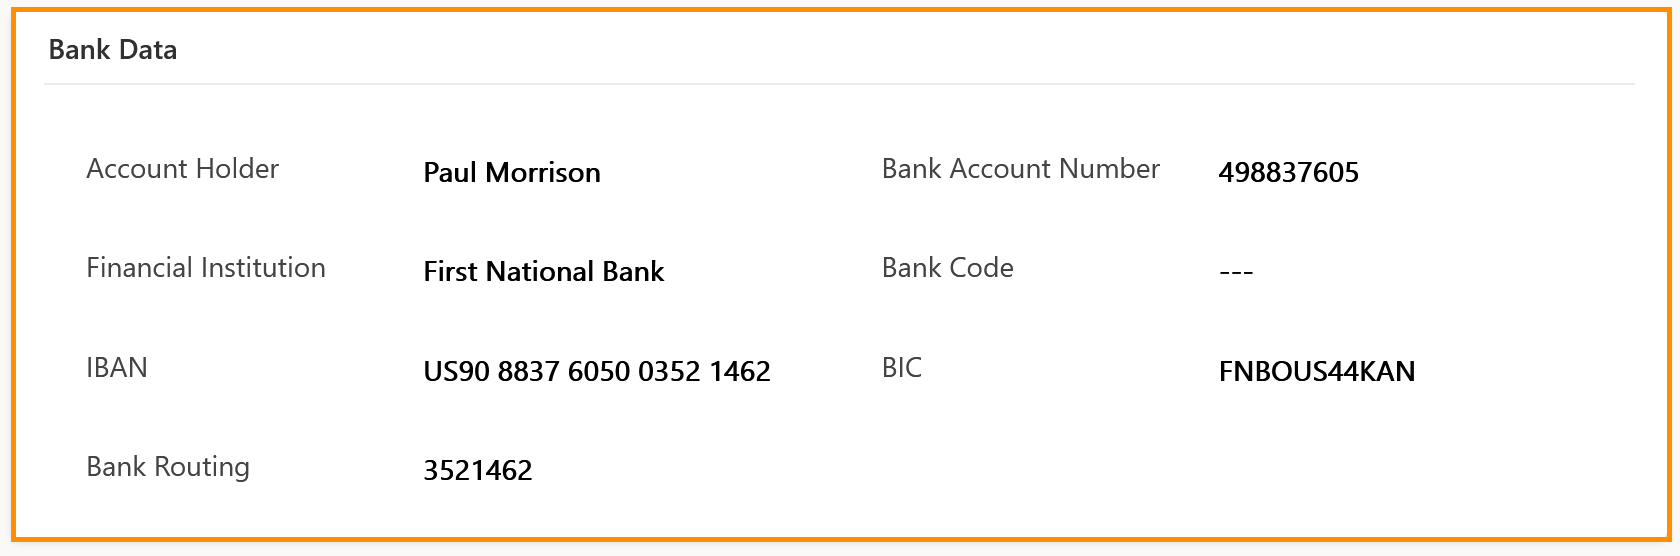
| Bank Data (screenshot) | Enter all of the employee's account information here. All fields are text-fields. |
| Current Position (screenshot) | The current position will indicate the actual position of the employee, and you change it, when the employee change department, for example. |
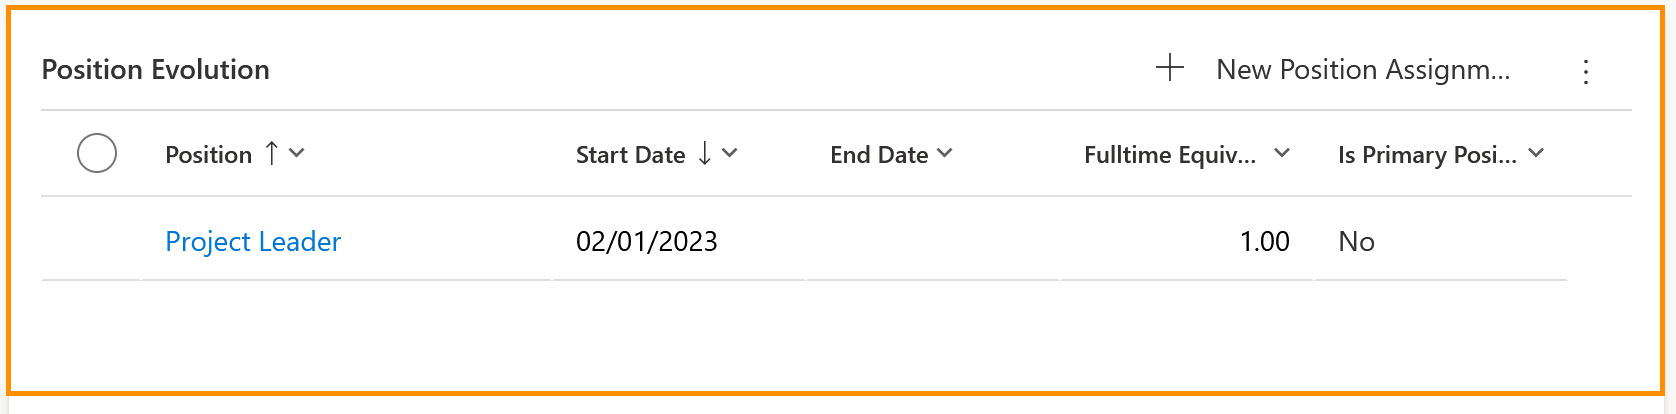
| Position Evolution (screenshot) | This will display the history of positions occupied by the employee, during his time in the company. Any position evolution will be tracked here. |
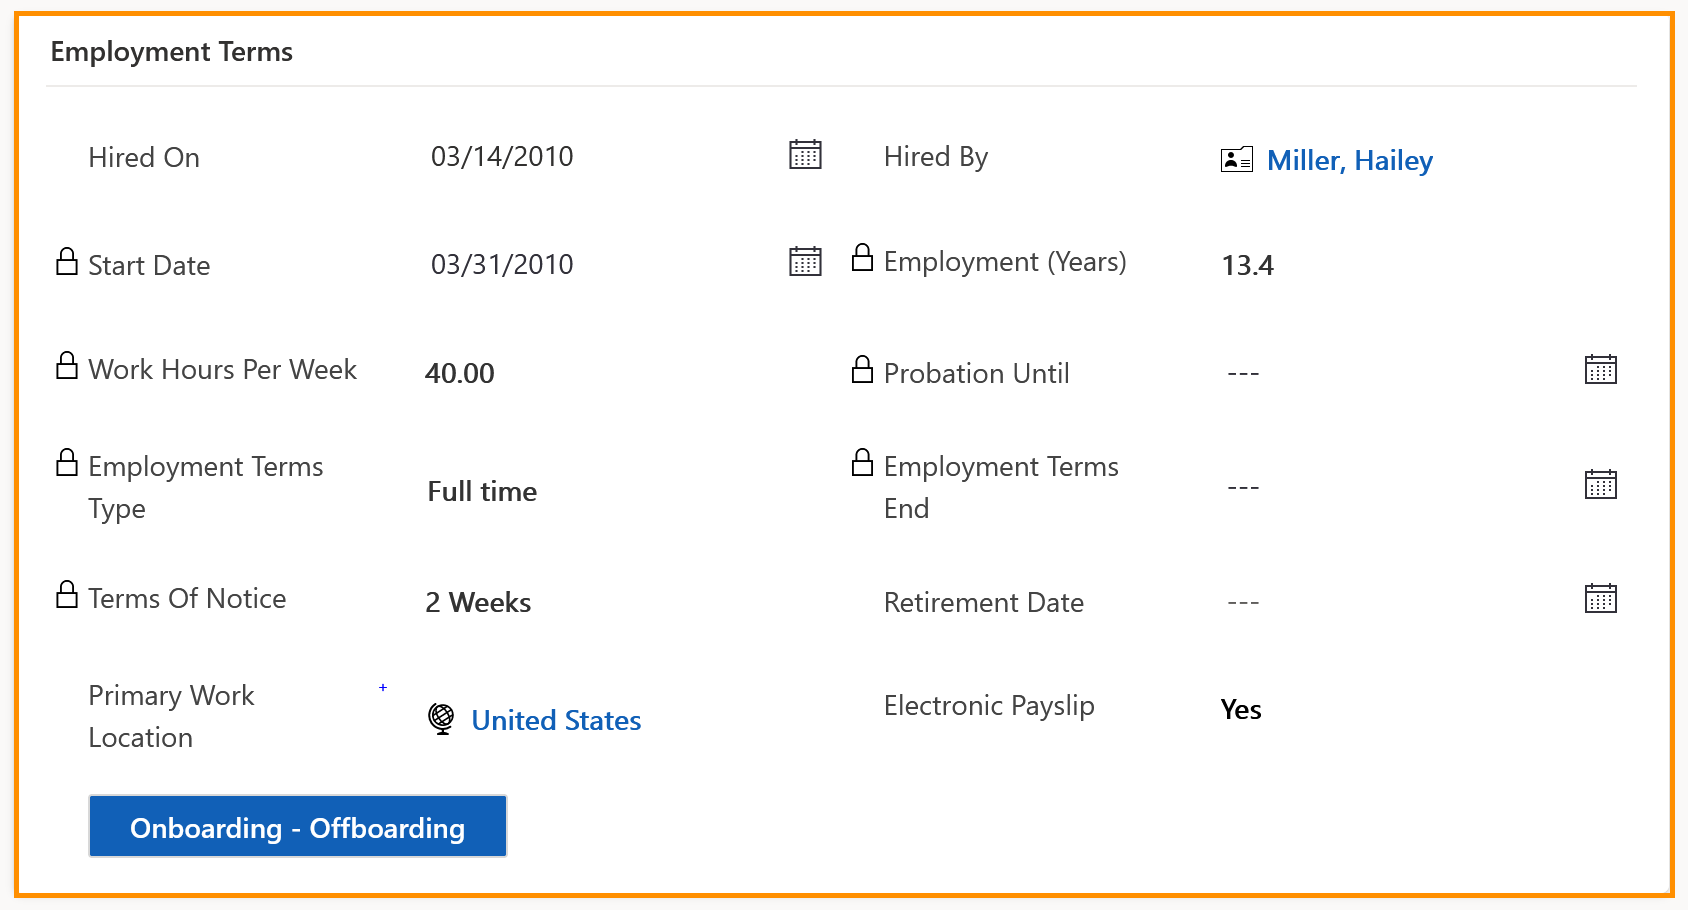
| Employment Terms (screenshot) | Most of these fields are filled automatically, as soon as the employee has a valid Employment Term. The Primary Work Location is particularly important here. This is used, among other things, to create a link to the calendar valid for this employee. This, in turn, is indispensable for absence management, since it specifies which days are not workdays, such as public holidays or weekends. The Primary Work Location also plays an important role in the calculation of expenses, since not only the destination country, but also the departure location is used for the calculation. The field will automatically be filled based on the entry added in the Employment Term of the employee. In this section, you can also find the button to assign an Onboarding/Offboarding project to the employee. |
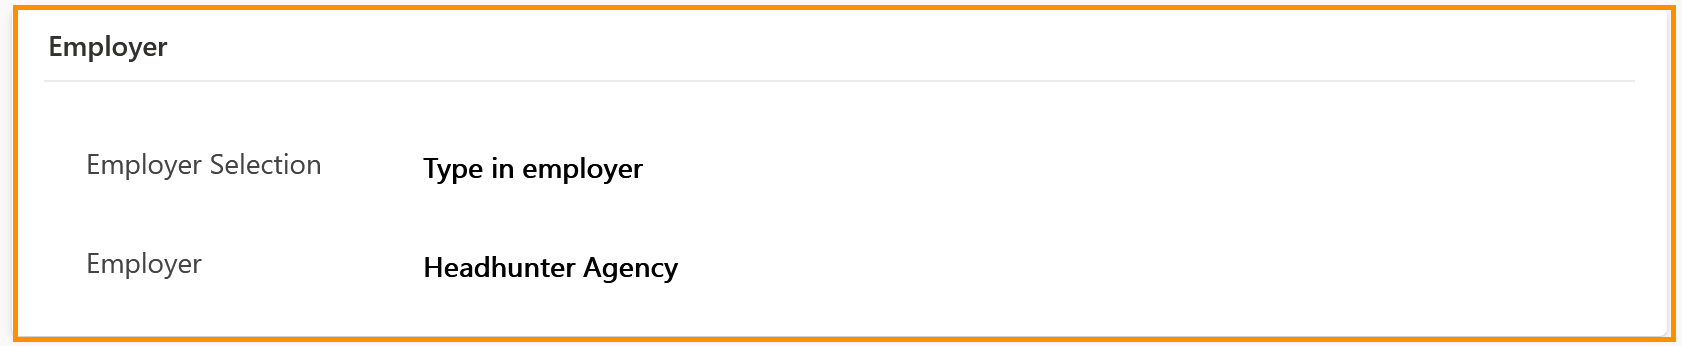
| Employer (screenshot) | This section applies to employees who are employed by a temporary employment agency, for example. Here you can specify the company in which these employees are employed. You have the choice of entering an employer freely, or selecting it from a list of your company contacts. |
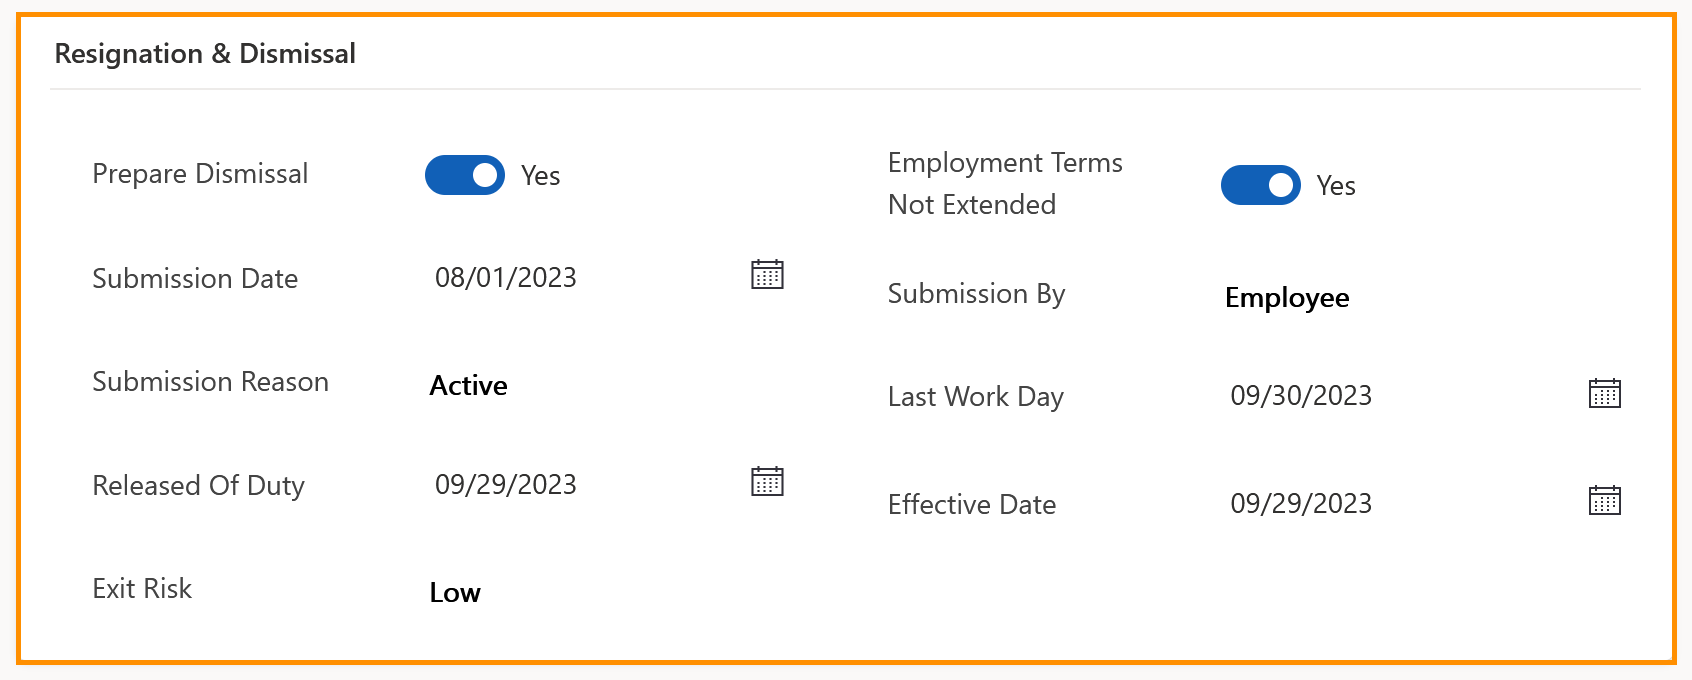
| Resignation & Dismissal (screenshot) | This section is only necessary as soon as an employment relationship ends. You can enter all the details for termination here. By entering the Last Work Day, this employee will also appear in your Deadline Dashboard as soon as the resignation is imminent. When the effective date is entered, the system will set the employee as out of payroll. |
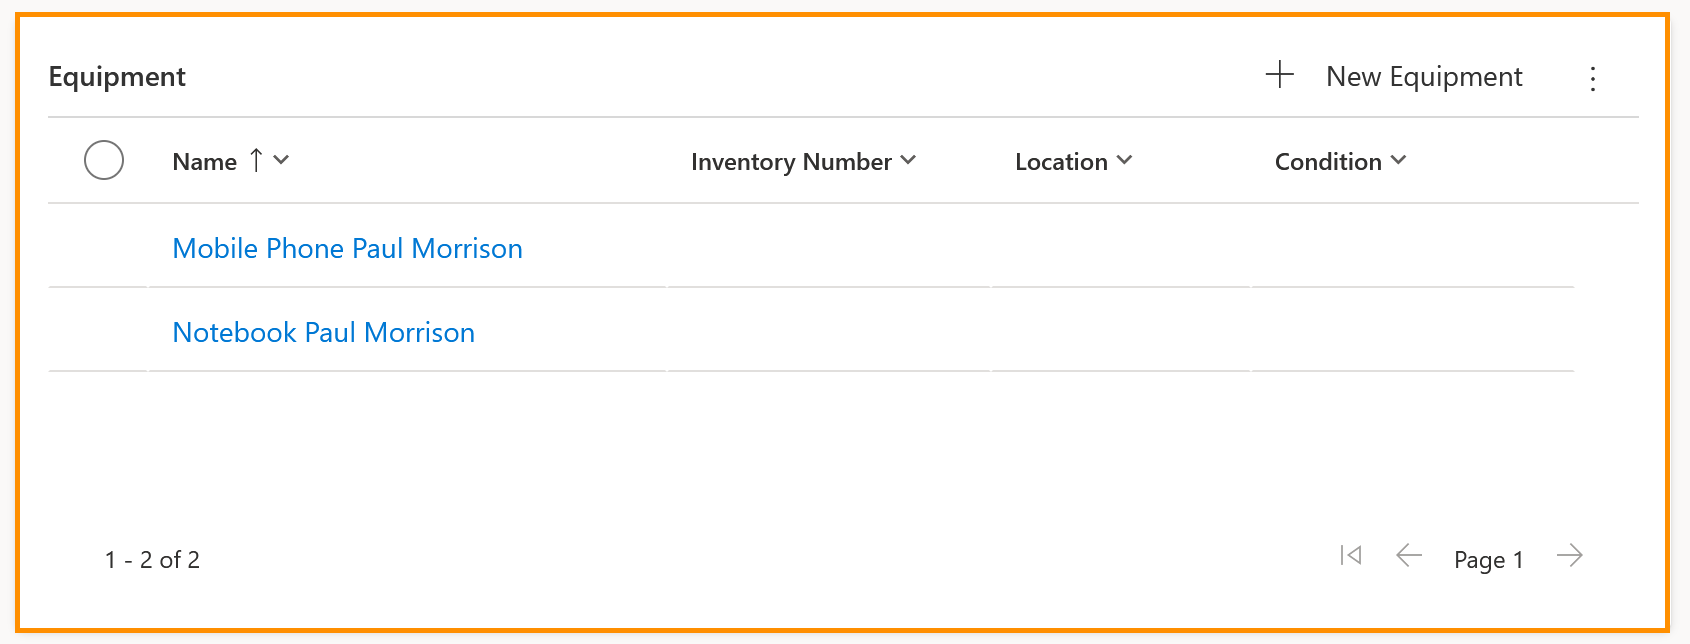
| Equipment (screenshot) | In this section, you can enter all equipment assigned to an employee. |
Click Through
- Start in HR HUB
- Click on Employees
- Open the file of the desired employee
- The tab HR Details is the second tab